


46
SECTION 6: ASSEMBLY PARTS
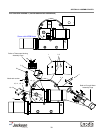
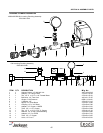
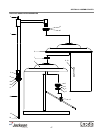
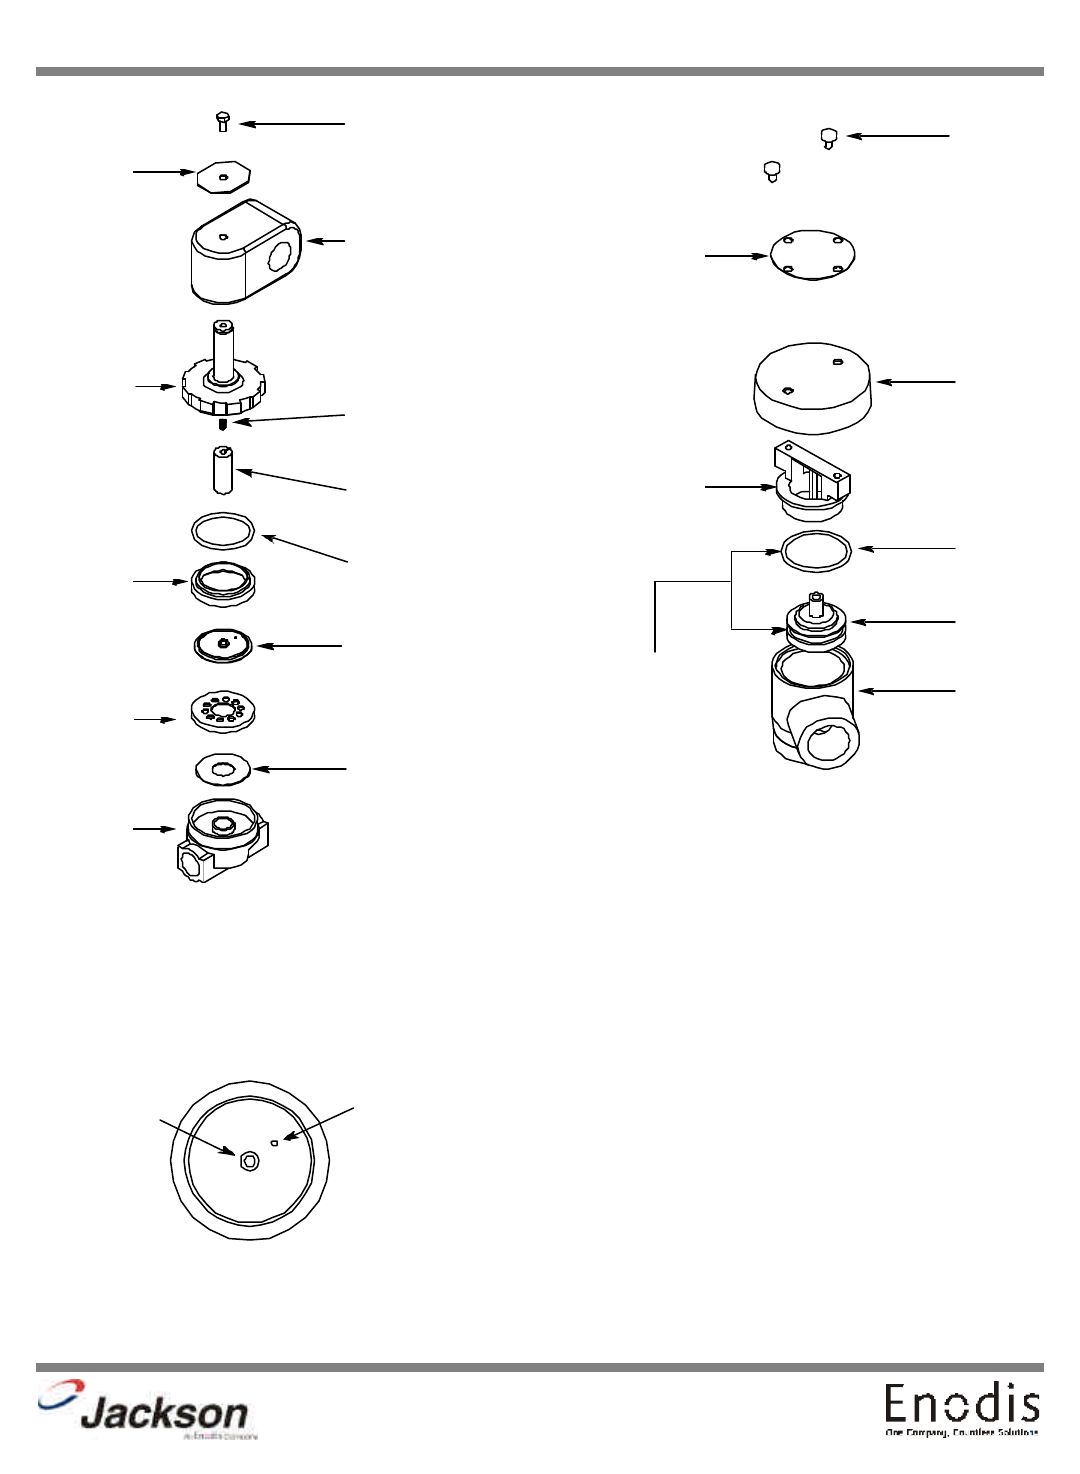
Complete Vacuum Breaker Assembly
4820-300-07-00
Componets of
Repair Kit
4820-001-60-56
Cap Screw
Data Plate
Cap
O-Ring
Plunger
Body
Cap Retainer
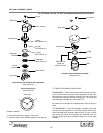
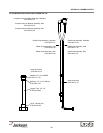
Possible Problems:
1. Pilot port extension #1 clogged. Clean hole.
2. Hole #2 Clogged. Pass heated straight pin through hole.
TO TAKE THE SOLENOID VALVE APART
DISASSEMBLE - These valves may be taken apart by unscrew
-
ing the bonnet and the enclosing tube assembly from the valve
body assembly. After unscrewing, carefully lift off the bonnet and
enclosing tube assembly. Don’t drop the plunger. The o-ring seal
and diaphragm cartridge can now be lifted out.
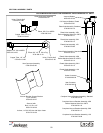
Be careful not to damage the machined faces while the valve is
apart.
TO REASSEMBLE - Place the diaphragm cartridge in the body
with the pilot port extension UP. Hold the plunger with the syn
-
thetic seat against the pilot port. Make sure the o-ring is in place,
then lower the bonnet and enclosing tube assembly over the
plunger. Screw the bonnet assembly snugly down on the body
assembly.
1
Diaphragm
2
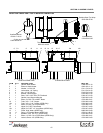
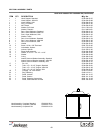
1/2” SOLENOID VALVE & 1/2” NPT VACUUM BREAKER REPAIR PARTS KITS
Complete 220 Volt Solenoid Valve Assembly
4810-100-09-18
Coil & Housing only
4810-200-02-18
Screw
Data Plate
Coil & Housing
Valve Bonnet
Spring
4810-200-04-18
Plunger
4810-200-04-18
O-Ring
4810-100-03-18
Diaphragm
Retainer
Diaphragm
4810-100-03-18
Screen
Retainer
Mesh Screen
Valve Body