


24 16026923 © 2006 Maytag Services
Disassembly Procedures
To avoid risk of electrical shock, personal injury or
death; disconnect power and gas before servicing,
unless testing requires power and/or gas.
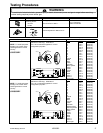
Maintop Assembly Removal (Select Models)
1. Remove power from unit.
2. Remove range from installation position, see
“Removing and Replacing Range” procedure.
3. Remove front side trim, see "Front Side Trim
Removal" procedure.
4. Remove air grill, grill grates, filter, aeration pan and
cartridges (cartridge models).
5. Remove cartridge receptacles and grill pans
(cartridge models).
6. Remove screws from plenum area at front of main
top cartridge opening (cartridge models).
7. Remove screws securing top burner assembly to
lower burner assembly.
8. Label and disconnect wire terminals to ignitors.
9. Remove perimeter screws securing main top to
chassis.
10.Gently lift main top away from chassis.
11. Reverse procedure to reinstall maintop assembly.
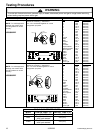
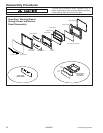
Top Burner Assembly Removal
(Select Models)
1. Disconnect power before servicing.
2. Remove screws securing burner top assembly to
lower assembly.
3. Label and remove wire terminals to ignitor.
4. Reverse procedures to reassemble.
Lower Burner Assembly Removal
(Select Models)
1. Remove top burner, see "Top Burner Assembly
Removal (Select Models)" procedure.
2. Disconnect tubing from lower assembly.
3. Reverse procedures to reassemble.
NOTE: Perform gas leak test.
Removing and Replacing Range
1. Turn off power and remove gas supply from unit.
2. Slide range forward from installation position.
3. Unplug power cord and disconnect gas line from unit.
4. Disconnect downdraft blower motor and remove flex
ducting to the blower and range (select models).
NOTE: To avoid countertop damage, do not move
range forward until range has been raised
enough to clear all cabinetry.
5. Pull the range forward out of the cabinet opening.
6. Disconnect or unplug the power cord leading from
unit to fuse box or junction box depending on unit.
7. Replace the oven using the installation instructions
and anti-tip bracket(s).
Front Side Trim Removal
1. Remove power from unit.
2. Slide unit out far enough to access side trim.
3. Remove screws securing front side trim piece(s) to
oven chassis (left and right trim pieces).
4. Gently grasp trim piece with both hands, pull forward
and roll trim piece off retainer clips.
5. Reverse procedure to reinstall front side trim piece(s).
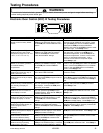
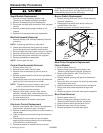
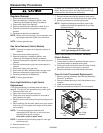
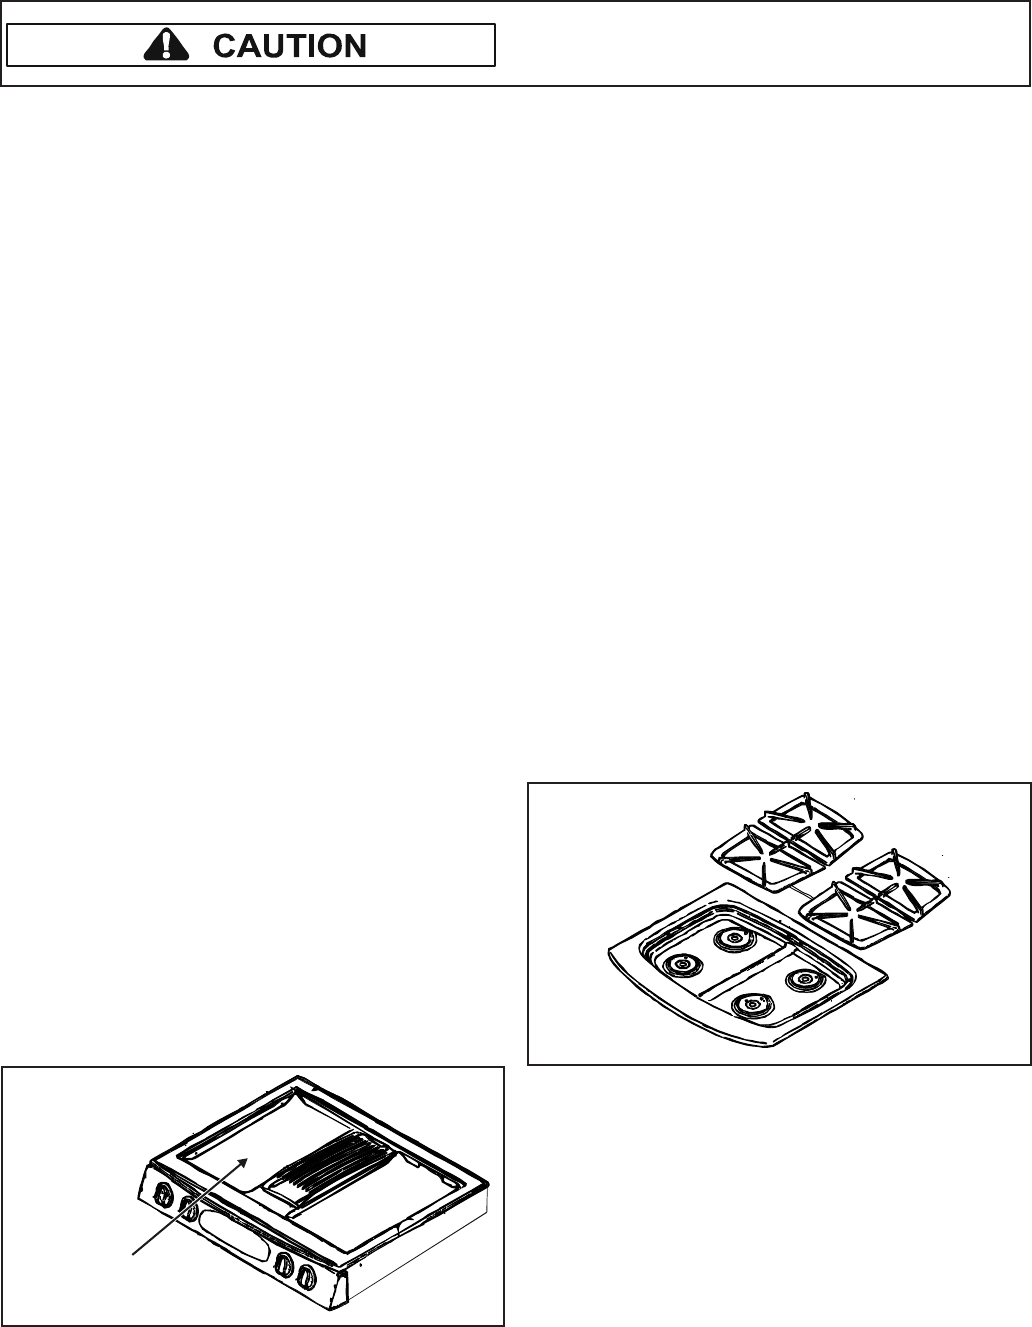
Cartridge Assembly Removal
(Select Models)
Cooktop cartridges are installed on the left side of the
range cooktop.
1. Remove power from unit.
2. Lift up on the tab (located on the cartridge) until top of
cartridge clears the opening on the range by 2 inches.
NOTE: Lifting the cartridge too high while still engaged
in the receptacle could damage the terminal
plug.
3. Hold cartridge by the sides and slide away from
terminal receptacle.
4. Lift cartridge out when fully unplugged.
Install cartridges here