


© 2006 Maytag Services 16026923 27
To avoid risk of electrical shock, personal injury or
death; disconnect power and gas before servicing,
unless testing requires power and/or gas.
Disassembly Procedures
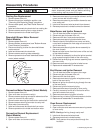
Regulator Removal
1. Disconnect power before servicing.
2. Remove range from installation position, see
"Removing and Replacing Range" procedure.
3. Disconnect tubing from regulator.
4. Remove screws securing bracket to back of unit.
5. Remove screws securing regulator to support
bracket.
6. Reverse procedures to reassemble.
NOTE: When reconnecting supply line to regulator, use
pipe dope compound to seal the connection.
NOTE: Perform gas leak test.
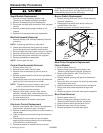
Gas Valve Removal (Select Models)
NOTE: Removal of range from installation position is
required.
1. Disconnect power before servicing.
2. Remove range from installation position, see
"Removing and Replacing Range" procedure.
3. Remove screws securing bottom rear access panel to
chassis.
4. Remove screws securing top rear access panel to
chassis.
5. Disconnect tubing from gas valve.
6. Disconnect and label wire terminals from gas valve.
7. Remove screws securing gas valve to chassis.
8. Reverse procedures to reassemble.
NOTE: Perform gas leak test.
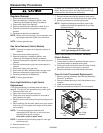
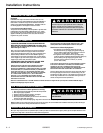
Oven Light Bulb/Oven Light Socket
Replacement
The light automatically illuminates when the door is
opened. The light will not operate during a clean cycle.
1. Remove power from unit.
2. Open oven door and locate oven light.
3. Grasp lens cover and pull outward on one side to
gain access to the bulb.
4. Carefully remove old bulb by lifting bulb straight out of
base.
5. When installing the new bulb, place cover over socket
so the cut-out in the glass cover aligns with the base
on the socket.
NOTE: To avoid damaging the new bulb and
decreasing life of the bulb, do not touch new
bulb with bare hands or fingers.
Hold with a cloth or paper towel.
NOTE: Proceed with the following steps for oven light
socket removal.
6. Remove power to unit.
7. Remove screw securing light socket to oven cavity.
8. Label and disconnect wire terminals from light socket.
9. Reverse procedure to reinstall light socket.
NOTE: Reposition fiberglass insulation around light
socket to eliminate the possibility of any heat
related problems.
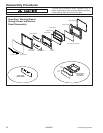
Lens
Bulb
Socket
Bulb specifications
G5.3 Type Halogen Bi-Pin 25W-120V
Oven Vent/Smoke Eliminator Removal
(Select Models)
1. Remove power from unit.
2. Locate tabs on bottom of smoke eliminator and turn
counterclockwise to release locking ears.
3. Gently pull smoke eliminator down and align locking
ears with notches in oven cavity to remove.
4. Reverse procedure to reinstall smoke eliminator.
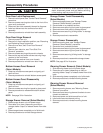
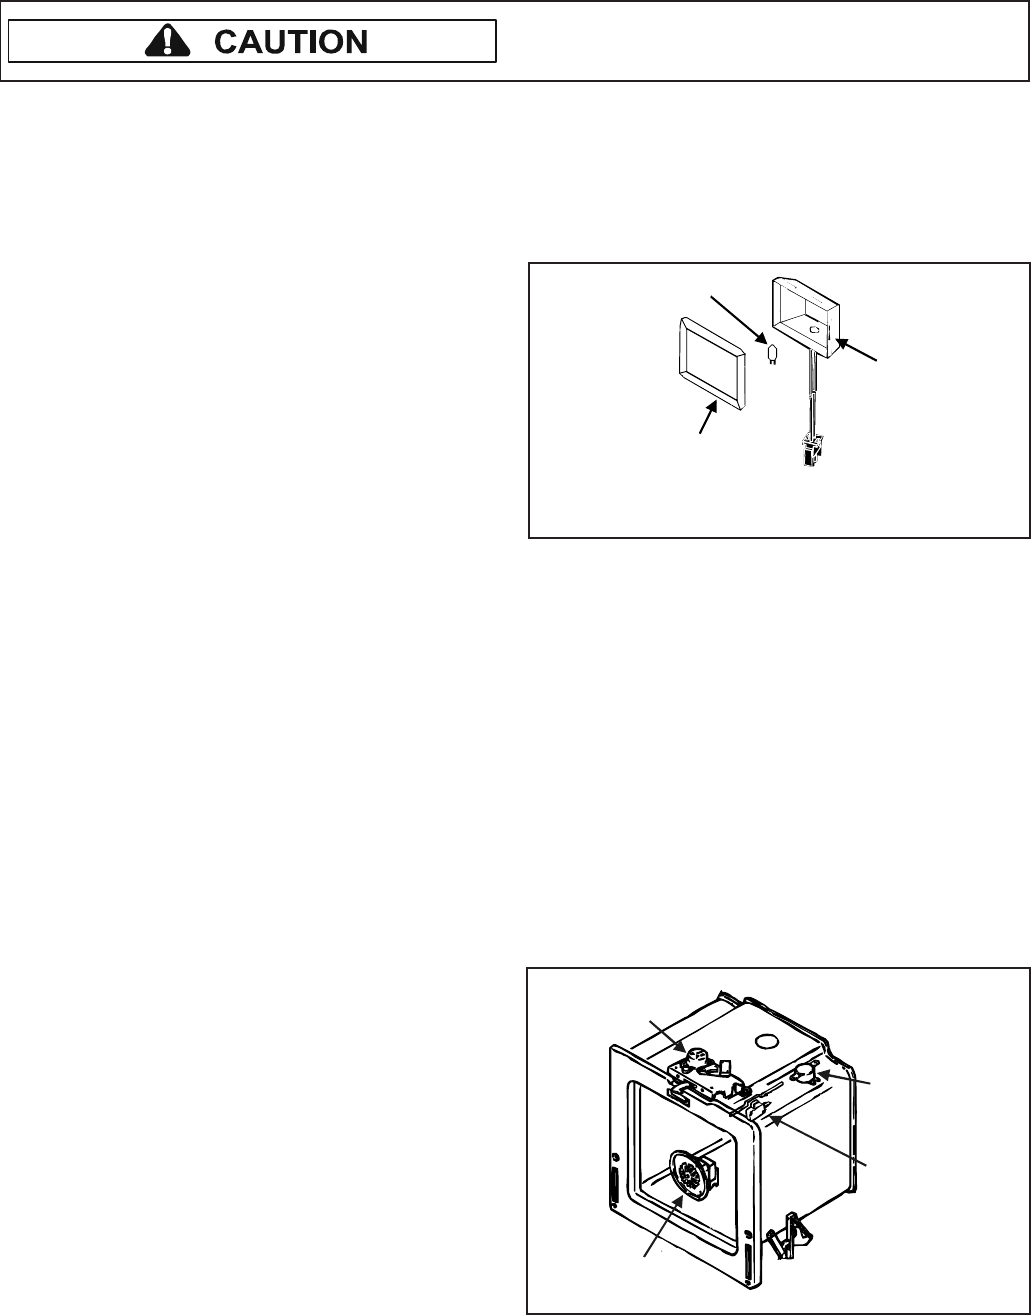
Oven Hi-Limit Thermostat Replacement
1. Remove maintop assembly, see "Maintop Assembly
Removal" procedure.
2. Remove screws securing hi-limit thermostat to oven
chassis.
3. Label and remove wire terminals.
4. Reverse procedure to reinstall hi-limit thermostat.
Convection
Fan
Hi-Limit
Thermostat
Door Hinge
Receiver
Oven
Light
Switch
Door
Latch