


6
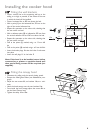
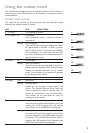
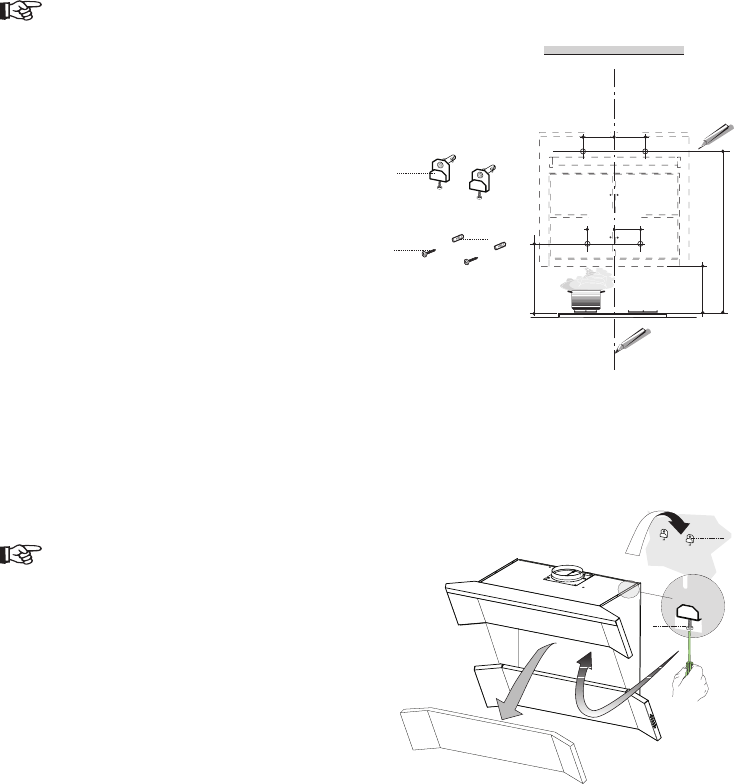
Fitting the wall brackets
• Draw a vertical line on the supporting wall up to the
ceiling, or as high as practical, at the centre of the area
in which the hood will be installed.
• Draw a horizontal line at 850 mm above the hob.
• Mark a point (1) on the horizontal line, 250 mm to the
right of the vertical reference line.
• Repeat this operation on the other side, checking that
the two marks are level.
• Mark a reference point (2) as indicated at 200 mm from
the vertical reference line and 540 mm above the hob.
• Repeat this operation on the other side, checking that
the two marks are level.
• Drill at the points (1) marked, using a ø 12 mm drill
bit.
• Drill at the points (2) marked, using a ø 8 mm drill bit.
• Insert the bracket plugs 11a into the holes 1 and screw
into place.
• Insert the wall plugs 11 in the holes. 2.
Note: If the hood is to be installed onto a hollow
construction or plaster or partition board wall
then special fixing screws will be required (not
supplied).
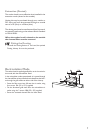
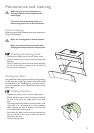
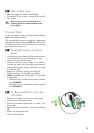
Fitting the canopy hood
• Disconnect by pulling only the central ducting panels.
• Remove the metal grease filters (see Maintenance para-
graph)
• Adjust the two screws Vr, on brackets 11a, to a mini-
mum.
• Hook the hood canopy onto the two brackets 11a.
• From inside the hood canopy, adjust the screws Vr to
set the Hood Canopy level.
• Tighten the safety screw 12a.
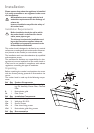
Installing the cooker hood