


INSTALLATION
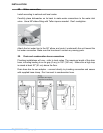
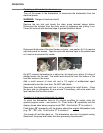
Don’t over tighten the 90° elbow. Doing so may damage the water inlet valve and
cause a water leak. Temperatures required for soldering and sweating will damage
the dishwasher’s water inlet valve. If plumbing lines are to be soldered or sweated,
keep the heat source at least 6 inches (152.4 mm) away from the dishwasher’s water
inlet valve.
Check local plumbing codes for approved plumbing procedures and accessories. All
plumbing should be done in accordance with national and local codes.
These instructions depict an installation method for stainless steel braided hose or
PEX hot water supply lines. If using copper tubing or other material for water supply,
defer to a licensed plumber for proper installation.
II. INSTALLATION
IIA. Pre-Install checklist
Unpack unit. Retain packing material until installation is successful. Remove
packing material from inside the dishwasher.
Inspect parts to ensure you have all the necessary materials.
Flush household hot water supply for at least two minutes.
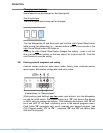
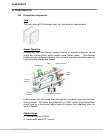
Measure the enclosure area. The opening must be at least 34" (87 cm) high and
23-5/8" (60-61 cm) wide.
The opening must be close enough to the sink for water line and drain hose
plumbing access.
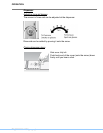
Unit must be installed close enough to the sink so that drain hose length does not
exceed 92" (234 cm) and a high loop is raised at least 20" (51 cm) above the floor.
Wooden openings must be sanded smooth and metal openings must be covered
by a protective gasket.
Is your water heater set at 120°F (49°C) and does water pressure measure 15-145
psi (1-10 bar)?
If installing in a corner, the dishwasher door must clear cabinet hardware.
Determine mounting method based on dishwasher model and countertop type,
whether top or side mount.
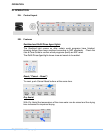
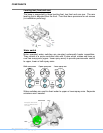
IIB. Alignment
702_58300000149896_ara_en_b
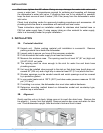
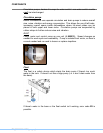
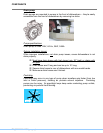
Gently rest the unit on its back, taking care not to crush the drain hose. Remove the
toe panel(s). Loosen front feet slightly. Remove junction box cover and retain for later
use. Place dishwasher upright, then level side to side and front to back.