


2322
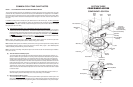
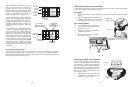
Accessing Components in the Sump Assembly
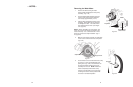
Components inside the sump can be accessed without removing the sump from the dishwasher tub.
1. Remove the four (4) Torx T-20 screws securing the soil accumulator from the sump base.
(Fig. 3-25)
2. The soil accumulator assembly will now lift free of the sump base.
(Fig. 3-26)
Fig. 3-25
Fig. 3-26
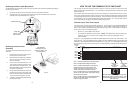
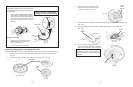
3. Remove the screw securing the foreign
object protector to the sump base and
remove the protector.
(Fig. 3-27)
Fig. 3-27
Sump
Base
Foreign
Object
Protector
Accumulator
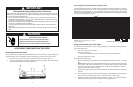
4. Remove the screw securing the inlet protector to the sump base and lift the inlet protector out.
(Fig. 3-28)
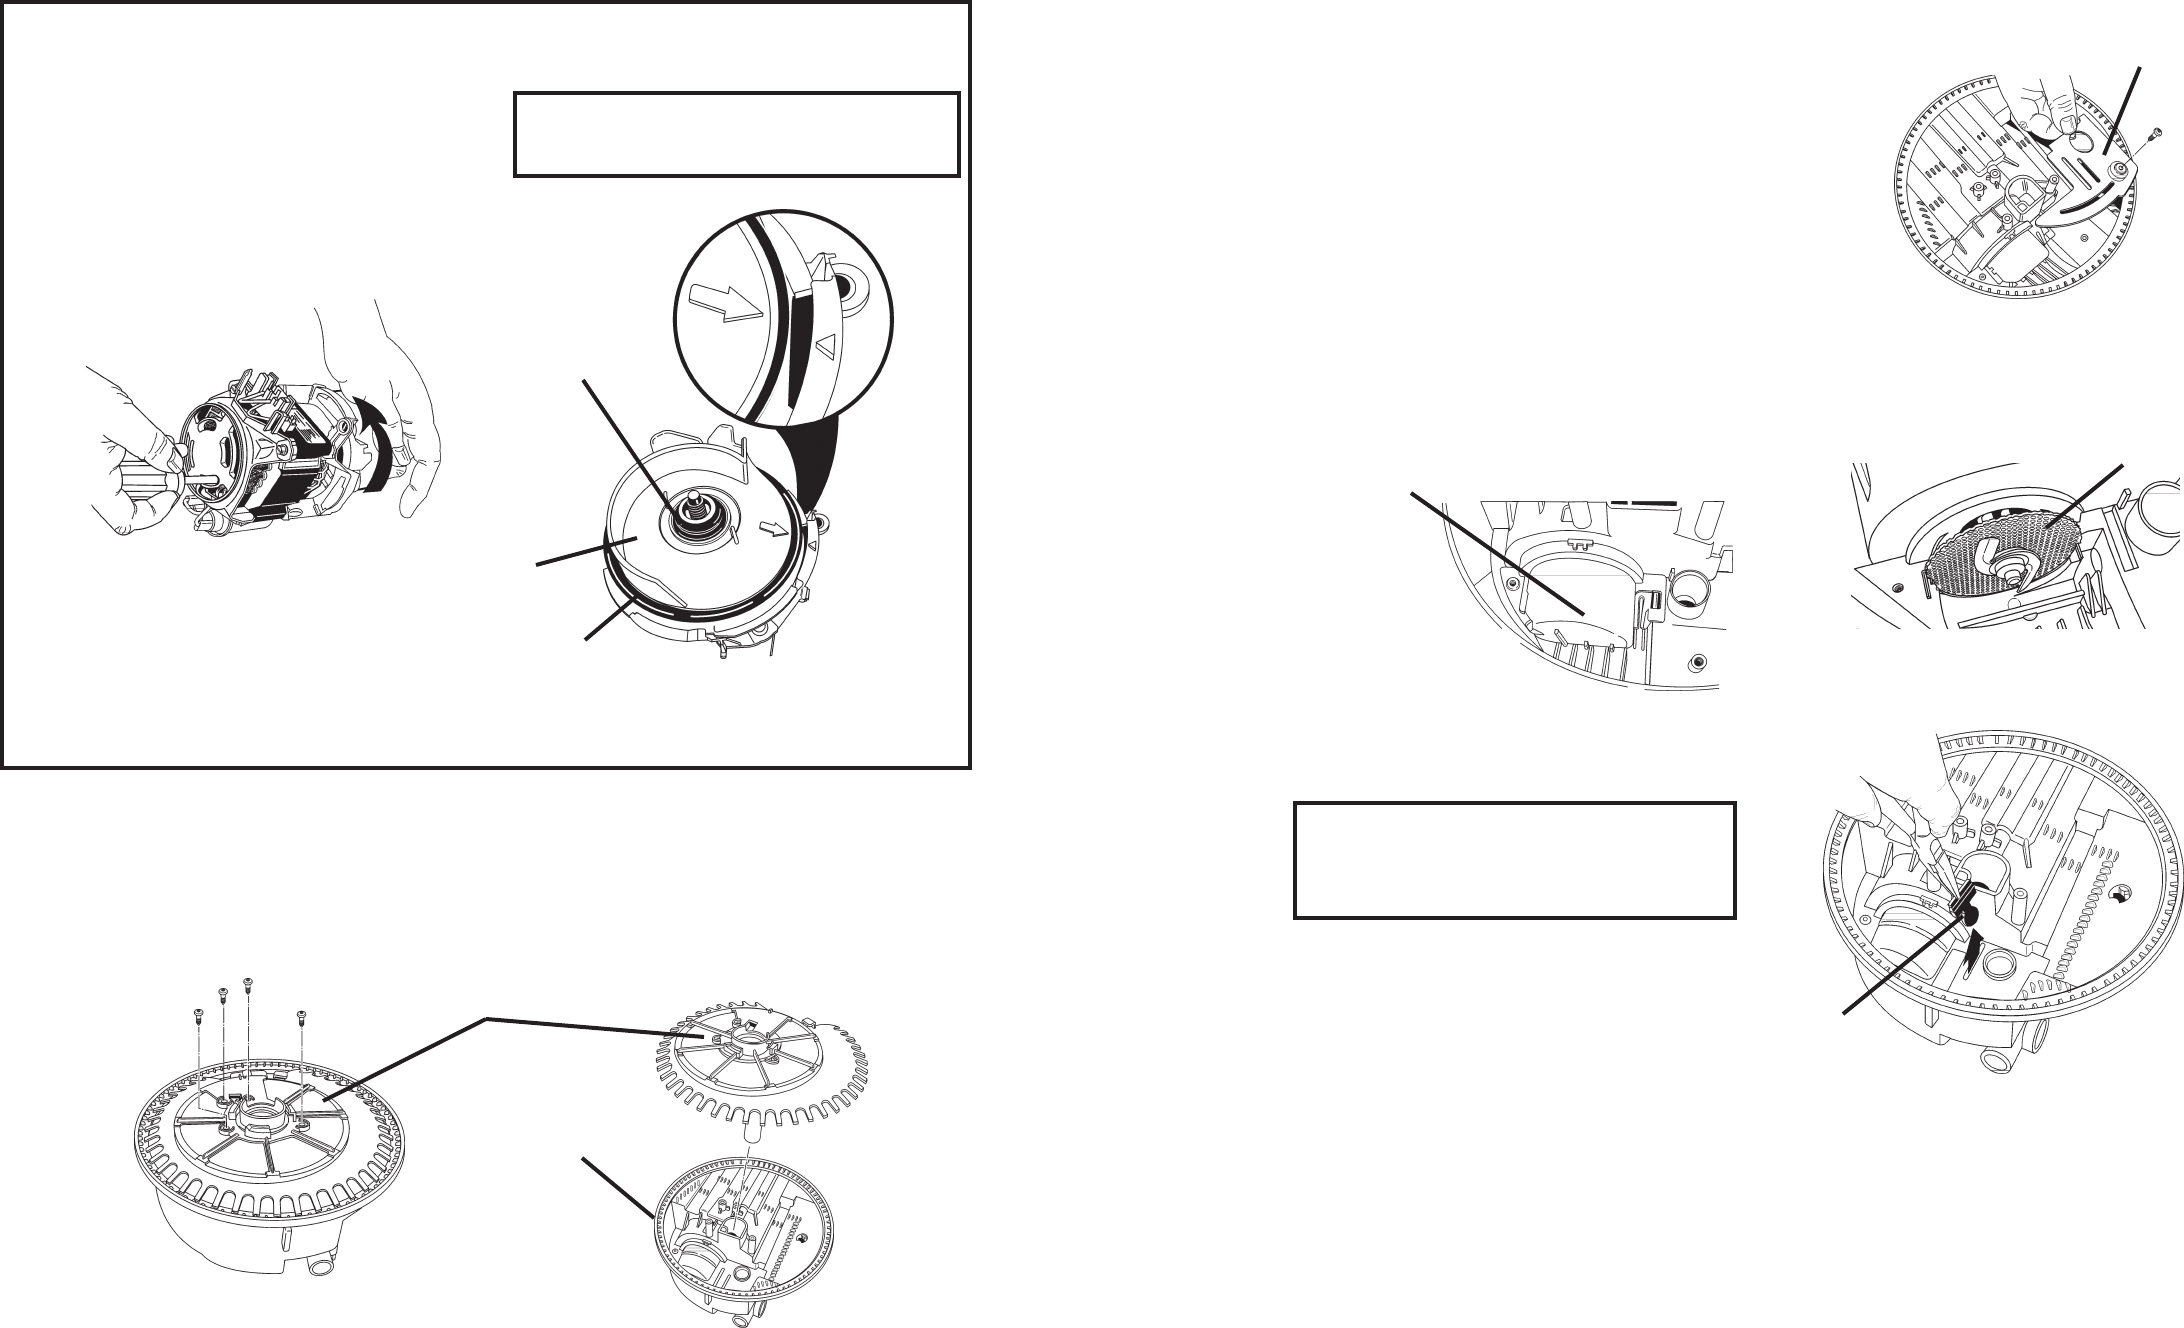
5. Remove the chopper assembly from the impeller shaft and lift it from the sump base.
(Fig. 3-29)
Chopper
Inlet
Protector
Fig. 3-28
Fig. 3-29
Fig. 3-30
6. The check valve, located between the
wash motor and the drain can be removed
with a pair of needle nose pliers.
(Fig. 3-30)
NOTE: When replacing the check valve,
simply drop it in place. The inlet protector
will seat the flapper valve properly when it is
reinstalled.
Check
Valve
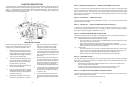
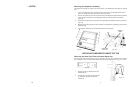
Removing the Impeller from the Wash Motor
The impeller is attached to the wash motor and can
be removed once the wash motor is removed from
the pump base.
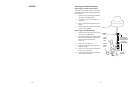
1. Place the end of a flat-bladed screwdriver
into the back of the wash motor to hold the
armature of the motor from turning while un-
screwing the impeller clockwise.
(Fig. 3-23)
Take care not to scratch or nick the motor
windings.
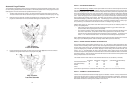
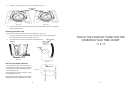
To Remove the Volute
1. Align the arrow on the volute and the
locator triangle on the wash motor
frame as in Figure 3-24.
2. Lift the volute from the wash motor.
Fig. 3-23
Fig. 3-24
Do not touch seal surfaces on the
impeller or the volute. Contamination
or damage will cause premature failure.
Volute
Seal Surface
Volute
Seal