


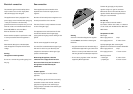


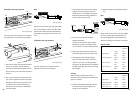


Remove the three screws securing the dual ring
wok burner. Remove the wok burner base plate.
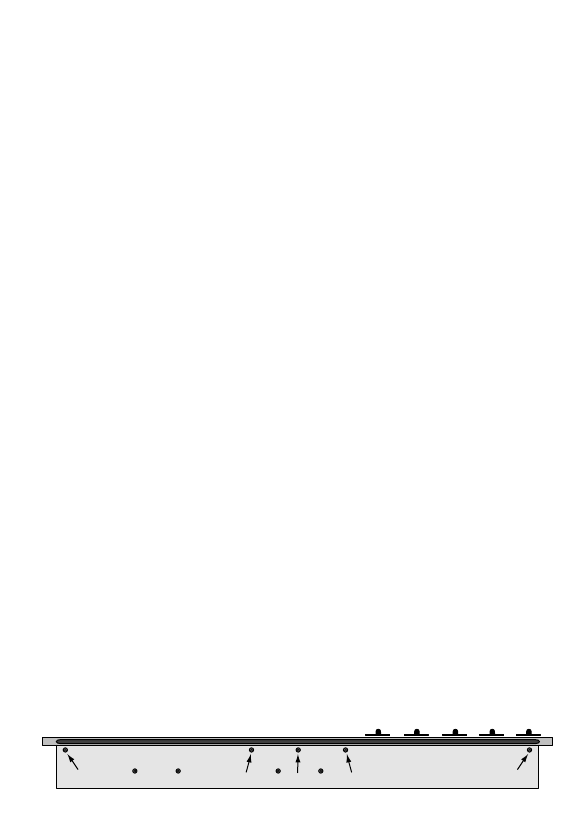
Lift the ceramic tray from the hob.
Note
Each regulator shaft is equipped with a black
ring. This ring may cling to the rubber seal in the
ceramic tray. Check and remove the rings from
the rubber seals.
For future use
Save the orifices removed from the appliance
for future use. For converting this appliance
back to Natural gas, follow the instructions and
use the numbers in brackets (… ).
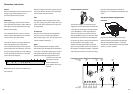
Igniter
The relationship between the igniter and the
main burners can't be changed. The relationship
in the case of LP gas and natural gas is identical.
The distance between the igniter and the high
speed burner and super high speed burner is
± 3.5 mm. For the two zone
high speed burner the
distance between the
igniter and the inner ring is
± 2.5 mm.
Conversion instructions
Caution
Before proceeding with the conversion, shut off
the gas supply to the appliance prior to
disconnecting the electrical power.
Disassembly
Shut off gas supply, disconnect the manifold
pipe, disconnect the electrical power. Remove
pan supports, burner heads and burner rings.
Remove control knobs.
In the event that the hob is built in, undo the
bracket clamps underneath the work surface.
Lift the hob on to the work surface.
Unscrew the venturis on the high-speed and
super high-speed burners using a 20 mm
wrench. Lift and remove the burner rings and
burner base plates. Disconnect the wires from
the ignition plugs. Keep the wire from dropping
into the undertray by inserting it in one of the
slots in the burner supports.
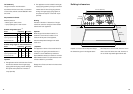
Remove the top five screws in the back of the
hob undertray.
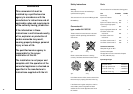
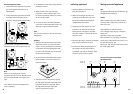
Pressure regulator conversion
The pressure regulator is located on the gas
supply pipe. Unscrew and remove the brass cap
in the centre of the regulator. This gas regulator
is only adjustable for 4" and 10" gas pressure.
There is a blue plastic pin on the inside of the
cap, marked "NAT" and "LP". Pull this pin from the
cap and insert it the other way round. Snap the
pin into the cap. The pin must be positioned as in
the drawing above. The regulator is now
adjusted for propane gas 10" WC. (For natural
gas 4", turn the pin back.) Screw the cap back on
the regulator. The pressure regulator is equipped
with a separate connection for pressure testing
purposes. Check gas pressure. Permitted
pressures: min. 11" WC (5" WC, natural gas), max.
1/2 psi.
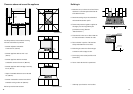
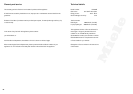
High speed and super high speed burner
conversion
Unscrew and replace injectors on the high-
speed and super high-speed burners. Replace
each injector separately. Refer to illustration
“Locations of injectors and minimum adjustment
screws” for screw locations.
2120
(034)
007
(170)
090
(166)
087
(145)
075
087
(166)
075
(145)
054
(100)
025
(042)
036
(055)
040
(060)
036
(055)
040
(060)
(Natural gas)
LP gas
LP gas
(Natural gas)
Locations of injectors and minimum adjustment screws