


2524
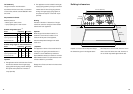
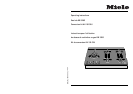
Installing appliance
1. Install the appliance according to the
installation instructions.
2. Attach the moulding at the rear to the
undertray. Put the hob back in the work
surface and fasten the bracket clamps
underneath the work surface.
3. Set the gas pressure regulator to a new
pressure of 10” WC (4" WC, natural gas).
Check pressure (see page 21). Permitted
pressures: minimum 11” WC (5" WC, natural
gas), max. 1/2 psi.
4. Reconnect gas supply, reconnect the manifold
pipe, reconnect the electrical power.
5. Put the burner heads and pan supports in
place. Make sure the burner heads are
mounted the right way. Put the burner head
marked "A" on top of the wok burner.
Testing converted appliance
Note
This appliance has been internally tested for gas
leakages by the manufacturer.
Caution
Check converted hob for gas leaks. Check the
connection with a soapy solution. Never use a
flame of any sort.
Check that the hob functions normally:
Turn on the gas supply and plug in the power
supply cord.
Light each of the burners individually.
When the burner is at low setting, or when the
control knob is turned quickly from 'high' to 'low',
the flame should not go out.
When set at 'high', the gas flame must burn with
the center clearly visible.
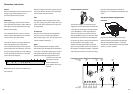
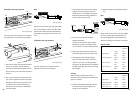
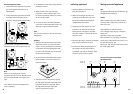
Minimum adjustment screws
1. Lift and remove the small black ring if this is
still on the regulator shaft (see note in
"Disassembly").
2. Lift and remove the square black switches.
Do not disconnect the wires from the
switches or the light emitting diodes (LED).
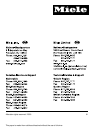
The wok burner is equipped with two minimum
adjustment screws, one for each burner ring.
Note
Make sure you replace both minimum
adjustment screws. Put screw 054 (100, natural
gas) on the left, 025 (042, natural gas) on the
right.
Use a small screwdriver and replace each
screw individually.
3. Put the black switches with the light emitting
diodes back in place.
4. Attach the label 'This control has been
converted for use with propane gas' to the
top of the hob undertray. Attach it as close to
the controls as possible.
5. Fill in the conversion date label and attach
conversion kit identification label close to the
appliance's original identification plate.
Note
This concludes conversion. The hob can now be
reassembled.
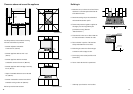
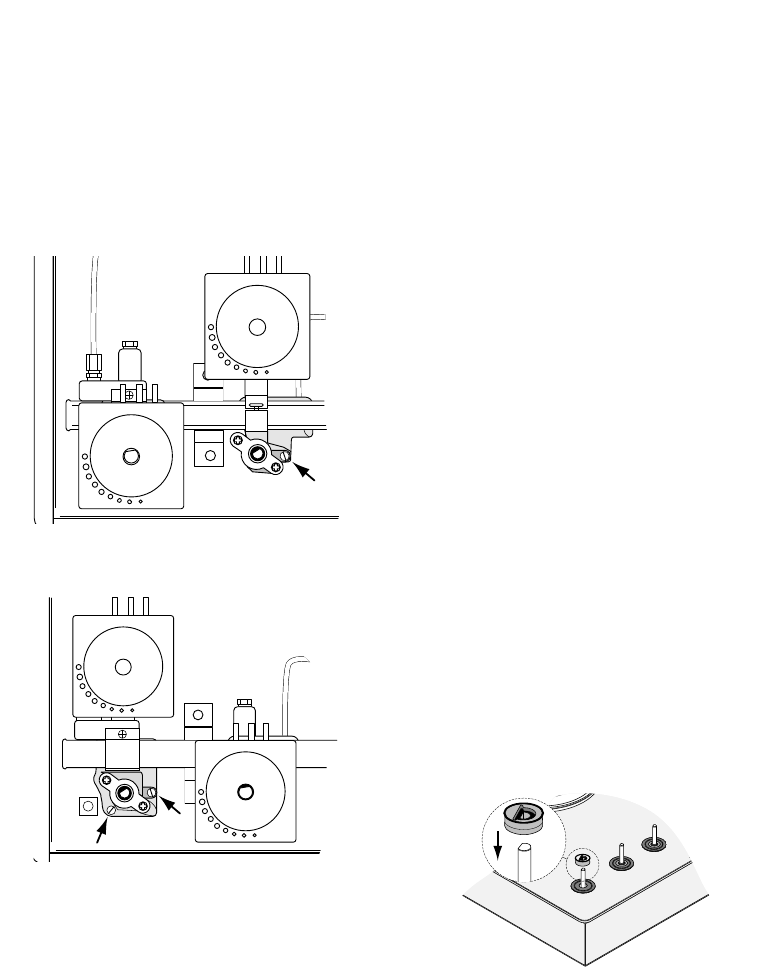
Assembly
1. Check that the seals are fitted on the ceramic
tray. Put the ceramic tray on the hob. Make
sure it is correctly positioned on the undertray.
Put the black ring around the regulator shaft
as shown. Press the black rings into the seals.
Put the control knobs back.
2. Put the wok burner base plate back in place.
Fasten the three screws securing the wok
burner base plate.
3. Connect the wires to the ignition plugs. Put
the high-speed and super high-speed burner
base plates and burner rings back. Fasten
the high-speed and super high-speed
venturis using a 20 mm wrench.
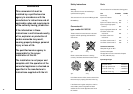
(034)
007
(170)
090
(166)
087
(145)
075
087
(166)
075
(145)
054
(100)
025
(042)
036
(055)
040
(060)
036
(055)
040
(060)
(Natural gas)
Propane gas
Propane gas
(Natural gas)
Locations of injectors and minimum
adjustment screws