10
W415-0223 / E / 03.05.09
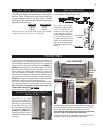
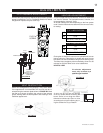
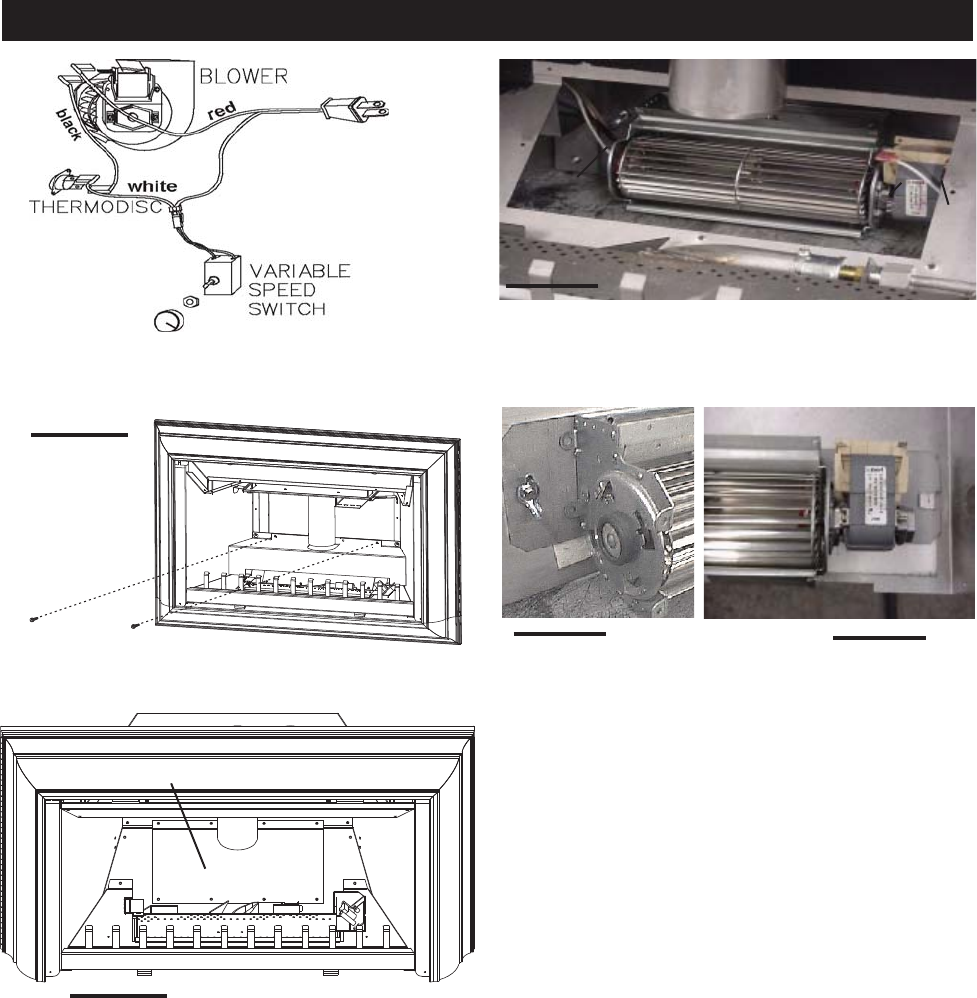
1. Turn off the electrical power and the gas supply to the
fi replace insert.
2. Remove the fi re viewing door. Remove the logs.
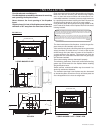
3. Detach the two screws from the back of the fi rebox and
remove the panel, as illustrated.
4. Remove the blower access door held on with the remain-
ing 8 screws. Replace the blower access door gasket when
changing the blower.
FIGURE 21
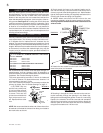
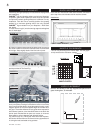
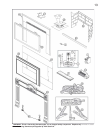
4. Disconnect the two blower wires. Remove the blower
bracket secured with one wing nut and lock washer.
For thermodisc replacement: Remove the "Z" shaped mount-
ing bracket secured to the fi rebox wall to the left of the blower.
Remove the thermodisc from the bracket and replace.
5. Replace the blower using the existing bracket. Slide the
vibration reducing pad (A) into the clip (C) and up against the
threaded stud (B) at the other end. The blower must be able
to be positioned entirely onto the pad.
Slide the blower into the clip (C). Secure to the threaded stud
using the existing lock washer and wing nut. Ensure that the
blower does not touch the fi replace base or the fi rebox.
6. Reconnect the two wires. Holding the replacement gasket
in place, reattach the blower access door and panel. Replace
the logs. Re-install the fi re viewing door.
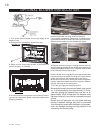
7. Turn the gas supply and electricity back on.
Because the blower is thermally activated, when turned
on, it will automatically start approximately 5-15 min-
utes after lighting the fi replace insert and will run for
approximately 30-45 minutes after the fi replace insert
has been turned off. Use of the fan increases the output
of heat.
Drywall dust will penetrate into the blower bearings
causing irreparable damage and must be prevented
from coming into contact with the blower or its compart-
ment. Any damage resulting from this condition is not
covered by the warranty policy.
BLOWER
WIRES
FIGURE 24
THERMODISC
BRACKET
ASSEMBLY
FIGURE 26
FIGURE 25
A
B
C
OPTIONAL BLOWER INSTALLATION
FIGURE 22
FIGURE 23
BLOWER ACCESS DOOR