


www.oster.com
6
www.oster.com
7
Traditional White Bread 2 lb. loaf
Ingredients:
1 & 3/8 cups water
2 tablespoons softened butter or margarine
4 cups bread our
2 tablespoons sugar
2 tablespoons dry milk
1 & 3/4 teaspoons salt
2 & 1/4 teaspoons active dry yeast
Instructions:
1 Carefully measure 1 and 3/8 cups water. Remember, use water that is room
temperature. DO NOT use very hot or very cold water. It’s a good idea to view the
measuring cup at eye level to make sure you have measured exactly 1 and 3/8 cups.
2 Pour the water into the bread pan.
3 Carefully measure 2 tablespoons of butter or margarine that is at room temperature.
Add this to the bread pan. This takes care of all of the liquid ingredients for the recipe.
Next comes the dry ingredients.
4 Measure 4 cups of bread our. Make sure not to “overpack” the our into the cup.
To avoid over packing, a good trick is to ll the measuring cup to overowing, then
tap the side of the cup with a knife or spatula to remove air pockets. Level o the
measuring cup with the knife or spatula. Pour the our into the bread pan.
5 Measure 2 tablespoons of sugar. Again, make sure to level o the tablespoons for
an exact measurement. Add the sugar into the bread pan.
6 Measure 2 tablespoons of dry milk. Level o the tablespoons of dry milk like all of the
rest of the dry ingredients. Add the dry milk to the bread pan.
7 Measure 1 & 3/4 teaspoons of salt. It is especially important to measure the salt
precisely because too much salt, even a little, can aect the rising of the dough.
Add the salt to the bread pan.
8 Before adding the yeast, use your nger to form a well (hole) in the our where you
will pour the yeast. Yeast must NEVER come into contact with a liquid when you are
adding ingredients. Measure (again, leveling o) 2 & 1/4 teaspoons of yeast and
carefully pour it into the well you made in the our.
9 Carefully snap the baking pan into the breadmaker.
10 Close the lid of the bread machine and plug the power cord into the wall outlet. The
following things will happen. The machine will “beep,” and the lights of the display will
turn on. The time setting will say “3:25” hours.
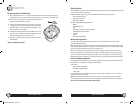
11 Repeatedly press the “Crust Color” button to select the kind of crust you want. For this
recipe we recommend “Medium”. Depending on the crust color you select, the arrow
will be pointing to either light, medium or dark.
12 Press the “Start/Stop” button and your machine will start making bread. You will hear
the breadmaker begin to mix the ingredients.
Note: It is important that you DO NOT press the “Start/Stop” button while the breadmaker
is making bread. If you do, the machine will turn o and you will need to start over again,
from scratch.
Note: It is important that you should not raise the lid for this recipe. (For other recipes you
try later, you will need to raise the lid to add nuts, fruits, or other ingredients.)
Caution: The breadmaker is very hot DO NOT handle the machine while it’s operating.
DO NOT lift the lid while the breadmaker is baking
bread.
Bread Machine Stages (for 2 lb. loaves)
It’s fun to watch your bread being made through the viewing window. For the basic cycle,
you can expect the following things to happen as the timer counts down to zero.
To begin: The ingredients are kneaded for the rst time (5 minutes)
At 3:20, the dough rests for 5 minutes
At 3:15, the dough is kneaded for the second time (20 minutes)
At 2:55, the dough begins to rise (39 minutes)
At 2:16, the dough is “punched down” (10 seconds)
At 2:16, the dough continues to rise (25 minutes and 50 seconds)
At 1:50, the dough is shaped (15 seconds)
At 1:50, the dough comes to the last period of rise (48 minutes and 45 seconds)
At 0:60, the dough begins to bake (60 minutes)
At 0:00, the bread is nished.
After the bread is baked
Caution: Do not put your face near the lid when you open the breadmaker, hot steam may
escape that could burn you.
Important: The breadmaker has an automatic “keep warm” setting that will keep your
bread warm for up to one hour, we recommend however to remove the bread from the
breadmaker right away to preserve its freshness.
1 Use pot holders or oven mitts to carefully lift the pan by its handle from the breadmaker.
2 Turn the pan upside down onto a cooling rack and gently shake it until the bread comes
out. If it sticks, take a rubber spatula (metal can damage the pan’s surface) and carefully
go around the sides of the loaf until the bread comes out.
3 If the kneading blade comes out with the bread, use the included kneading blade
removal tool to remove it from the loaf, Remember, it will be hot!
Allow the bread to cool for 15 minutes before slicing and enjoying it.
Important: If you wish to make another loaf of bread right away, please allow the
breadmaker to cool down for 10 to 15 minutes with the cover open and the pan removed.
CKSTBRTW20-BM-IB-RevC.indd 6-7 6/30/09 5:20:21 PM