


1-2
Locate your Pitco Frialator warranty and fill in the serial number of the fryer and the date received. You
will find the serial number on the plate inside the door. Put your warranty card in a safe place for future
reference. DO NOT return the card to Pitco Frialator.
1.2.1 Check Your Order
The crate containing the fryer unit will also contain the following:
(2) Pitco Cleaner Sample
(1) Drain Clean Out Rod
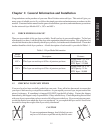
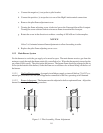
1.3 ASSEMBLY AND LEVELING
When you receive your fryer, it is completely assembled with the possible exception of the legs (or
casters) and the heat shield. In some cases, if you have purchased a multi-fryer unit, you may need to
assemble the system.
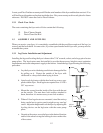
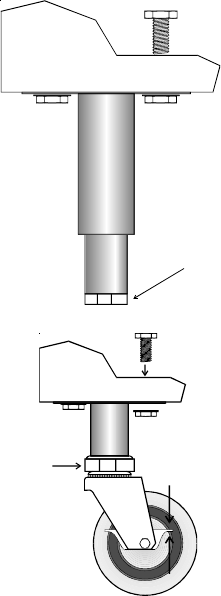
1.3.1 Leg/Caster Installation and Adjustment
Installing the legs and leveling the fryer is done with a 7/16" wrench, socket, and a large pair of water
pump pliers. The legs/casters must be installed to provide the necessary height to meet sanitation
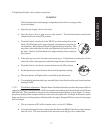
requirements and assure adequate air supply to the burner. Attach the legs by performing the following
procedure.
a. Lay the fryer on its side being careful not to damage the flue
by pulling on it. Protect the outside of the fryer with
cardboard or a drop cloth when laying it down.
b. Attach each leg/caster with the hex head cap screws sup-
plied with the fryer. Each leg/caster requires four 1/4-20 x
5/8" cap screws.
c. Mount the screws from the inside of the fryer with the nut
on the outside. The nuts have lock washers attached to
them, therefore it is not necessary to use lock washers.
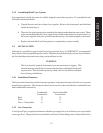
d. When all four legs/casters are mounted, stand the unit up
being careful not to put too much weight on any one leg/
caster. Adjust the height and level the fryer by adjusting the
leveling devices on the leg/caster with the water pump
pliers.
e. On units with casters, move the fryer to the desired location
and lock the wheels using the locking devices on the sides
of the casters.
Adjust Here
Lock
Adjust
Here
Un Lock