


24
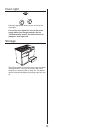
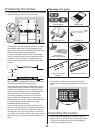
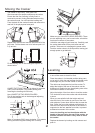
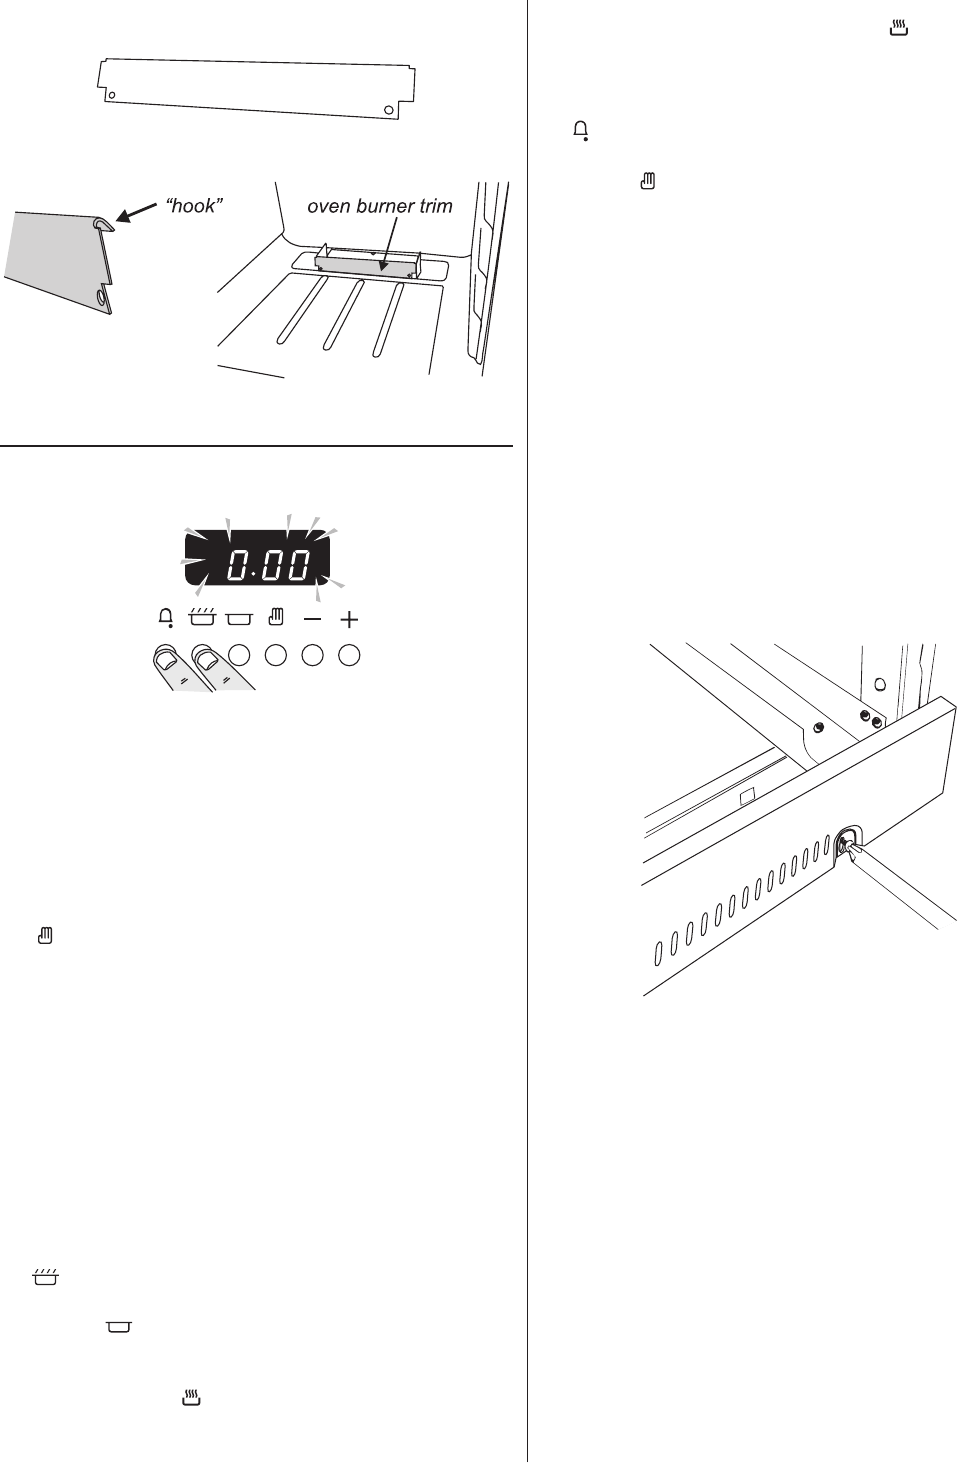
Fitting the oven burner trim
(supplied with some models only)
The loose oven burner trim hooks onto the front of the
oven burner bracket.
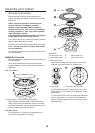
Oven check
The clock must be set to the time of day before the
ovens will work.
Press and hold as above.
At the same time, press - or + until the correct time
shows.
Don’t forget it’s a 24 hour clock.
If you make a mistake or press the wrong button, turn
off the power supply for a minute or two and start
again.
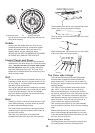
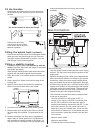
CONTROL KNOB (THERMOSTAT) CHECK
If (AUTO) is flashing, press and release the manual
( ) button. Check each oven in turn. Push in and turn
the control knob to maximum. A series of sparks will
occur at the oven electrode and when the oven burner
lights the sparking will stop. A small flame will appear
on the oven burner, but as this flame is ‘sensed’ by the
flame supervision device, the gas flow will come on
full after a short delay. Heat each oven for 10 minutes
at maximum then turn to ‘S’ and check that the flame
size has reduced. Turn off each oven and check that
the oven burner goes out.
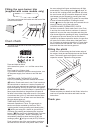
TIMER AND SOLENOID CHECK
Automatic Operation of Timer: The gas supply to
each oven can be controlled by the timer. Set a
‘cooking period’ time by pressing and releasing the (
) button and using the + button to give a time of
2 minutes. By pressing and releasing the ‘stop time’
button ( ) the stop time is displayed. Add 3 minutes
to this time by using the + button. The display will
automatically change to show the time of day, the
cooking symbol ( ) will go out and (AUTO) will show.
Push in and turn one of the oven knobs to maximum,
the timer will run until the ‘cook period’ starts, when
the oven solenoid will open and the burner will light
automatically. The cooking symbol ( ) will show. At
the end of the ‘cooking period’ the solenoid will close,
the oven burner will go out and the beeper will sound
(the beeper may be stopped by pressing the timer (
) button). The flashing (AUTO) symbol is a reminder
to reset to manual operation. Pressing the reset’
button ( ) once to stop the beep and a second time to
return to manual, turn off the oven knob.
CONTROL KNOB (THERMOSTAT) CHECK
Set timer to manual. Check each oven in turn. Push
in and turn the control knob to maximum. A series of
sparks will occur at the oven electrode and when the
oven burner lights the sparking will stop. A small flame
will appear on the oven burner, but as this flame is
‘sensed’ by the flame supervision device, the gas flow
will come on full after a short delay. Heat each oven
for 10 minutes at maximum then turn to ‘S’ and check
that the flame size has reduced. Turn off each oven
and check that the oven burner goes out.
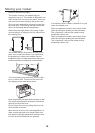
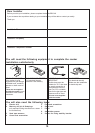
Fitting the plinth
Loosen the 3 screws along the front bottom edge of
the cooker. Hook the central keyhole over the central
screw. Twist and fit each end keyhole over their
respective screws. Tighten the fixing screws.
Customer care
Please complete your details in this Guide, inform the
user how to operate the cooker and hand over the
Instructions.
Thank you.