


24
GB/IE
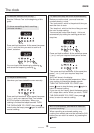
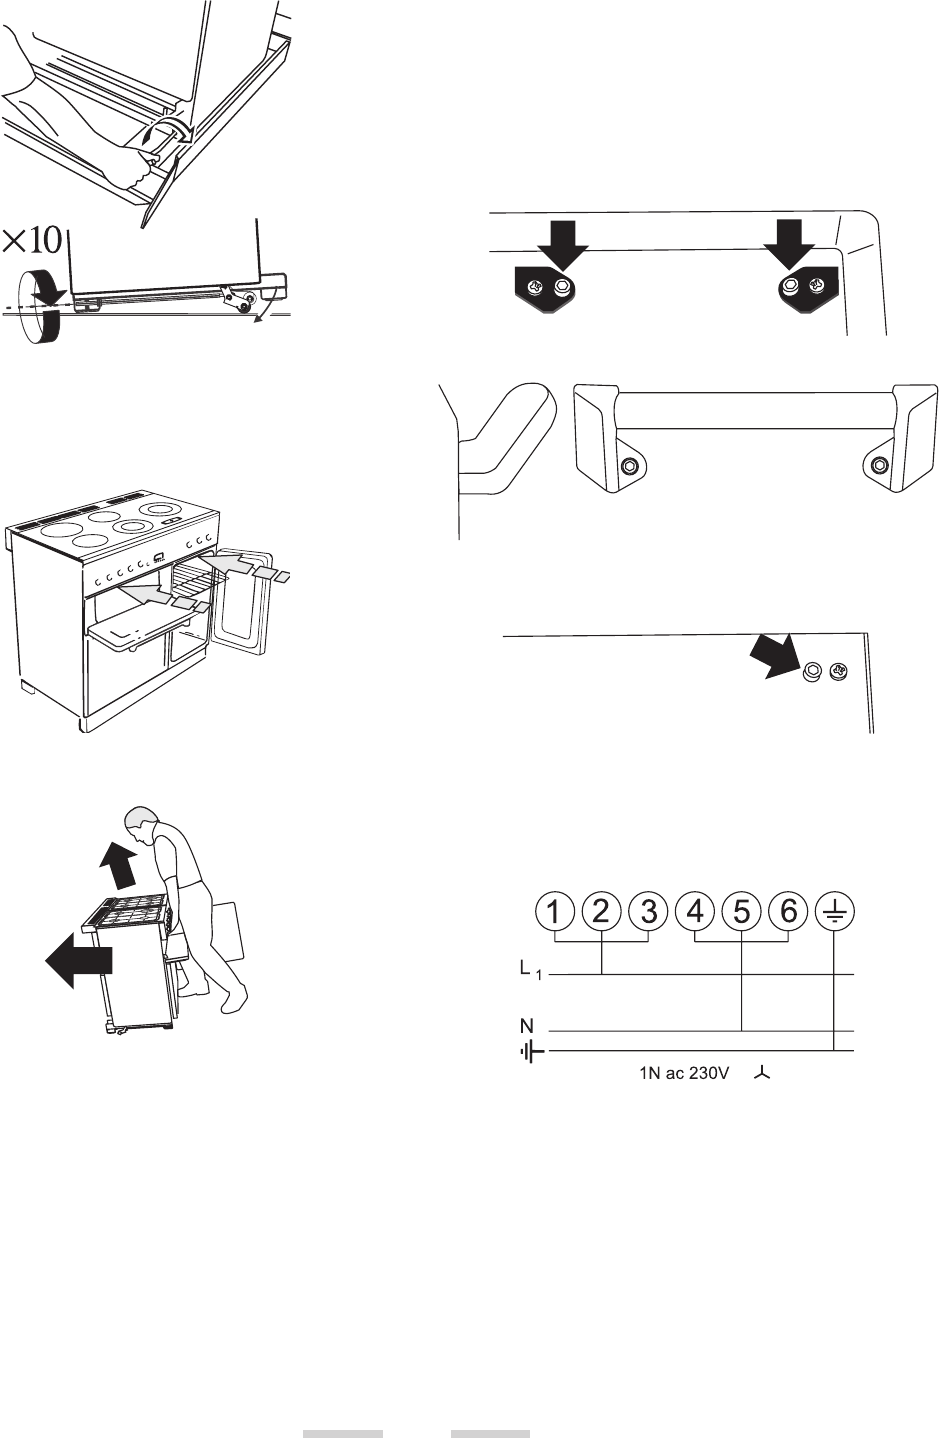
Make 10 complete (360°) turns clockwise. (This means
turning and removing the levelling tool 20 times).
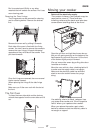
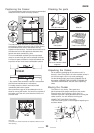
Make sure you lower BOTH REAR ROLLERS. There
are two adjusting nuts, one for each roller, at both the
front bottom corners of the cooker. Open the grill door
and the Holding oven door. Grip under the facia panel
and lift the front of the cooker.
Carefully push the cooker backwards close to its final
position leaving just enough space to get behind it.
Take care not to damage the power cable.
Do not use the door handles or control knobs to
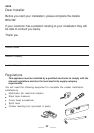
manoeuvre the cooker. Remove the pack base tray.
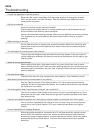
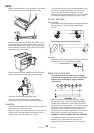
Levelling
You are recommended to use a spirit level on a shelf in
one of the ovens to check for level.
Place the cooker in its intended position taking care not
to twist it within the gap between the kitchen units as
damage may occur to the cooker or the units.
The front feet and rear rollers can be adjusted to level
the cooker. To adjust the height of the rear of the
cooker use the levelling tool supplied to turn the
adjusting nuts at the front bottom corners of the cooker.
To set the front feet turn the bases to raise or lower.
Fit the Handles
Door handles
Remove the 4mm Allen screws from the doors with the
hexagon key tool. Use the screws to fit the door
handles.
The handles should be above the fixings.
Handrail
Remove the 4mm Allen screws from the top corners of
the facia and fix the front handrail in position.
Electrical Connection
This appliance must be installed by a qualified
electrician to comply with the relevant regulations
and also the local electricity supply company
requirements.
Make sure that the mains characteristics (voltage,
nominal, power, etc.) match the ratings indicated on
the data plate affixed to the lower right hand cooker
upright (remove storage drawer). The cooker is preset
for a single-phase earthed electrical connection. It is
essential to install a multi-pole circuit breaker that
completely disconnects the appliance from the mains,
with a minimum contact break distance of 3mm.
WARNING: THIS APPLIANCE MUST BE EARTHED
The appliance must be connected to an efficient
earthing circuit. If the electricity network is not
equipped with an earth connection, then it must be