


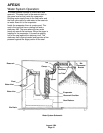
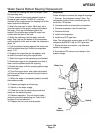
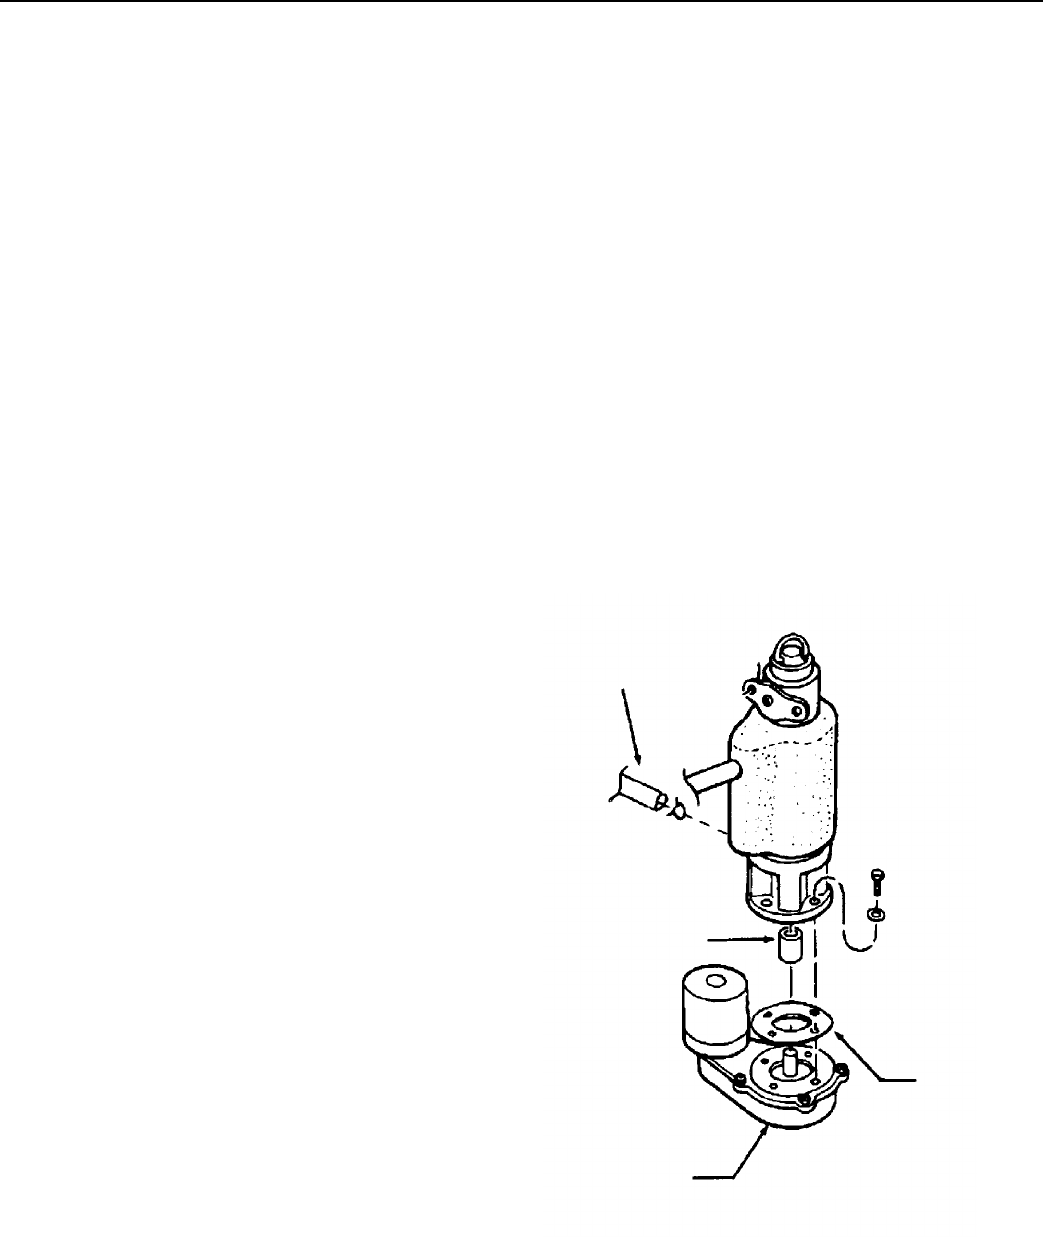
Water Seal & Bottom Bearing Replacement:
1. Remove old rotating half from the auger. Clean
the mounting area.
2. Place a bead of food grade sealant (such as
Scotsman part number 19-0529-01) onto the
shoulder of the auger where the rotating half of the
water seal will be installed.
3. Wash the new seal in water. While wet, slip it
onto the bottom of the auger, rubber side toward
the auger. Push up until seated against the
sealant. Do not allow any sealant to come into
contact with the face of the seal.
4. Wash the stationary half the water seal with
water. Slip it up into the bottom of the evaporator
until the bottom of the seal is inside the evaporator
about 1/4".
5. Push the bottom bearing against the water seal
until the bottom bearing is inside the evaporator
about 1/16".
6. Replace the evaporator on the adapter, and
re-attach the stand using the original bolts.
7. Attach the auger to the top bearing and breaker.
8. Return the auger to the evaporator and slide it
down until the splines touch the coupling.
9. Rotate the auger until the coupling splines align
with the auger.
10. Push the auger down, and rotate the breaker
until the screw holes line up with the pilot holes in
the evaporator.
11. When the auger is completely seated, reinstall
the breaker screws.
12. Replace permagum and foam top.
13. Switch on the water supply.
14. Check bin cover for electrical grounds and
switch on the electrical power.
15. Observe operation. The unit should make
minimal noise while producing ice. Catch first 2
minutes of ice and discard it.
16. Replace the bin cover and all panels.
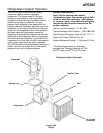
Evaporator
Follow all steps to remove the auger & bearings.
1. Recover the refrigerant charge. Note: The
refrigeration system must not remain open for
more than 15 minutes.
2. Unsweat suction and cap tube connections.
3. Remove evaporator from the machine.
4. Remove old drier.
5. Install new evaporator.
6. Install new HFC type drier.
Note: The refrigeration system uses an HFC type
refrigerant and MUST use an HFC type drier.
7. Braze the drier connections, cap tube and
suction line together.
8. Evacuate to 200 microns, and weigh in the
system charge.
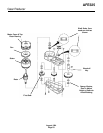
Water Line
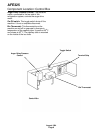
Coupling
Gear
Reducer
Gasket
AFE325
August 1994
Page 19