


Configuring Switching
37
SonicOS 5.7: Advanced Switching Feature Guide and Screencast Tutorial
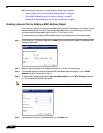
Step 6 Select the zone from the Zone Assignment drop-down list. This is the zone for the computer with this
MAC address. You can select any zone that exists on the SonicWALL NSA 2400MX, including custom zones
and the SonicOS default zones, which are LAN, WAN, DMZ, VPN, SSLVPN, MULTICAST, and WLAN.
Step 7 The only available selection for Type is MAC, indicating that you are creating a MAC Address Object.
Step 8 If the device with this MAC address can have multiple IP addresses, select the Multi-homed host checkbox.
Otherwise, clear this checkbox.
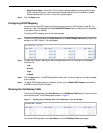
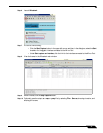
Step 9 Click OK in the Add Address Object window. The new address object appears in the MAC Address field
of the Add Static MAC Address window.
Step 10 Click OK in the Add Static MAC Address window to complete the secure port configuration using these
settings.
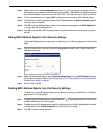
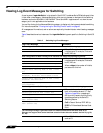
Editing MAC Address Objects in Port Security Settings
To edit a MAC address object for a secure port on the Switching > Port Security page, perform the following
steps:
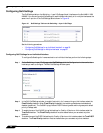
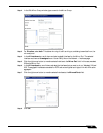
Step 1 Click the Configure icon in the row for the MAC address object you want to edit. The Edit Static MAC
Address window opens.
Step 2 Select a different address object or select Create new address object from the MAC Address drop-down
list and follow the steps provided in Step 4 through Step 9 of the “Creating a Secure Port by Adding a MAC
Address Object” section on page 36.
Step 3 When finished, click OK.
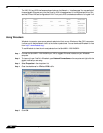
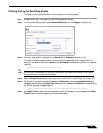
Deleting MAC Address Objects from Port Security Settings
To delete one or more MAC address objects from your secure port settings on the Switching > Port Security
page, perform the following steps:
Step 1 To delete a single MAC address object, click the Delete icon in the Configure column for the row with
the MAC address object you want to delete.
Step 2 To delete multiple MAC address objects, select the checkboxes next to the MAC address objects you want
to delete and then click the Delete Selected button at the bottom of the page.
Step 3 Click OK in the confirmation dialog box.