


Part # 4523343 Rev 1 (02/12/08)Page 6
INSTALLATION
This product has been certied as commercial cooking
equipment and must be installed by professional personal
as specied. THIS APPLIANCE IS NOT RECOMMENDED FOR
RESIDENTIAL INSTALLATION.
We suggest installation, maintenance and repairs should
be preformed by your local Garland/US Range authorized
service agency.
Siting
The oor on which the appliance is to be sited must be
capable of adequately supporting the weight of the
appliance and any ancillary equipment. Units with ovens
must be tted with legs if installed on a combustible oor.
Adequate clearance must be provided for servicing and
proper operation.
Appliances Equipped With Casters
1. The installation shall be made with a connector that
complies with the Standard for Connectors for Moveable
Gas Appliances, ANSI Z21.69/CSA 6.16, Addenda Z21.69B-
2006/CSA 6.16B-2006 (or latest edition), and a quick-
disconnect device that complies with the Standard for
Quick Disconnects for Use with Gas Fuel, ANSI Z21.41/
CSA 6.9, Addenda Z21.41A-2005/CSA 6.16A-2005 (or
latest edition).
2. The front casters of the appliance are equipped with
brakes to limit the movement of the appliance without
placing any strain on the connector or quick disconnect
device or its associated piping.
3. Please be aware; required restraint is attached to a
bracket, (which is located on the rear of the caster closest
to the gas connection), and if disconnection of the
restraint is necessary, be sure to reconnect the device
after the appliance has been returned to its original
position.
Appliances Equipped With Legs
1. Raise the front of the appliance and block. Do not lay the
appliance on its back.
2. Legs are threaded to be easily screwed into the holes
provided on the bottom of the range.
3. Once legs have been attached and secured they can
be adjusted to level the appliance and compensate for
uneven ooring.
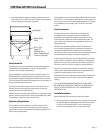
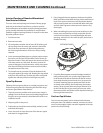
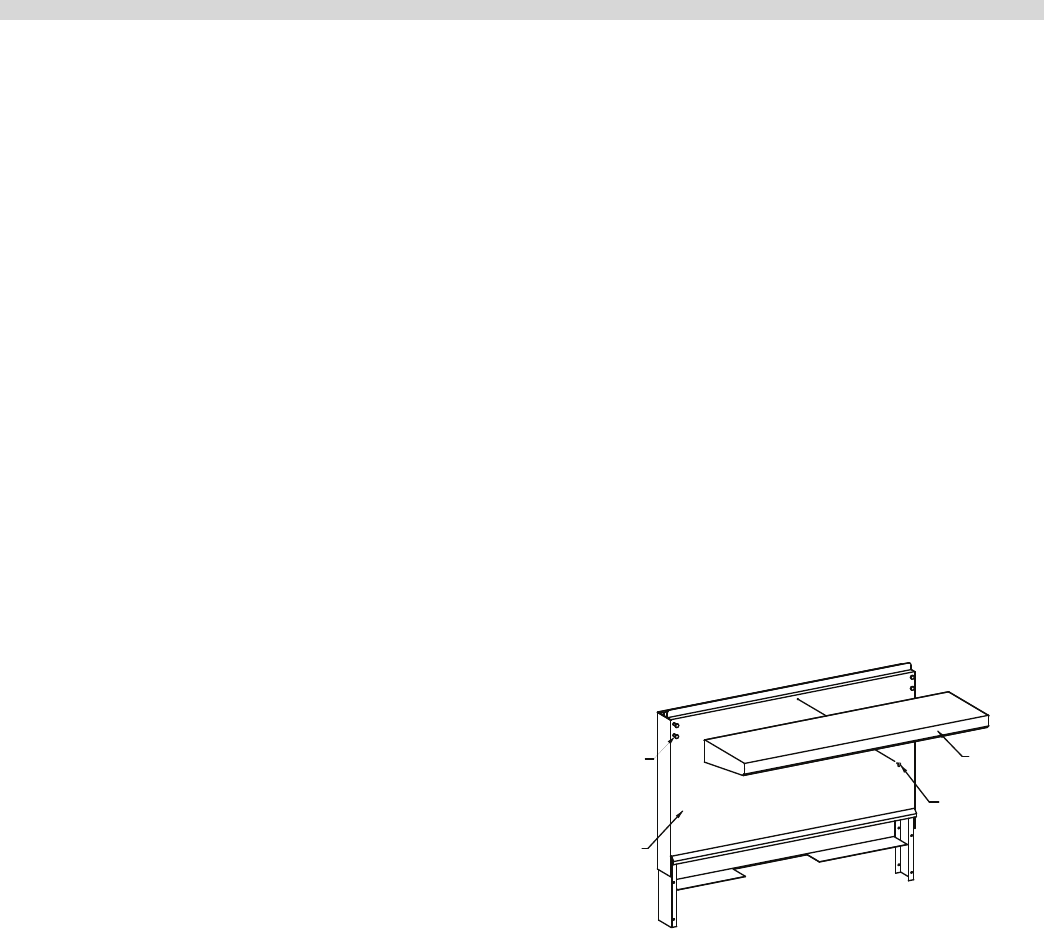
Installing Shelf To Backguard
Note: Shelf may be installed before or after installing the
backguard to the range.
1. Loosen 4 bolts on the front of the backguard
approximately 1/4” (6mm).
2. Align the 4 slotted holes on the back of the shelf with the
4 bolts on the backguard.
3. Slide the shelf downward until the 4 bolts are engaged in
the slotted portion of the keyhole.
4. Tighten the 4 bolts to secure the shelf.
5. On 60” units only, install a sheet metal screw though the
hole in the underside of the shelf into the backguard and
tighten.
SHELF
BACKGUARD
MOUNTING
BOLTS
SHEETMETAL
SCREW
Backguard With High Shelf, Salamander Or
Cheesemelters Mounting Instructions
1. Rear of the range must be easily accessible.
2. Place the backguard, high shelf, salamander, or
cheesmelter on the rear of the range, slipping the
support brackets into the openings in the main body
sides.