


switch itself on again, disconnect it from the
mains supply, and wait for approximately 15
minutes before reconnecting. If the machine
does not start again seek authorised technical
assistance.
Cleaning
- Disconnect the appliance from the mains
and allow it to cool before undertaking any
cleaning task.
- Clean the equipment with a damp cloth with
a few drops of washing-up liquid and then dry.
- Do not use solvents, or products with an
acid or base pH such as bleach, or abrasive
products, for cleaning the appliance.
- Never submerge the appliance in water
or any other liquid or place it under running
water.
- During the cleaning process, take special
care with the blades, as they are very sharp.
- It is advisable to clean the appliance
regularly and remove any food remains.
- If the appliance is not in good condition
of cleanliness, its surface may degrade
and inexorably affect the duration of the
appliance’s useful life and could become
unsafe to use.
- The following pieces may be washed in a
dishwasher:
- Liquidiser attachment
- Whisk
- Goblet
- Sieve
- Chopping container
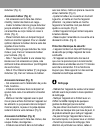
- The draining/drying position of the articles
washable in the dishwasher or in the sink
unit and then remove the whisk accessory by
pulling it outwards. (Fig. 4).
- Note 1: Do not work at high speeds with
this accessory attached, as this would cause
defects in the whisk (spinning its wires).
- Note 2: To free the whisk (F) from the
adapter tting (E), pull the ring on the whisk.
Sieve accessory (Fig. 5):
- This accessory is used for making juices,
stock…
- Place the sieve in the jug and add the foods
to be processed (Fig. 5).
- Switch the appliance on with its foot
attached and work with the food to be
processed. The juice will go into the jug, but
the pips, skin and thick pulp will remain in the
sieve container (Fig. 5).
Mixing container (Fig. 6):
- This accessory is used for processing
milkshakes, cold soups, vegetables…
- Place the foods to be processed in the
mixing container with its blades in position
and t the cover rmly (Fig. 6).
- Attach the whisk accessory to the lid by
turning to the left, and start up the appliance.
(Warning: Do not start up the appliance if
the entire unit is not correctly in place and
attached.) (Fig. 6)
- Stop the appliance when the food reaches
the desired texture.
- Remove the lid tment by turning it to the
right. (Fig. 6)
Safety thermal protector:
- The appliance has a safety device, which
protects the appliance from overheating.
- If the appliance turns itself off and does not