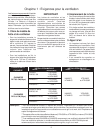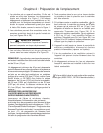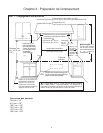
INSTALLER CHECKLIST
❑ The appliance is connected
only to the type of gas for which
it is certified for use.
❑ Manual gas shut off valve in-
stalled in an accessible loca-
tion (without requiring removal
of range).
❑ Unit tested and free of gas
leaks.
❑ Gas supply pressure does not
exceed 14" W.C. (34.9 mb).
ELECTRICAL
❑ Receptacle with correct over-
current protection is provided
for service cord connection.
❑ Proper ground connection.
❑ Proper polarity at receptacle.
OPERATION
❑ If used on propane gas, verify
that the propane gas supply is
equipped with its own high pres-
sure regulator in addition to the
pressure regulator supplied
with the appliance.
❑ Bezels centered on burner
knobs, and knobs turn freely.
FINAL CHECK LIST
❑ Specified clearances main-
tained to cabinet surfaces.
❑ Unit Level – front to back –
side to side.
❑ Burner caps positioned prop-
erly on sealed burner bases.
❑ All packaging material removed.
❑ Island trim or backguard at-
tached. Backguard needed if
horizontal clearance to com-
bustible materials behind cook-
ing surface is less than 12".
❑ Check door fit to oven cavity.
Reinstall door if necessary (See
door reinstallation procedure at
the bottom of page 15.
❑ Kick panel in place and two (2)
screws secure.
❑ The griddle or grill plate and
frame is correctly positioned,
tilted slightly forward. (See page
9 for adjustment procedure.)
GAS SUPPLY
❑ Connection: 1/2" N.P.T. with
a minimum 3/4" diameter
flex line - suggested length four
(4) ft., depending upon local
codes.
18
❑ Each burner lights satisfacto-
rily, both individually and with
other burners operating.
❑ Air Shutter adjustment for
proper flame made for Grill. See
Step 9 and Fig.9.
❑ Griddle or grill is tilted
slightly
forward and does not rock (not
all models).
❑ Oven door hinges seated and
hinge locks in proper position.
Door opens and closes prop-
erly.
❑ Burner grates correctly posi-
tioned, level, and do not rock.
❑ INSTALLER: Leave the Care
and Use Manual and Installa-
tion Instructions with the owner
of the appliance.
The stainless steel surfaces may be cleaned by
wiping with a damp soapy cloth, rinsing with clear
water and drying with a soft cloth to avoid water
marks. Any mild glass cleaner will remove fingerprints
and smears.
For discolorations or deposits that persist, refer to the
Care and Use Manual.
To polish and protect the stainless steel, use a cleaner/
polish such as Stainless Steel Magic
®
.
DO NOT allow deposits to remain for long periods of
time.
DO NOT use ordinary steel wool or steel brushes.
Small bits of steel may adhere to the surface causing
rust.
DO NOT allow salt solutions, disinfectants, bleaches
or cleaning compounds to remain in contact with
stainless steel for extended periods. Many of these
compounds contain chemicals which could prove
harmful. Rinse with water after exposure and wipe dry
with a clean cloth.
To Clean and Protect Exterior Surfaces


