


SMW Oven Care and Use Manual Lower Oven Maintenance
Do-It-Yourself Maintenance
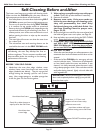
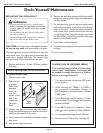
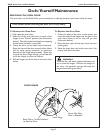
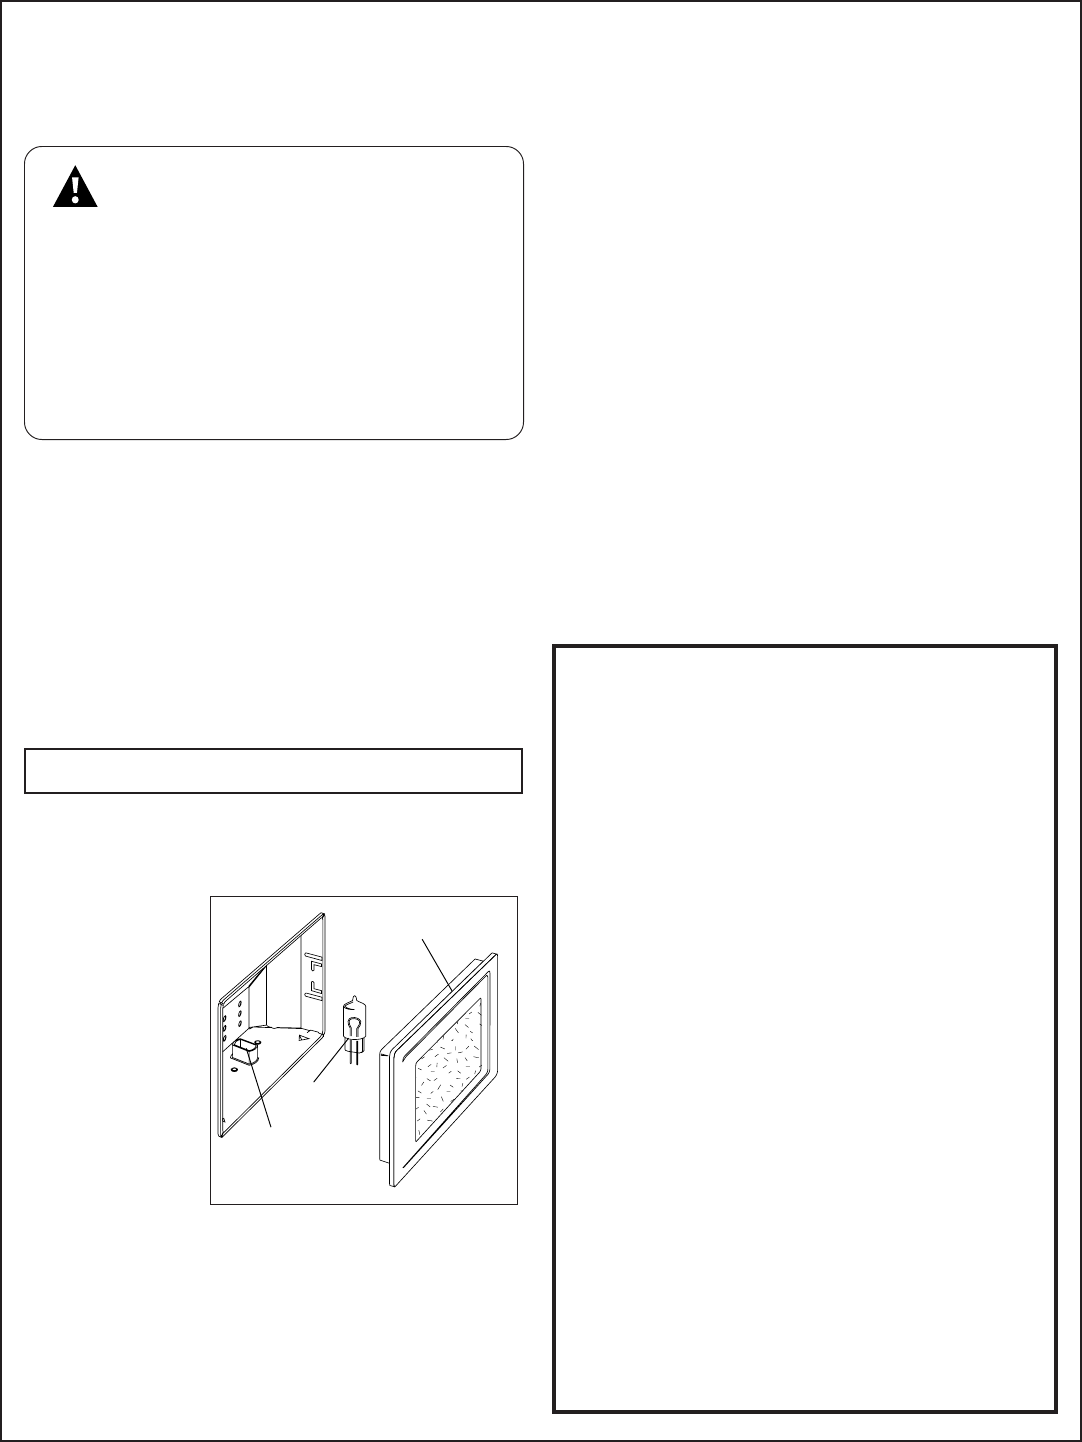
REPLACING THE OVEN LIGHT
• Replace bulb with a 12-Volt, 10-Watt Halogen
bulb only.
Before replacing bulbs, turn off oven circuit.
To replace Halogen Bulb:
1. Remove oven racks.
2. Slide the tip
of a table
knife
blade
between
oven wall
and the
center of the
side of the
protective
glass lens
cover.
3. Support the glass lens cover with two fingers
along the bottom edge to prevent the cover from
falling to the bottom of the oven.
4. Gently twist the knife blade to loosen the glass
lens cover.
5. Remove the glass lens cover.
WARNINGS:
To prevent electrical shock and or personal injury:
• Before replacing the light bulb, be sure the
electric power is turned off at the circuit
breaker.
• Do not operate the oven unless the light cover is
securely in position.
• Halogen bulbs get HOT instantly when turned ON.
• Be sure the oven and light bulb are cool.
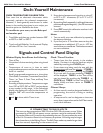
Light Bulb
Lens Cover
Light
Socket
CAUTION: If the light cover is damaged or broken,
do not use the oven until a new cover is in place.
The oven lights are located on the left and right side
walls of the oven. The lights have a removable lens
cover and a halogen light bulb. The ceramic light
socket housing is not removable by the user.
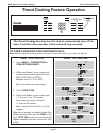
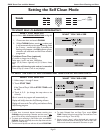
24-HOUR CLOCK OR CENTIGRADE FORMAT
Your oven has been preset to a 12-hour clock
format and F° temperature. Two people will
be needed to change the clock to a 24-Hour
format or a temperature to C°.
1. Turn electric power to the oven OFF at the
circuit breaker.
2. While touching the
TIMER 1 or TIMER 2
pad, turn power on at breaker. Number 12
and F will appear in the clock window. Release
TIMER pads.
3. Touch BAKE pad and 24 replaces 12 in the
clock window. This will toggle with repeated
touches of BAKE.
4. Touch BROIL pad
and
C replaces F. These
will toggle with repeated touches of BROIL.
5. To complete the change, touch OFF pad.
6. Set the correct Time of Day, see Page 30.
6. Remove the bulb by grasping and sliding the bulb
straight up until the two prongs have cleared the
ceramic holder.
7. Do not touch the glass of the new replacement
bulb with your fingers. It will cause the bulb to fail
when it first lights. Grasp the replacement bulb
with a clean paper towel or facial tissue with the
prongs facing down. Locate the two prongs in the
ceramic holder, gently poking until the two prongs
locate in the ceramic socket.
8. Press down to seat the bulb.
9. Snap the protective glass lens cover over the bulb
housing.
10. Turn on circuit breaker.
Page 54