F35425 (February 2006) Page 14 of 40
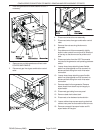
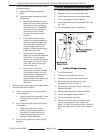
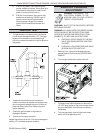
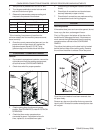
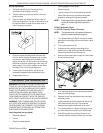
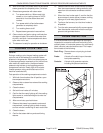
The screw head should not extend out past
the screw housing.
1) If gas valve energizes, proceed to
step 5.
2) If gas valve does not energize, check
the following:
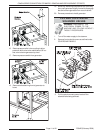
a. Remove the lead wires from the
switch and verify with a meter that
the switch contacts are closing
with the blower on. If necessary,
continue to turn the adjustment
screw several turns counter-
clockwise to close the switch
contacts.
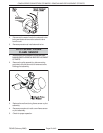
b. If the switch contacts are not
closing, turn the power switch off,
remove the pressure switch from
the manifold and check the air
orifice for debris build up and
clogging. If debris is found, clean
it away from the orifice.
c. Replace the orifice, pressure
switch and connect the lead wires
to the switch. Turn the power
switch on and adjust the pressure
switch again as outlined in steps
4A and 4B. Verify the pilot gas
valve is energizing.
d. If the pilot gas valve is not
energizing and power is available
to the pressure switch, turn the
power switch off. Replace with a
new air pressure switch and
adjust the switch as outlined from
step 3 thru the end of this
procedure.
5.
Restart the ignition sequence by turning the power switch
off, waiting 3 seconds, then back on.
A. Listen or use a meter for gas pilot ignition
to verify operation.
1) If gas pilot ignition is successful, listen
for main gas burner ignition to verify
operation.
B. Verify the pilot and main burner both ignite
in succession.
1) Restart the ignition sequence by
rapidly turning the power switch off
then back on. A rapid switching is
needed to keep the generator from
starting automatic blowdown.
C. Listen for main gas burner ignition to verify
operation.
PILOT BURNER ADJUSTMENT
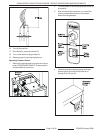
1. Shut the gas off at combination gas valve.
2. Remove cover from manifold pressure tap.
3. Install a barb fitting and connect manometer.
4. Turn on the steamer, let generator fill.
5. Verify air pressure setting is between 0.35" and
0.4" W.C.
6. Verify air pressure switch adjustment.
7. Turn off the steamer.
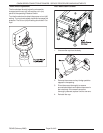
8. Remove pilot assembly from burner.
9. Remove cap from pilot adjustment screw.
10. Using cabinet tip screwdriver turn pilot
adjustment screw all the way in.
11. Back out pilot adjustment screw 1 (one) turn
counter clockwise.
12. Remove the wire from main valve (wire # 35).
13. Turn on the steamer, let generator fill.
14. Turn on combination gas valve.
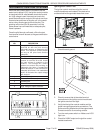
15. Observe pilot flame; adjust pilot flame length
using pilot adjustment screw. Set flame to
approx. 2" long (Pilot flame should be a nice blue
flame; with slight touch of yellow permissible at
tip.)
C24GA SERIES CONVECTION STEAMERS - SERVICE PROCEDURES AND ADJUSTMENTS


