


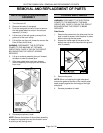
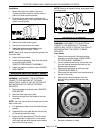

ELECTRIC COMBI OVEN - REMOVAL AND REPLACEMENT OF PARTS
Page 13 of 68
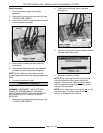
Installation
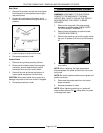
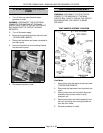
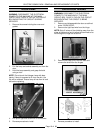
1. Mount the motor to the back of the oven.
Tighten the bolts enough to hold the motor in
place, but allow some movement.
2. Ensure that the motor shaft is centered (use
shaft centering tool) in the motor shaft hole and
tighten mounting bolts.
3. Remove the shaft centering tool.
4. Connect the lead wires to the motor.
5. Install seal and cover as outlined under
“BLOWER MOTOR SHAFT SEAL”.
NOTE
: Remove all traces of motor seal grease from
the motor shaft.
6. Install the blower wheel.
7. Install exhaust assembly, filter, and rack guide
as outlined under “RACK
GUIDE/FILTER/EXHAUST ASSEMBLY”.
8. Install rear panel as outlined under “COVERS
AND PANELS”.
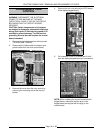
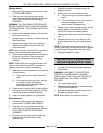
BLOWER MOTOR SHAFT SEAL
WARNING:
DISCONNECT THE ELECTRICAL
POWER TO THE MACHINE AT THE MAIN
CIRCUIT BOX. PLACE A TAG ON THE CIRCUIT
BOX INDICATING THE CIRCUIT IS BEING
SERVICED.
1. Remove blower as outlined under “BLOWER
AND MOTOR”.
2. Remove motor seal cover plate.
3. Remove the seal from the recess in the rear
oven wall.
NOTE:
You may have to drive the seal out from the
back of the oven.
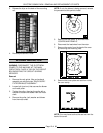
4. Fill replacement seal cover with white silicone
grease.
5. Assemble the motor seal with the convex part
of the spring toward the motor.
6. Apply red high temperature RTV to the outer
edge of the seal to help hold it in the recess
and install the seal with the seal cover toward
the front of the oven cavity.
NOTE
: Remove all traces of motor seal grease from
the motor shaft.
7. Install the seal cover plate and then the blower.
HEATING ELEMENTS
WARNING:
DISCONNECT THE ELECTRICAL
POWER TO THE MACHINE AT THE MAIN
CIRCUIT BOX. PLACE A TAG ON THE CIRCUIT
BOX INDICATING THE CIRCUIT IS BEING
SERVICED.
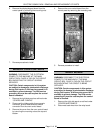
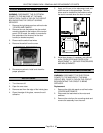
Oven Cavity
1. Remove the rack guide, filter and exhaust
assembly as outlined under “RACK GUIDE/
FILTER/EXHAUST ASSEMBLY”.
2. From inside the oven cavity, remove the nuts
from the heating element stand-offs for the
element being replaced.
3. Remove the rear panel as outlined under
“COVERS AND PANELS”.
4. Disconnect the lead wires from the elements at
the rear of the oven.
5. Remove the nuts and washers from the
element being replaced then remove the
element.
6. Reverse procedure to install.