


2-3
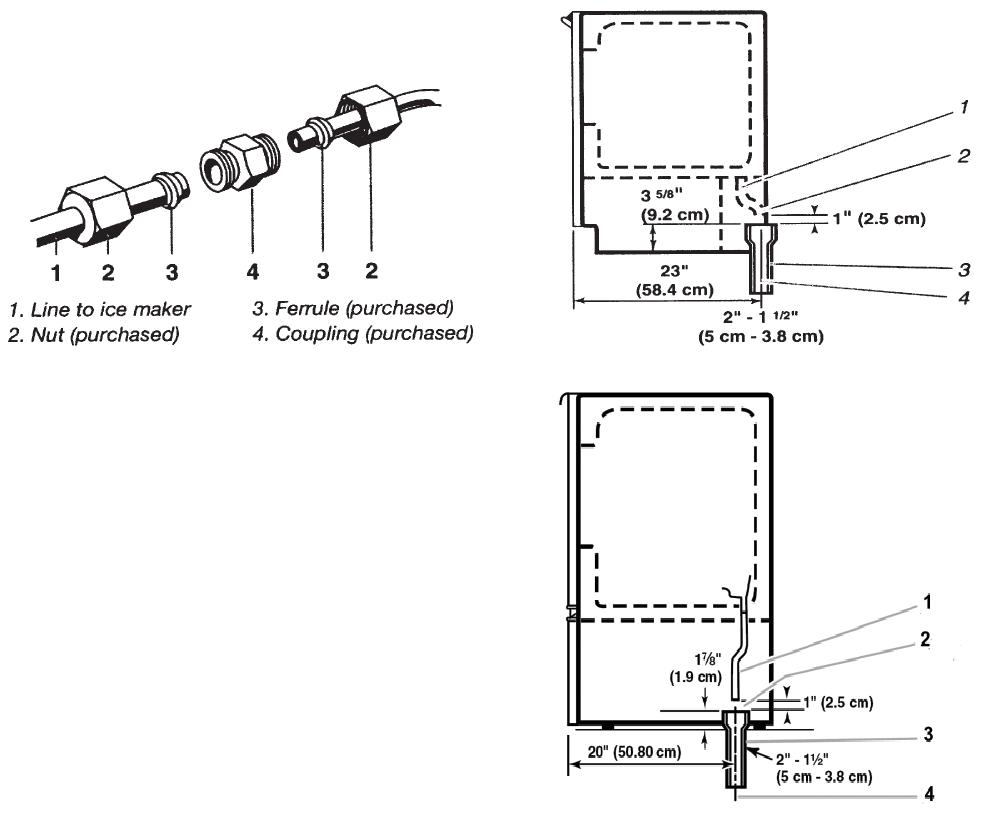
11. Thread the nut onto the coupling at the
end of the copper tubing. Tighten the nut
by hand. Then tighten it with a wrench two
more turns. Do not overtighten.
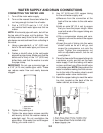
CONNECTING THE DRAIN
Gravity Drain System
Connect the ice maker drain to your drain
in accordance with all state and local codes
and ordinances. If the ice maker is provided
with a gravity drain system, use the following
guidelines when installing the drain lines. This
will avoid water from fl owing back into the ice
maker storage bin and potentially fl owing onto
the fl oor, causing water damage.
• Drain lines must have a minimum of 5/8"
(15.88 mm) inside diameter.
• Drain lines must have a 1" drop per 48"
(2.54 cm drop per 122 cm) of run, or 1/4"
drop per 12" (6.35 mm per 30.48 cm) and
not have any low points where water can
settle.
• The fl oor drains must be large enough to
accommodate drainage from all drains.
• The ideal installation has a standpipe with a
1-1/2" (3.81 cm) to 2" (5.08 cm) PVC drain
reducer installed directly below the outlet of
the drain tube, as shown. You must maintain
a 1" (2.54 cm) air gap between the drain hose
and the standpipe.
• It may be desirable to insulate the drain line
up to the drain inlet.
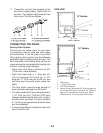
SIDE VIEW
1. Drain Hose
2. 1" (2.54 cm) Air Gap
3. PVC Drain Reducer
4. Center of drain should be 20" (50.8 cm) back on
15" models from front of door and 23" (58.4cm)
back on 18" models from front of door, with or
without the 3/4" (1.91 cm) panel on the door.
15" Models
18" Models