


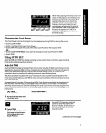
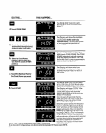

m When Cook 2 ends, “End” will show on
. . .
. . .:m 12.
I
the Display and 4 beeps will sound.
(You can stop the beeping by opening
the door or by touching CANCEL.)
“End” will remain on the Display and a
reminder tone will sound every 60 sec-
onds [to remind you that food is left in
’ the oven) until the door is opened or
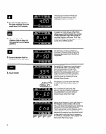
Hints for cooking with more than one cycle
You can program the cooking cycles in any order. However, when the microwave oven is
started, it will automatically go through the cycles in the order of the examples described in this
book. For example, if you program COOK 1, KEEP WARM and QUICK DEFROST, the microwave
oven will automatically follow this sequence: QUICK DEFROST + (STANDING TIME] + COOK 1
+ KEEP WARM.
NOTE: The microwave oven will automatically provide standing time between QUICK DEFROST
and COOK 1. (See page 16.)
If you want the oven to stop between cycles so that you can check food, add ingredients or
additional food items, stir, turn over, etc., you can program PAUSE between each Cook cycle.
(See page 22.)
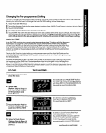
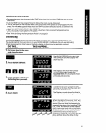
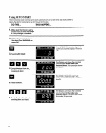
Changing or adding instructions
You can change times, Cook Powers, or add cycles any time before touching START or during
oven operation.
l
Touch the Cook cycle you wish to change or add (COOK 1 or 2).
l
Touch Number Pads for new time, if desired.
l
Touch COOK POWER, if change is desired.
l
Touch Number Pad for new Cook Power, or touch COOK POWER again if a HIGH Cook Power
is desired.
l
Touch in new cycle and time, if desired.
l
Touch START.
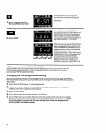
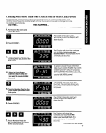
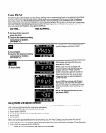
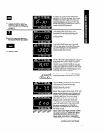
Cooking with the Temperature Probe
The Temperature Probe helps take guesswork out of cooking roasts and larger cas-
seroles. The probe is designed to turn off the oven when it senses the temperature
you chose. See your MICRO MENUS” Cookbook for helpful information in cooking
different types of food.
DO THIS...
!\ Cable
Probe
Socket
3
1’1 i
. I
\
?
Plug
1.
Insert at least YJ of the
Temperature Probe into the
food. [See page 21.)
2. Place food in the
oven and plug the
probe into the
socket on the oven
wall.
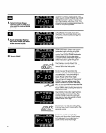
3.
Make sure the
probe does not
touch any part of
the oven interior.
Close the door.
continued on next page