


21
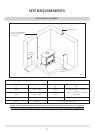
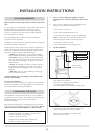
INSTALLATION INSTRUCTIONS
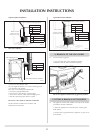
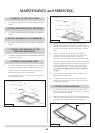
Typical Top Flue Installation
PR7515
600mm minimum
1000mm maximum
unsupportable weight
To chimney connection as
detailed in building regulations
Flue Pipe 915mm (3ft)
Size Stovax Part No.
5" 4502
6" 4602
135 Elbow
Size Stovax Part No.
5" 4512
6" 4612
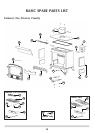
1.3 Rear flue installation
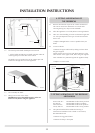
PR7512
Cap
Self Tapping Screw
Seal Collar with Fire Cement
Tee
Size Stovax Part No.
5" 4516
6" 4616
• Insert a tee into the flue collar
The cap supplied with the tee is used as cleaning access.
• Lift appliance into position
Take care not to damage the hearth finish.
• Level feet using adjustable bolts
• Connect tee to the chimney using flue pipe
• Secure tee to the flue collar with self tapping screw
• Seal the connecting joints with fire cement
Do not use a 90˚ elbow to make this connection
The Flue must be installed in accordance with
manufacturers instructions.
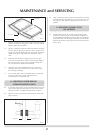
Typical Rear Flue Installation
PR7513
600mm minimum
1000mm maximum
unsupportable weight
To chimney connection as
detailed in building regulations
Elbow
Size Stovax Part No.
5" 4512
6" 4612
Flue Pipe 915mm (3ft)
Size Stovax Part No.
5" 4502
6" 4602
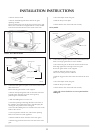
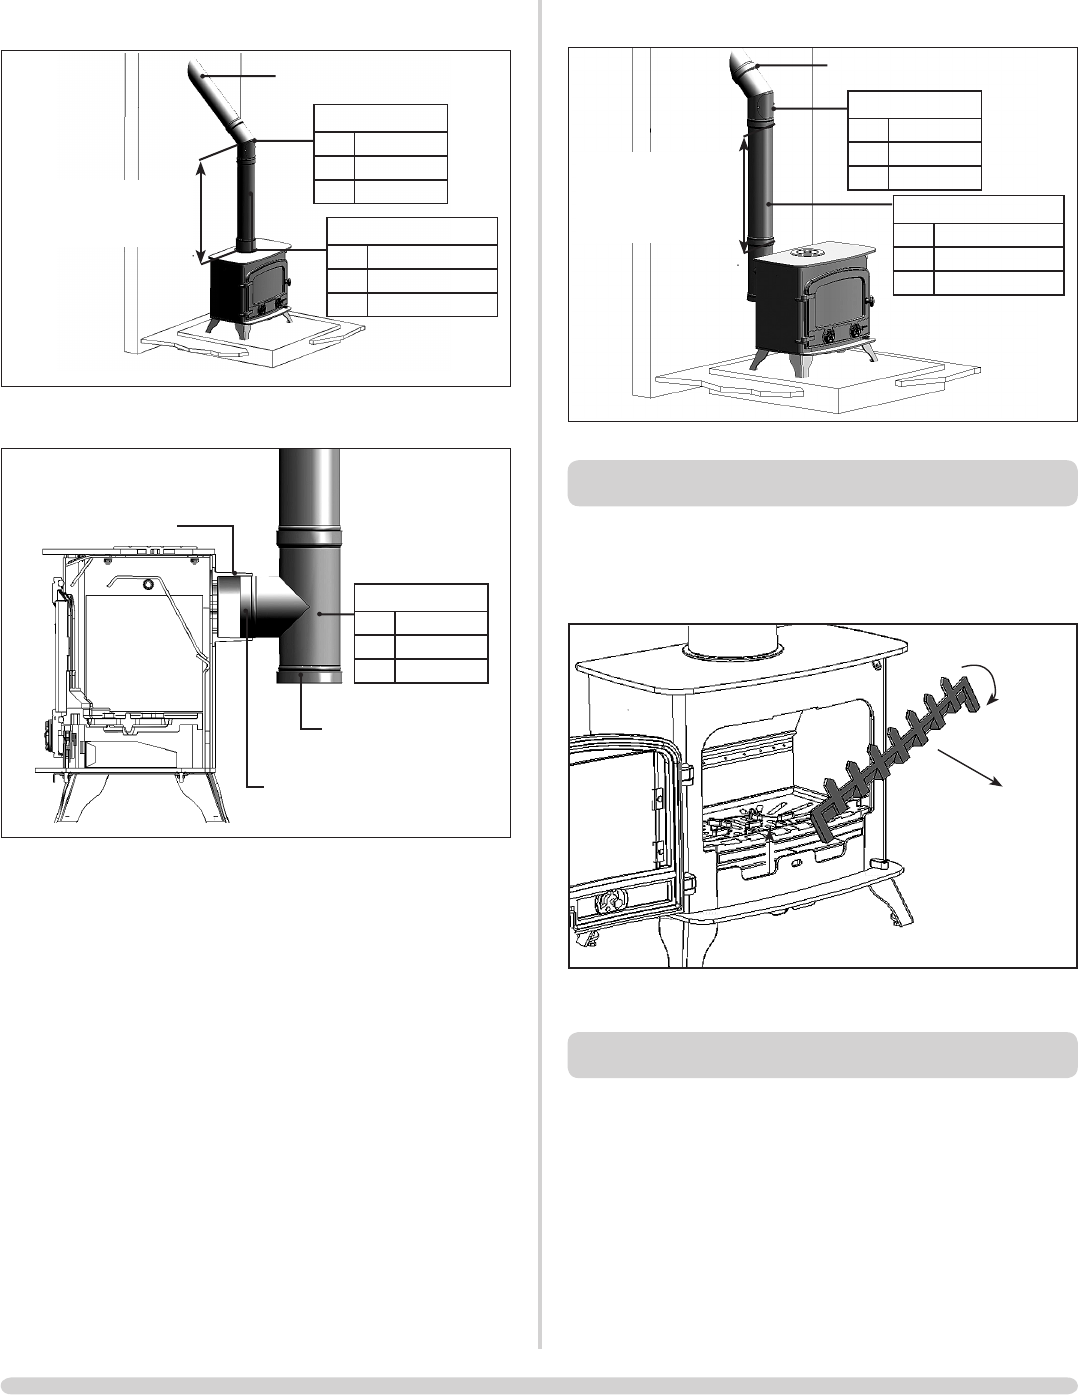
2. REMOVAL OF THE LOG GUARD
2.1 To remove the Log guard:
• Lift Log Guard clear of the supporting brackets
• Rotate to clear the sides of the door opening.
PR7537
Do not use appliance without the log guard in position.
3. FITTING & REMOVAL OF THE BAFFLE
3.1 The appliance is fitted with a baffle in the top of the firebox
to maintain efficient combustion.
• Allow the appliance to cool fully before removing the
baffle system.
• Remove the Log Guard from the appliance to give access
to the firebox