22
INSTALLATION INSTRUCTIONS
PR7525
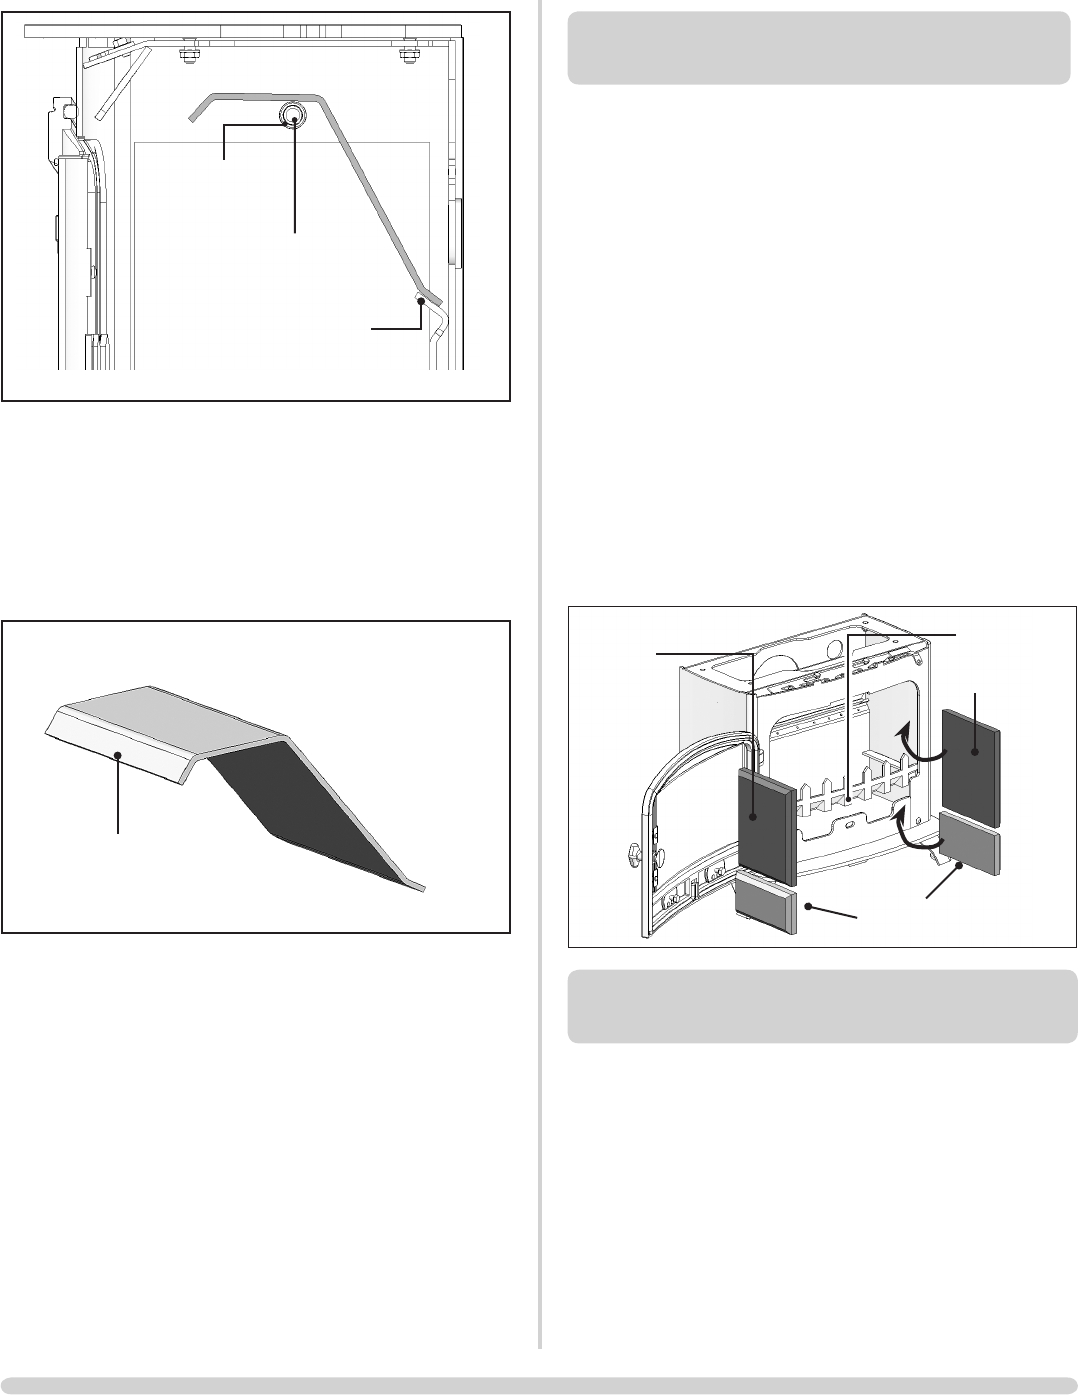
Baffle Extension
Tubes
Support Pin
Rear Lip
3.2 The front lip of the baffle should point downwards.
• Lift the baffle and slide the two baffle extension tubes off
of the support pins on the sides of the firebox.
The baffle can now be lifted clear of the support pins and
rotated out through the front of the appliance
PR7526
Front Lip
3.3 Do not modify the baffle
3.4 Fitting is the reverse of the above
IMPORTANT: Ensure the Baffle Extension Tubes are
fitted correctly before using the appliance.
4. FITTING AND REMOVAL OF
THE FIREBRICKS
4.1 Remove the firebricks as part of the routine maintenance.
This can be carried out without the use of tools after
removing the log bar, drop in front and baffle.
4.2 Allow the appliance to cool fully before removing firebricks.
4.3 Take care when handling, as bricks can become fragile after
use. Life span depends on the type of fuels burnt and the
level of use.
• Replace damaged bricks as soon as possible from your
dealer
4.4 To remove bricks:
• Remove the upper side bricks by sliding out from above
the grate supports
Wood versions have two lower side bricks. Remove in the
same manner as the upper bricks, below the grate supports.
Note: Chamfers are positioned against the appliance body
• Replace in reverse order
PR7527
Lower bricks in
wood stove only
Log Guard
Upper Side
Bricks
Upper Side
Bricks
5. FITTING & REMOVAL OF THE RIDDLING
MECHANISM
Exmoor M/F Kit - YM-A9040CE fits all Exmoor products
Exe M/F Kit- YM-A9140CE fits all Exe products
Devon M/F Kit- YM-A9240CE fits all Devon products
County M/F Kit- YM-A9340CE fits all County products
5.1 The optional multi-fuel kit enables the burning of
manufactured smokeless fuels as listed in User Section,
Recommended Fuels.
• Remove the log guard if fitted
• Remove the drop in front plate


