


OPERATING INSTRUCTIONS
AR-6G Rotisserie Operation & Care Manual • 15AR-6G Rotisserie Operation & Care Manual • 15
BURNER LIGHTING INSTRUCTIONS
Verify appliance connection to the correct gas source. Refer
to the data plate located on the back of the unit.
NOTE: Usesoapandwatersolutiontocheckallttingsfor
leaks. Brush solution on all joints and where any
leakage is suspected. If bubbles appear, re-tighten
thettingandrecheck.Ifbubblespersist,replace
ttingorcomponent.
Verify that the manual gas shut-off valve at the
back of the appliance is in the open position.
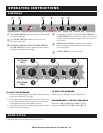
The appliance is equipped with three cooking zones: lower,
middle, and top burners.
RECOMMENDED LIGHTING SEQUENCE
Natural Gas: TOP MIDDLE BOTTOM
Propane Gas: BOTTOM MIDDLE TOP
TO LIGHT THE BURNERS:
1. Select corresponding gas valve knob. Rotate the knob
to the ignite position. (H=High)
2. If the burner fails to ignite after 5-seconds, turn valve
to the OFF position. Open the doors to allow the gas to
dissipate and repeat the ignition process.
3.Afterburnerhasignited,rotatethegasvalvetoame
height desired for cooking.
TO SHUT OFF BURNERS:
Rotate the gas valve knob to the OFF position.
NOTE: Following initial installation, it may take slightly
more time to evacuate the excess air from the
supply lines.
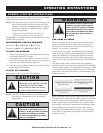
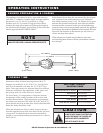
GAS FLAME PATTERNS
When starting the appliance after initial installation, the
gas lines must be free of air pockets. It may take up to
30 minutes to free the lines. If, after this time there is no
ignition, call for factory assistance.
For all practical purposes, the following will be the only
check necessary during initial operation by the installer.
After the installation is complete the appliance must be
testredtoensurethatthesystemisoperatingproperly.
Follow the operating instructions posted on the front of the
unit.
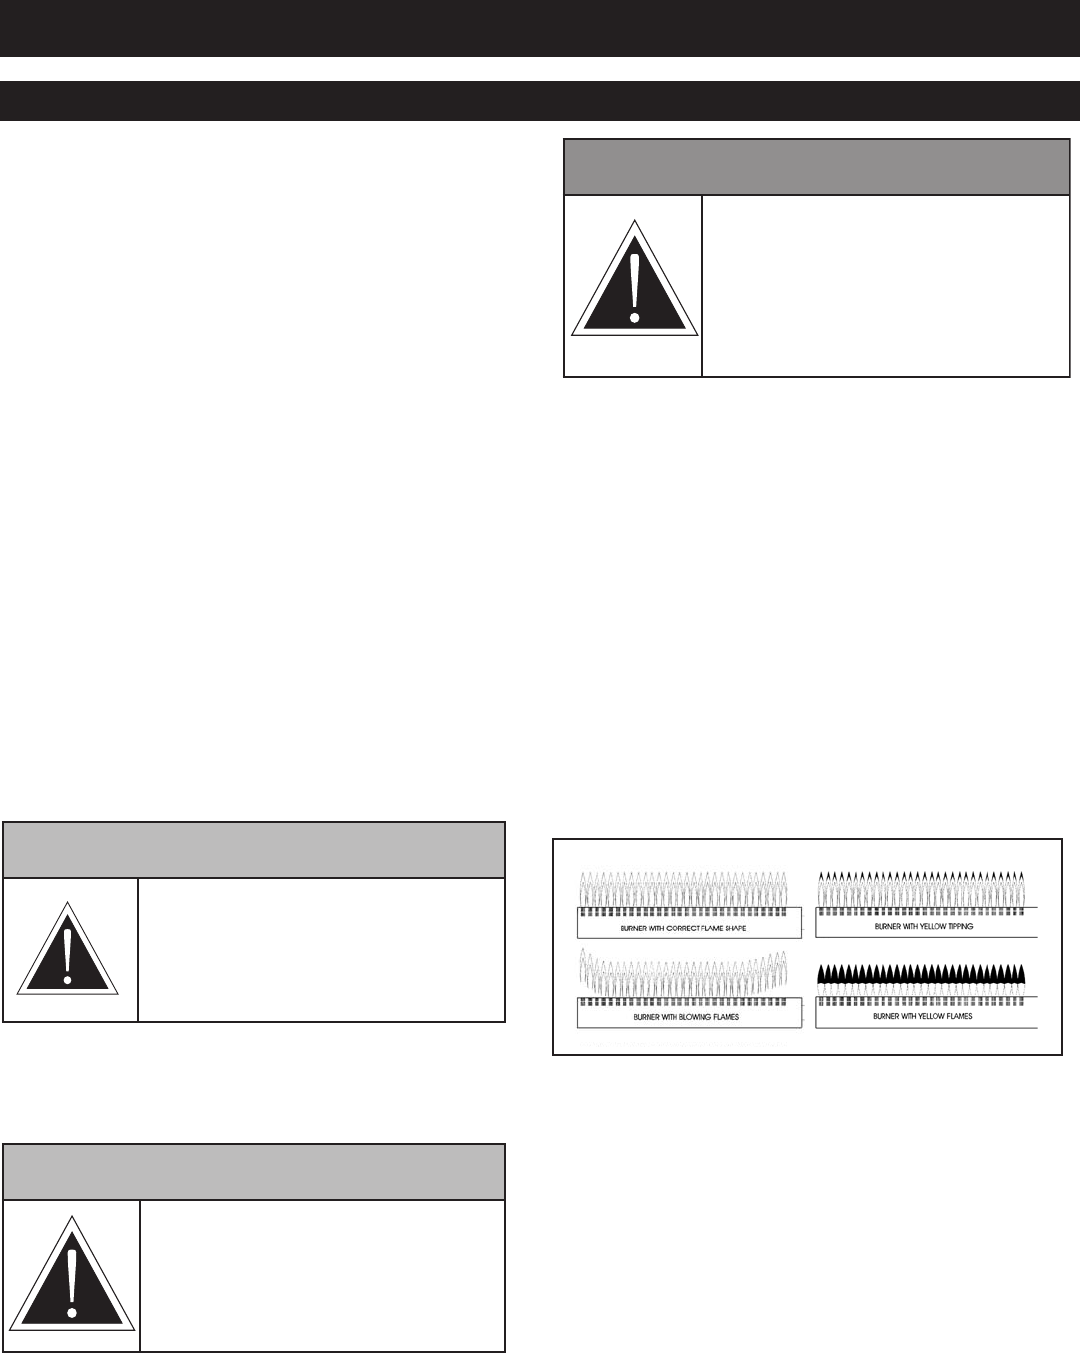
Theamepatternbothunderhotandcoldconditions
should be stable on all burner ports and there should be no
lifting or blowing after several seconds of operation. There
isanairshutteradjustmentontheseburners.Iftheame
pattern does not match that shown, contact the factory for
further directions.
Make certain the electric igniter lights the burner quickly.
The main burner should ignite within 5-seconds, smoothly,
with no harsh noise or any problem. Make sure that the
burner is lighting quickly from the electric igniter. Allow
the appliance to heat for 5 minutes and repeat the process.
Checktheamepatternontheburners.Whenusing
naturalgas,theamesshouldbeblueincolorwithlittle
ornoyellowintheame.Onpropanegassomeyellow
tipping is normal.
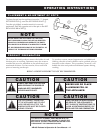
WARNING
In the event of loss of power to the
appliance, turn the “burner control
knobs” to the OFF position. Remove
food product from the unit. If burner
control fails to extinguish the fl ame,
shut off main gas valve located in
rear of unit.
CAUTION
Propane is a heavy gas and will settle
on the fl oor or the lowest point in a
building. If a raw gas smell is present,
evacuate the building and contact
your local fi re department or safety
agency for assistance.
CAUTION
IN AN EMERGENCY, PRESS THE
EMERGENCY STOP BUTTON LOCATED
ON THE FRONT CONTROL PANEL.
THEN CLOSE THE SHUT-OFF VALVE
LOCATED IN THE REAR OF THE UNIT.