INSTALLATION
STEP 2: PREPARE THE VENTING SYSTEM
[ _ CAUTION ]
To avoid risk of personal injury, property damage, or fire this microwave oven must be properly vented.
NOTE: The ductwork you need for outside ventilation is not included with your oven. The standard ductwork fittings
and length are shown in Figure 9.
You may vent your oven in one of three ways. However, do NOT vent into a wall cavity, an attic, or an unused area.
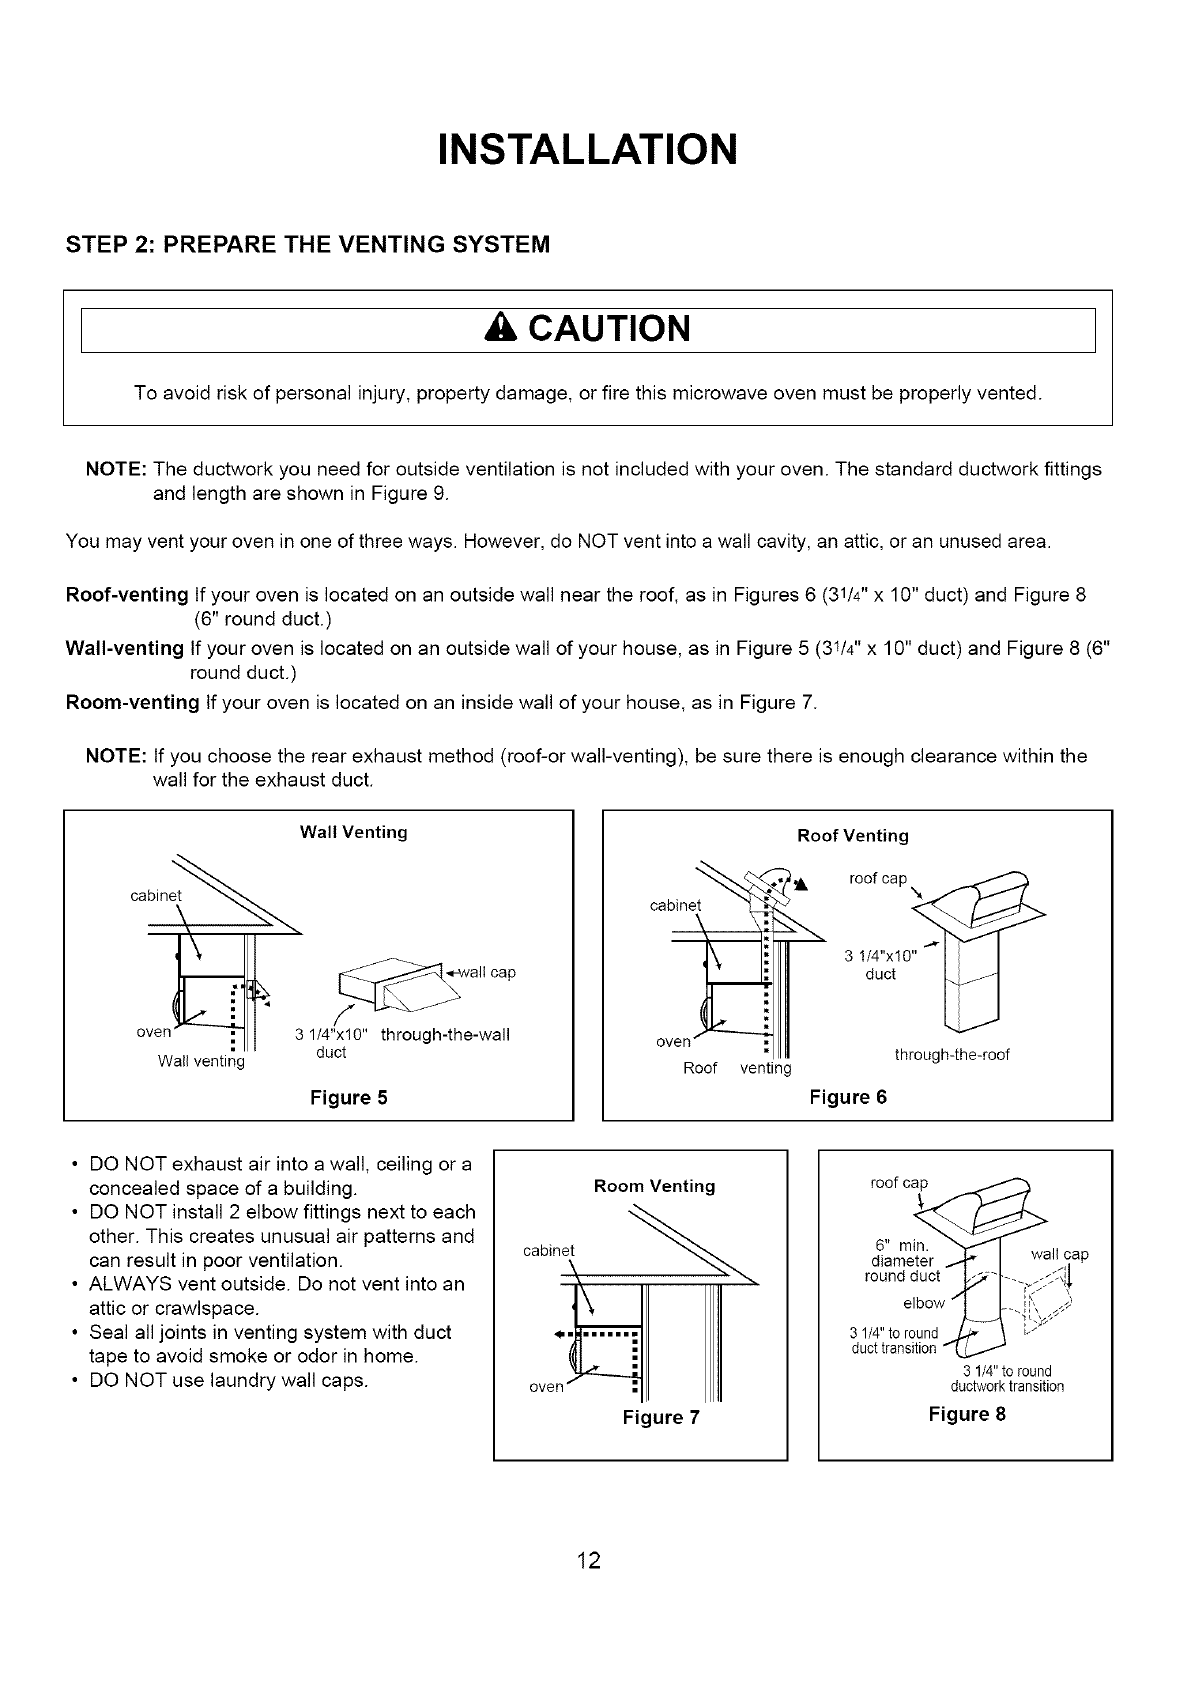
Roof-venting If your oven is located on an outside wall near the roof, as in Figures 6 (31/4" X 10" duct) and Figure 8
(6" round duct.)
Wall-venting If your oven is located on an outside wall of your house, as in Figure 5 (3I/4" X 10" duct) and Figure 8 (6"
round duct.)
Room-venting If your oven is located on an inside wall of your house, as in Figure 7.
NOTE: If you choose the rear exhaust method (roof-or wall-venting), be sure there is enough clearance within the
wall for the exhaust duct.
cabinet
Wall Venting
_-walI cap
/
oven 3 1/4"x10" through-the-wall
" duct
Wall venting
Figure 5
Roof Venting
cab_ / roof cap
3 !/4"x10" I I
duct _
oven ; II through-the-roof
Roof venting
Figure 6
• DO NOT exhaust air into a wall, ceiling or a
concealed space of a building.
• DO NOT install 2 elbow fittings next to each
other. This creates unusual air patterns and
can result in poor ventilation.
• ALWAYS vent outside. Do not vent into an
attic or crawlspace.
• Seal all joints in venting system with duct
tape to avoid smoke or odor in home.
• DO NOT use laundry wall caps.
RoomVenting
cabine_
ove:
Figure 7
roof cap
6" min.
diameter wall cap
round duct
elbow
3 1/4"to round _J
duct transition
3 1/4"to round
ductworktransition
Figure 8
12


