


40 Chapter 2 DNS Service
If you are using Mac OS X Server as your DHCP Server:
1 In Server Settings, click the Network tab, click DHCP/NetBoot, and choose Configure
DHCP/NetBoot.
2 On the Subnet tab, select the subnet on the built-in Ethernet port and click Edit.
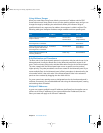
3 In the General tab, enter the following information:
Start: 10.0.1.3
End: 10.0.1.254
Subnet Mask: 255.255.255.0
Router: 10 . 0 .1.1
4 Click the DNS tab and enter the following information:
Default Domain: example.com
DNS Servers: 10.0.1.2
5 Click the Save button and log out of Server Settings.
Note: The client computers may not immediately populate with the new IP
configuration information. This will depend upon when their DHCP leases expire. It may
be necessary to restart the client computers for the changes to populate.
Check Your Configuration
To verify the steps were successful, open Terminal, located in /Applications/Utilities and
enter the following commands (substituting the local domain name for
“server.example.com” as appropriate):
dig server.example.com
dig -x 10.0.1.2
Note: If this generic configuration example does not meet your needs, Apple
recommends that you don’t attempt to configure DNS on your own and that you seek
out a professional consultant or additional documentation.
Using DNS With Dynamically Assigned IP Addresses
Dynamic DNS is a mechanism that lets you modify the IP address/domain name list
without directing the name server to reload the edited list. This means you can update
the name server remotely and easily modify DNS data.
You can use dynamic DNS with DHCP service. DHCP assigns each client computer a
dynamic IP address when the computer starts up. Because a DHCP server may assign IP
addresses randomly, it can be useful to assign meaningful DNS names to these
addresses on the fly.
LL2351.Book Page 40 Monday, September 8, 2003 2:47 PM