


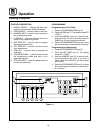
Maintenance
22
Cleaning
WARNING!!
Alway s disconnect the power supply b e-
fore cleaning or servicing the oven.
WARNING!!
If a gas o ven needs to be moved, the gas
must be turned off and disconnected from
the unit before removing the restraint. Re-
connect the restraint after the oven has
been returned to its original location.
Follow this recommended cleaning schedule for
proper oven performance.
Daily:
1. Clean the conveyor belt using a wire brush.Al-
low anyforeign material to drop intothe crumb
pans.
2. Empty and clean the crumb pans. Use a hot
water and detergent mix. Rinse with clean w a-
ter.
3. Make s ure cooling fans are operating.
Every Three Months:
1. Brush and clean the guards of the cooling
fans.
Every S ix Months:
1. Unplug the oven. On gas models, disconnect
the gas connections.
2. Remove the crumb pans.
3. Remove the conveyor assembly as follows:
a.) Pull the conveyor assembly out of the lo-
cating pins to loosen the drive belt.
b.) Remove the drive belt from the drive mo-
tor and then around the pulley on the con-
veyor assembly.
c.) Slide the conveyor assembly out through
the left hand tunnel opening.
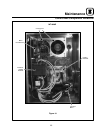
4. Slide the nozzles out of the baking chamber.
5. Remove the product clearance a djustment
plate. Slide t he air plate out of the baking
chamber.
6. Clean the oven interior with an appropriate
oven cleaner safe for aluminum.
7. Clean the conveyor assembly, crumb pans air
plate and nozzles. Wash in a hot water, deter -
gent mix and rinse with clean water. For diffi-
cult cleaning areas, use a “heavy-duty de-
greaser” or oven cleaner that is safe for
aluminum.
8. Move the oven (if not already moved) and clean
under i t. Be careful no t t o damage oven’s g as
hose or electrical cords when m o vi ng.
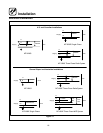
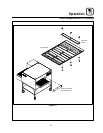
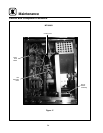
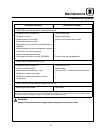
9. Reassemble the oven. Install the nozzles as
follows:
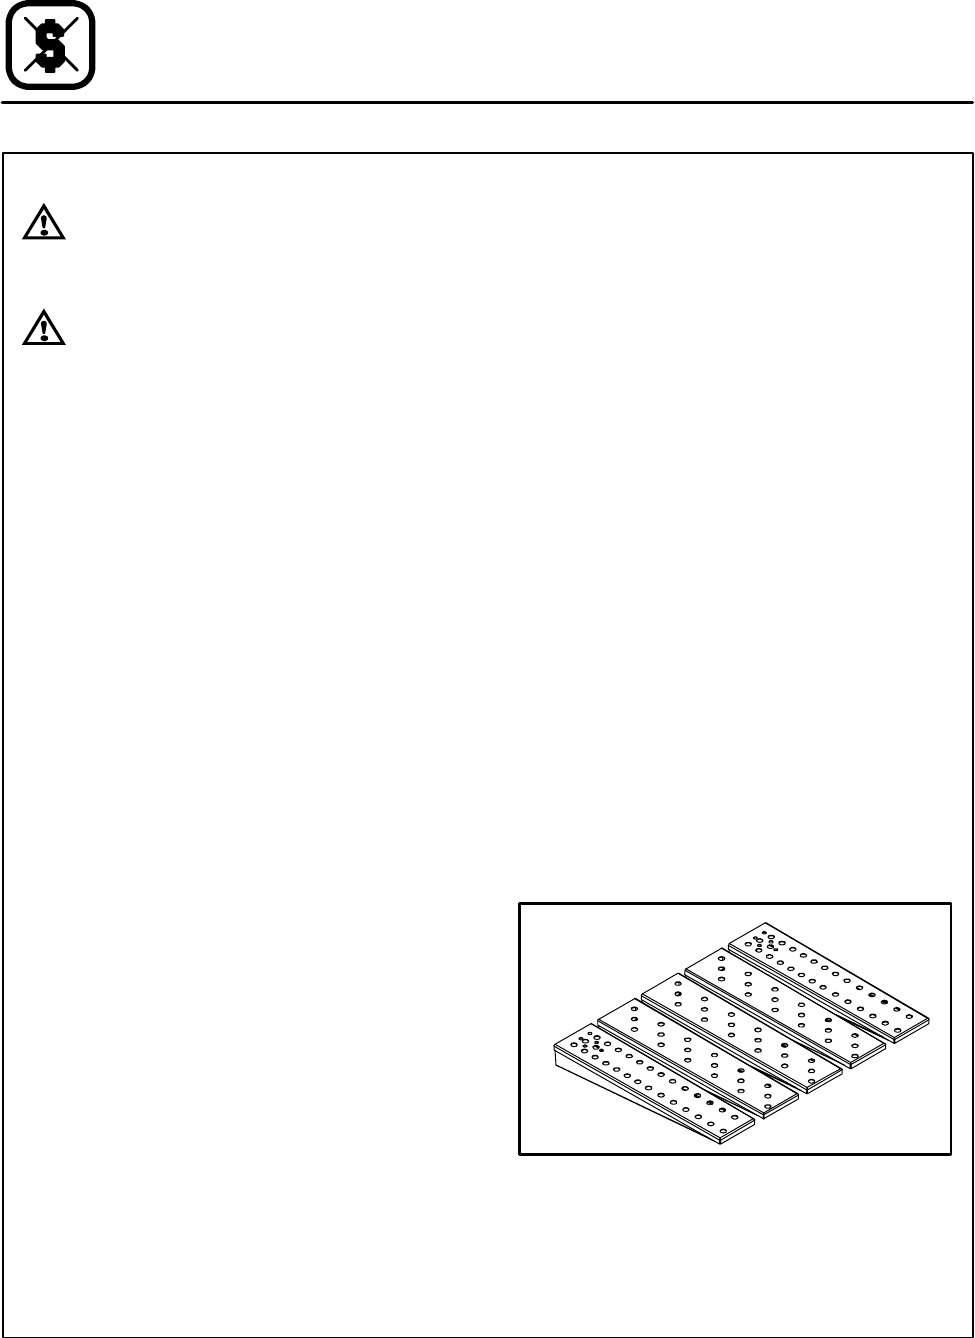
NOTE: Install the nozzles in the order shown
in Figure 16.
a.) Start from the center of the oven and work
toward the ends.
b.) Make sure the rear opening of each
nozzlefitsovertherectangularframein
thenozzlesupportplateattherearofthe
oven.
c.) The front of the nozzle rests in the support
at the front of the oven.
d.) Trytomovethenozzlefromsidetoside.
It should not move any appreciable dis-
tance.
Figure 16