


14
SERVICE (CONT.)
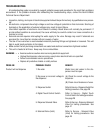
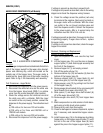
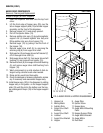
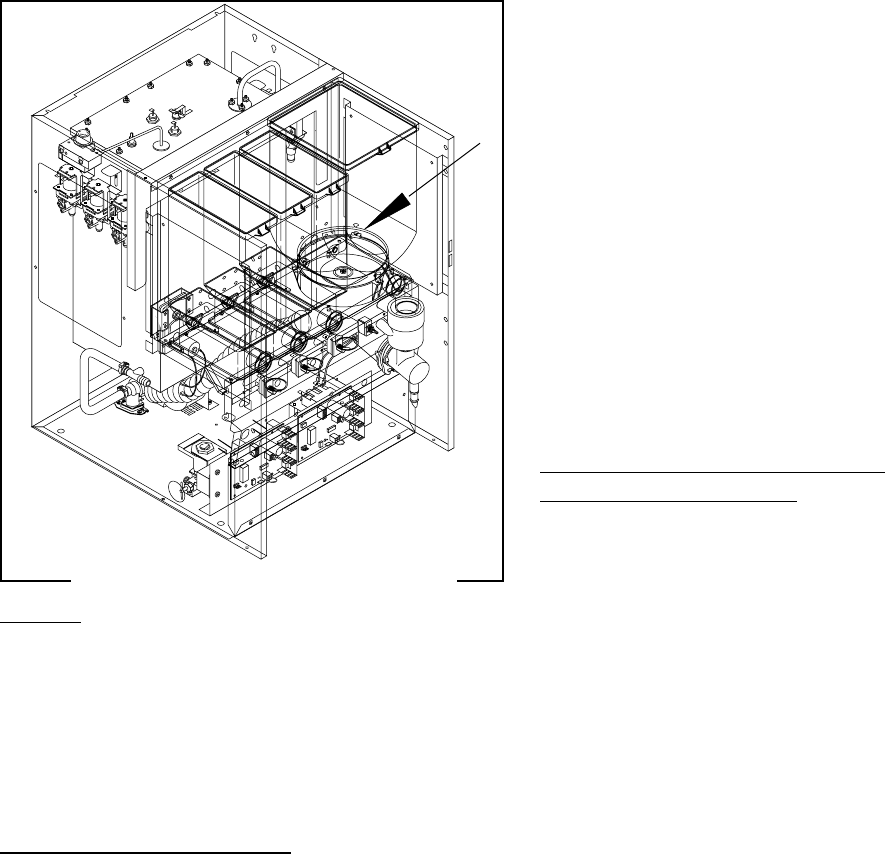
AUGER DRIVE COMPONENTS (all Models)
J4
J1
J2
J3
J4
J1
J2
J3
FIG. 2 AUGER DRIVE COMPONENTS
Location
The auger components are located inside the bottom
part of the hopper except for the auger drive bracket,
spacer and retaining clip, which are located on the
outside rear of the hopper base. The auger motor is
located on the lower right rear of the motor mounting
panel. Refer to Fig. 3 for disassembly and assembly.
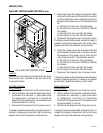
Test Procedures - Auger Motor
1. Disconnect the dispenser from the power source.
2. Disconnect the white/red wire and the white wire
from the hopper drive board (FMD-1) or relative
wires from the control board(all other models).
3. Check the voltage across the white/red wire and
the white wire with a voltmeter. With the rinse/
run switch in the run (lower) position, connect the
dispenser to the power supply. The indication must
be:
a) 120 volts ac for two wire 120 volt models.
b)120 volts ac for three wire120/208 volt or
120/240 volt models.
c) 230 volts ac for two wire 230 volt models.
4. Disconnect the dispenser from the power supply.
P4095
If voltage is present as described, proceed to #5.
If voltage is not present as described, refer to the wiring
diagram and check the dispenser wiring harness.
5. Check the voltage across the positive (red wire)
terminal and the negative (black wire) terminal on
the auger motor with a voltmeter. With the rinse/
run switch in the run (lower) position press and
hold the dispense switch. Connect the dispenser
to the power supply. After a .6 second delay the
indication must be 4.0 to 24.5 volts dc.
If voltage is present as described, the auger motor drive
is operating properly. If auger does not turn, replace
the auger motor.
If voltage is not present as described, check the auger
hopper drive board.
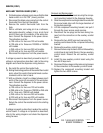
Removal, Cleaning and Replacement
Hopper & Auger (FMD-1,4)
1. Open the dispenser door and raise the top front
cover.
2. Lift the hopper assy (15) over the pins on hopper
support plate (11) and slide hopper assembly out
the front of the dispenser.
3. Remove hopper lid (1) and empty product.
4. Pull off the ejector elbow (14).
5. Remove retainer clip (10) and washer (9) from the
bottom of the hopper base (8).
6. Remove whipper shaft (3), wiper blade (4) and
wiper drive gear (5) from the hopper base (8).
7. Remove auger wire (13) by pulling it out the front
of the hopper base (8).
8. Remove auger drive bracket (6) by unscrewing left
hand threads from auger drive shaft (12).
9. Slide spacer (7) and auger drive shaft bracket (6)
off of the auger drive shaft (12).
10. Remove auger drive shaft (12) from hopper base
(8).
11. Wash components in a mild solution of dish deter-
gent using a bristle brush when needed.
12. Rinse and dry each item thoroughly.
13. Check for damaged or broken components, replace
any if necessary and reassemble hopper assem-
bly.
14. Install hopper assy (15) in the dispenser by sliding
hopper assy on the hopper support plate (11) until
the slot in the rear of the hopper base (8) seats
against the pins in the hopper support plate (11).
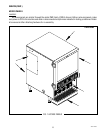
FMD-4 shown
42672 122209