37
STAINLESS STEEL AND ALUMINIUM PARTS AND SILK-
SCREEN PRINTED SURFACES
■ Clean using an appropriate product. Always dry thoroughly.
IMPORTANT: these parts must be cleaned very carefully to avoid scratching and
abrasion. You are advised to use a soft cloth and neutral soap.
WARNING
When correctly installed, your product meets all safety requirements laid down for
this type of product category.
However special care should be taken around the rear or the underneath of the
appliance as these areas are not designed or intended to be touched and may
contain sharp or rough edges, that may cause injury.
REMOVING AND REASSEMBLING THE SLIDING SHELVES AND
THE CATALYTIC PANELS
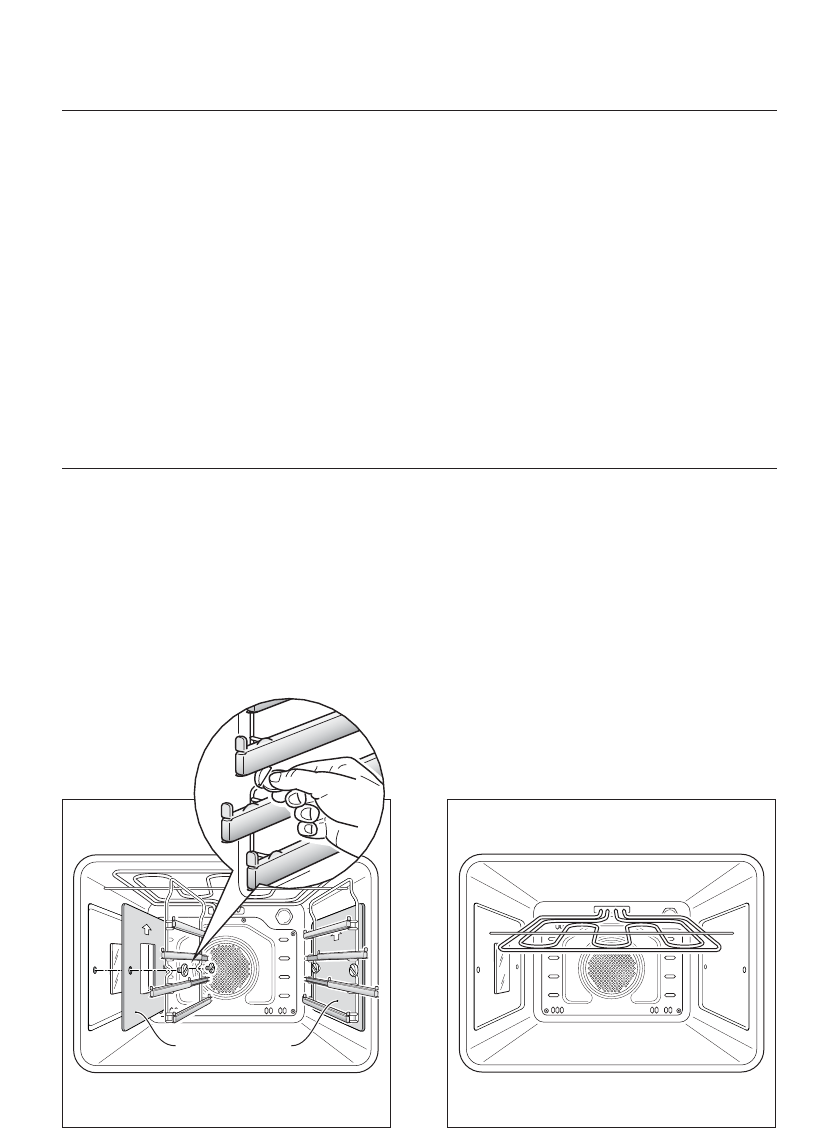
■ The sliding shelves and the catalytic panels can be removed easily by
unscrewing the fixing screws and detaching them from the oven walls (fig. 6.1).
Removing the sliding shelves improves access to the oven ceiling for cleaning
(after the grill heating element has been lowered - fig. 6.2).
■ Reassemble the sliding shelves on the oven walls using the 2 screws and
interposing the catalytic panels A and B with the arrow up (fig. 6.1). The
catalytic panel A with the hole for the side oven lamp must be positioned on
the left oven wall. DO NOT INTERPOSE THE CATALYTIC PANEL B ON THE
LEFT OVEN WALL.
Fig. 6.2
A
B
Fig. 6.1


