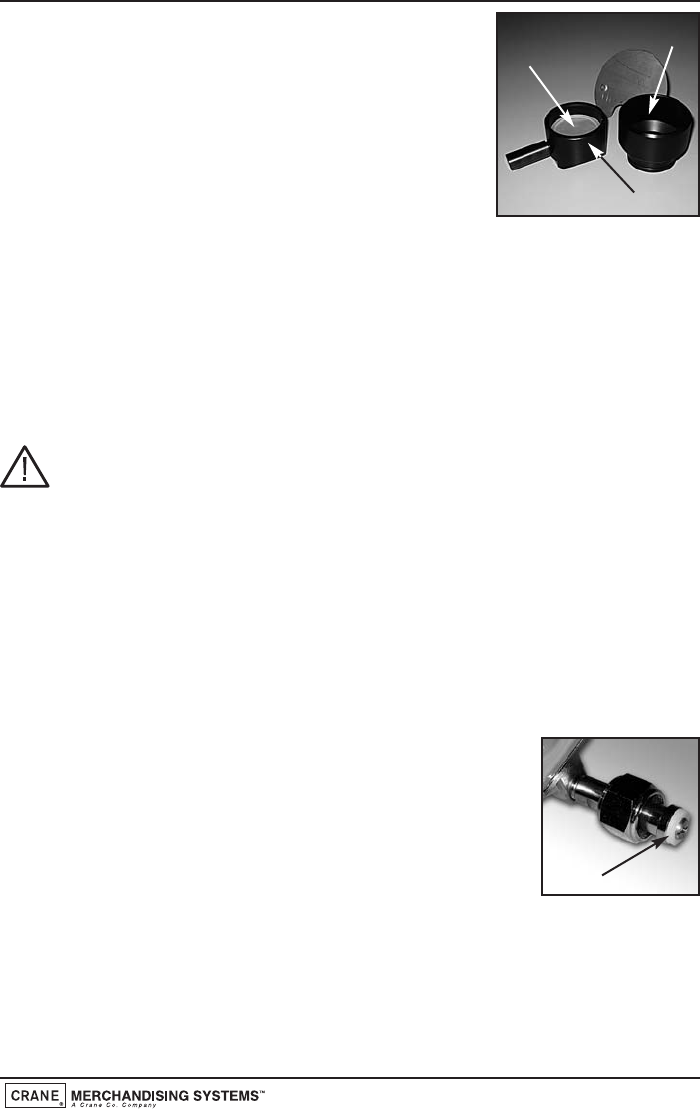
3. Split the brewer unit into its separate parts as shown.
Clean gauze (a), outlet (b) and bowl (c) using the liquid
destaining agent. Follow the instructions for soak
cleaning on the product packaging.
Rinse all components in clean water, dry thoroughly,
re-assemble and refit to machine. Secure using the
knurled thumb screw.
4. Re-fit tea pot bowl/mounting bracket assembly to the machine. Re-connect the
outlet pipe to the dispense head block.
4.11 Replacing the CO2 Bottle - Where Fitted
For machines fitted with a carbonator unit, it will be necessary for the operator to
regularly check and if necessary, replace the CO2 gas bottle. This will ensure that
carbonated vends are always delivered at optimum quality.
Safety First! The CO2 bottle is filled with gas at a pressure of 800 psi and
must be stored upright and away from sources of heat. In the event of a leak,
ventilate the area in the vicinity of the bottle to remove all traces of gas and
contact your supplier.
1. Open the cabinet door and un-hook the safety chain from the gas bottle. Turn
off the gas supply from the bottle.
2. Following correct procedures for safe lifting, lift the empty cylinder c/w regulator
out of the machine. Carefully undo the locknut using the spanner supplied.
Remove the regulator from the empty bottle.
3. Ensure that the seal (1) is seated correctly as shown. If the
seal has been damaged in any way, fit a new seal available
from the manufacturer.
4. Fit the regulator to the new gas bottle and tighten the
locknut. Carefully lift the cylinder into the machine ensuring
that the gas supply pipe is not trapped or obstructed in any
way.
5. Secure the gas bottle using the safety chain. Turn on the gas supply from the bottle
and ensure that the regulator indicates a gas pressure of 35 psi. Close the door
to restore power to the machine and test vend the carbonated drinks to ensure
that the carbonator unit is working correctly.
Operators Manual
31
a
c
b
1


