8
Installation instructions (Ice & Water models only)
To continue installation of Non Ice & Water models see page 9.
Important!
It is recommended that an authorised plumber in your city or town is used to install the water
connection.
The new tubings supplied with the refrigerator are to be used, old tubings from old Ice & Water
connections should not be used.
Installation precautions/warning
DO NOT use with water that is microbiologically unsafe or of unknown quality without
adequate disinfection before or after the system.
WARNING – connect to potable water supply only.
DO NOT install on line pressure above 900 kPa or below 150 kPa.
DO NOT use on hot water supply, 38°C max.
DO NOT install in a location that is susceptible to freezing temperatures as damage to the
housing could occur.
AVOID contamination of pipes during installation.
DO NOT use copper tubing. The plastic tubing supplied should always be used.
1
Read pages 9 – 12 carefully, and then turn refrigerator on.
2
The first time you require water out of the dispenser, there will be a delay while the water
reservoir fills up.
3
Run a further 3 L through the system, stopping intermittently to ensure the reservoir is flushed
out. Failure to do this will result in excessive dripping from your dispenser.
4
Press until the Ice menu is highlighted then press to turn on the ice maker. Press
together to force a cycle. The ice tray will flip. Force another cycle. The ice tray will flip and spill
the water into the ice bin. Empty water and replace bin.
5
You are now ready to enjoy chilled water and ice dispensing from your Active Smart™ refrigerator.
Please note that once installation is complete a few drips may appear out of the dispenser over
the next few days as the remaining trapped air is cleared.
Note: If you want to install a water filter see page 22.
Important!
All connections must be checked for leaks.
Ensure white 6 mm tubing is routed away from sharp objects, sharp corners (beware of kinking
tube as this will stop water flow), clear of the refrigerator unit
compartment and not in a location where it can be squashed.
Ensure all push-fit connections are firmly pushed into place. The tube
should push in 20 mm before reaching the stop.
If tubing is removed at any point, re-cut the end and re-insert. Tubing
must be fully inserted to avoid leaks.
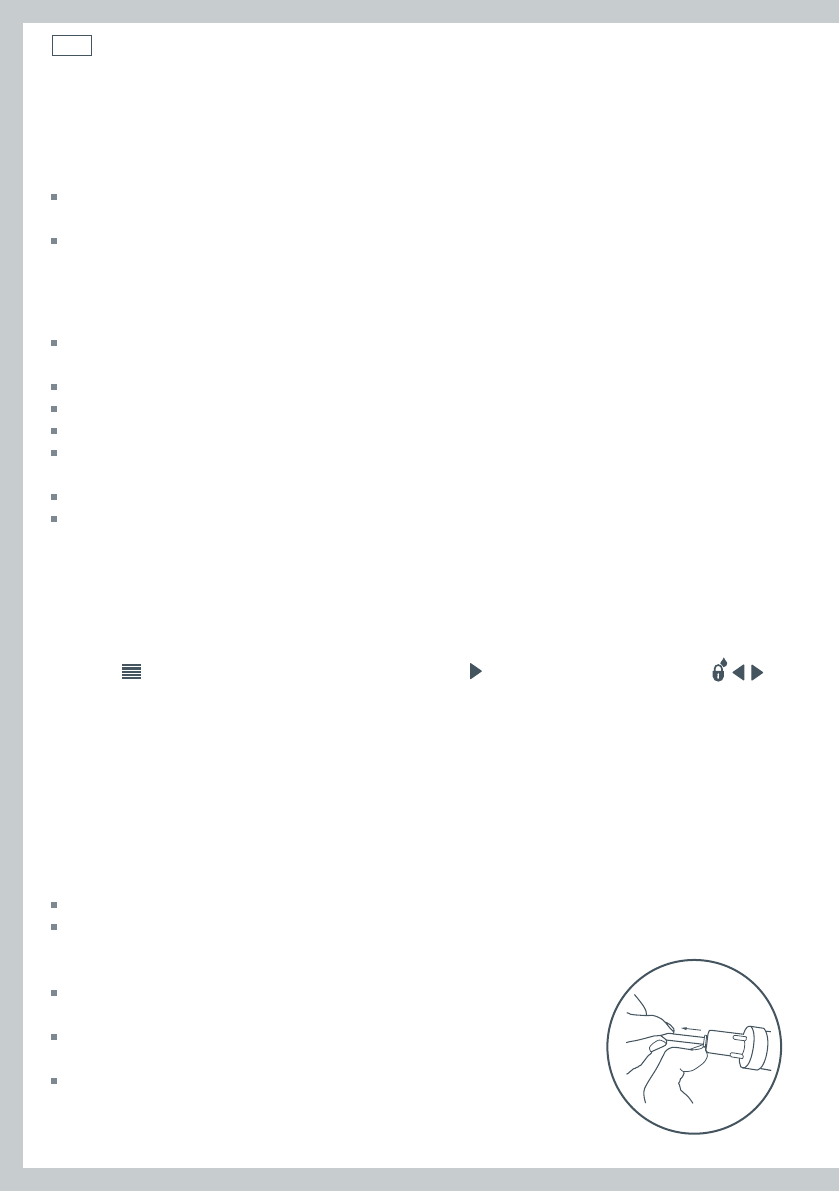
To remove tube from connection points, turn off the
isolating faucet, push in the collet and gently pull
tubing at the same time, as shown in Diagram 1.
Diagram 1


