25
25
5
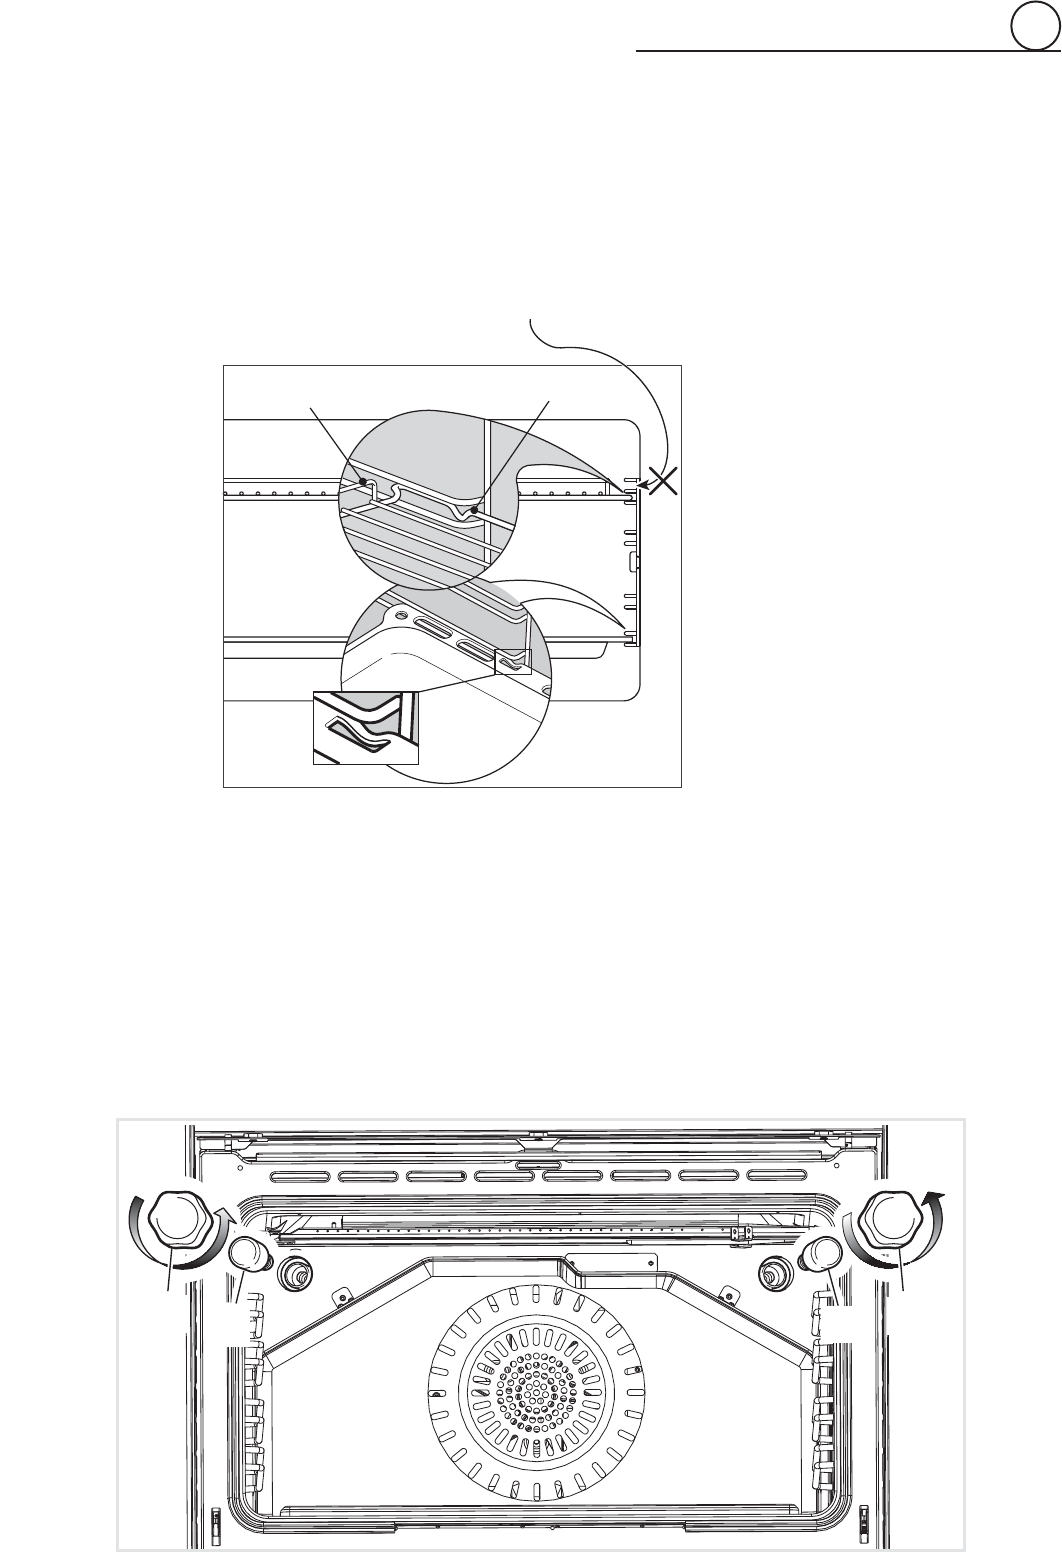
OVEN SHELF INSTALLATION AND REMOVAL
The oven shelf is provided with a security block to prevent accidental extraction.
Slide the shelf between the runners (fi g 6.9). The bigger guard rail goes to the rear.
Keep attention to insert the shelf correctly (see fi gure 6.9).
To remove, follow the steps in reverse order.
Do not use the fi rst step from the top.
REPLACING THE OVEN LIGHT (fi g. 6.10)
Before any maintenance is started involving electrical parts of the appliance, it must be disconnected from the power supply.
• Let the oven cavity and the heating elements cool down.
• Switch off the electrical supply.
• Remove the protective cover “A” (fi g. 6.10).
• Unscrew and replace the bulb “B” with a new one suitable for high temperatures (300°C) having the following specifi cations: 120V,
60 Hz, E14 and same power (check watt power as stamped in the bulb itself) of the replaced bulb.
• Refi t the protective cover.
NOTE: Oven bulb replacement is not covered by your warranty.
Do not use this step
Bigger guard rail
Stop notch
Stop
notch
Fig. 6.10
Fig. 6.9
B
A
B
A


