


1-5
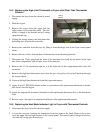
Gas Pressure
Natural
3.5" W.C.
0.73 kPa
Propane
8.25" W.C.
2.05 kPa
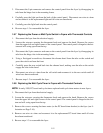
Non-CE Standard
Burner Manifold Gas Pressures
Gas
Pressure
(mbar)
Natural Gas Lacq
(G20) under 20 mbar
7,5
Natural Gas Gronique
*
(G25) under 25 mbar
10
Natural Gas Gronique
(G20) under 20 mbar
10
Propane
(G31) under 37 or 50 mbar
20,6
CE Standard
Burner Manifold Gas Pressures
* Belgian G25 = 7,0 mbar
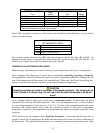
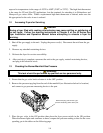
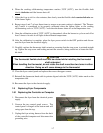
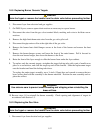
4. If the measured gas pressure does not match the appropriate pressure in the tables above, remove
the cap from the gas valve regulator and adjust to the correct pressure.
Robertshaw Valve
(Non-CE Units)
Honeywell Valve
(Non-CE Units)
Honeywell Valve
(CE Units)
Regulator Adjustment Screw Cap
5. Place the fryer power switch and the gas valve in the OFF position. Remove the fitting from the
pressure tap hole and reinstall the plug. Place the gas valve in the ON position, and check for and
eliminate any gas leaks. Place the gas valve in the OFF position.
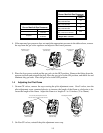
1.4 Adjusting the Pilot Flame
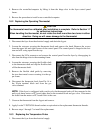
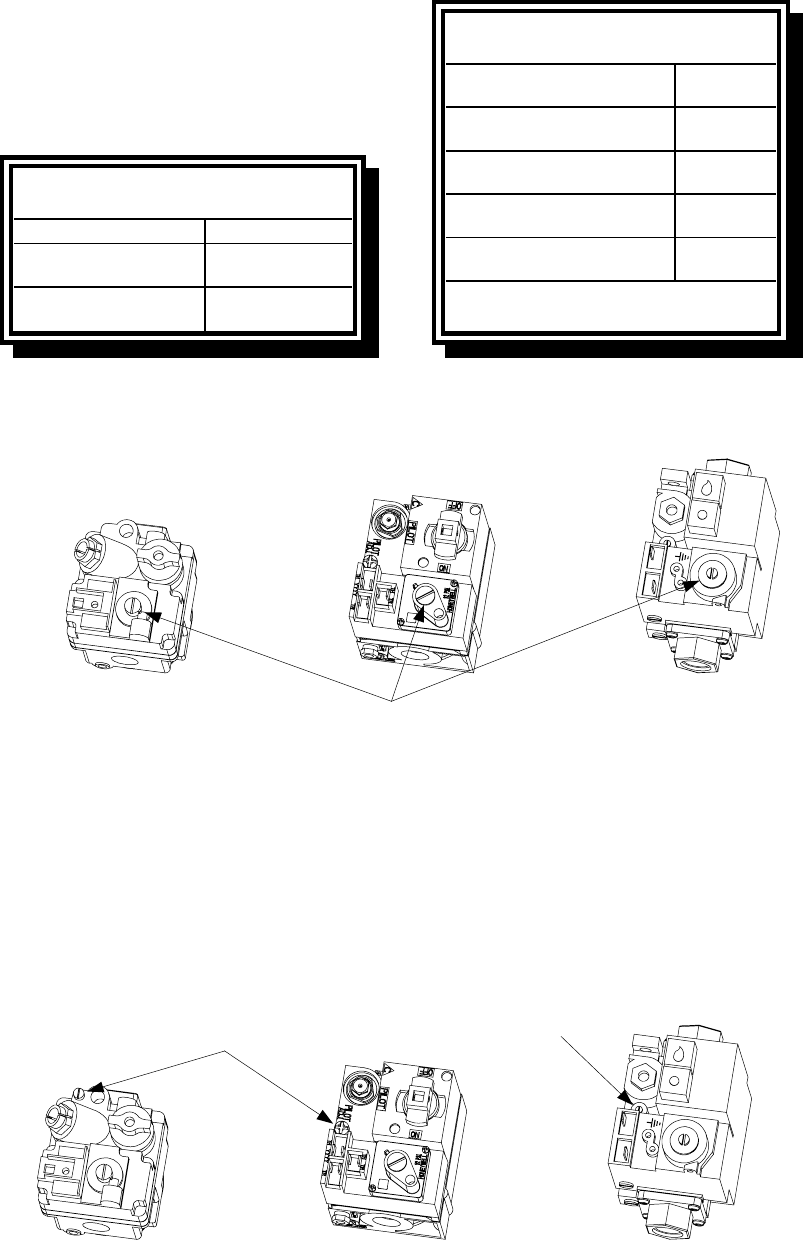
1. On non-CE valves, remove the cap covering the pilot adjustment screw. On all valves, turn the
pilot adjustment screw counterclockwise to increase the length of the flame or clockwise to de-
crease the length of the flame. Adjust the flame to a length of 1 to 1½ inches (25 to 38mm).
Robertshaw Valve
(Non-CE Units)
Honeywell Valve
(Non-CE Units)
Honeywell Valve
(CE Units)
To access the pilot adjustment screw on
Non-CE valves, this cap must be removed.
Pilot Adjustment Screw
2. On Non-CE valves, reinstall the pilot adjustment screw cap.