1-7
6. When the cooking oil/shortening temperature reaches 325ºF (162ºC), turn the flexible shaft
slowly clockwise until the burner shuts off.
7. Allow the fryer to sit for a few minutes, then slowly turn the flexible shaft counterclockwise un-
til the burner lights.
8. Repeat steps 6 and 7 at least three times to ensure an accurate setting is obtained. The Thermo-
stat Control is considered to be properly calibrated when the burner lights as the cooking
oil/shortening cools to 325ºF (162ºC)—not when the burner shuts off as the temperature rises.
9. Once the calibration point of 325ºF (162ºC) is determined, allow the burner to cycle on and off at
least 3 times to be sure it will light at the calibrated temperature.
10. After the calibration is complete, place the fryer power switch in the OFF position and discon-
nect the fryer from the electrical supply.
11. Carefully replace the thermostat shaft extension, ensuring that the stop screw is pointed straight
up. Tighten the stop screw and locking nut and the setscrew, being careful not to rotate the flexi-
ble shaft.
CAUTION
The thermostat flexible shaft must not be rotated while installing the thermostat
shaft extension!
When handling the thermostat, do not rotate the shaft more than two turns in either
direction. Doing so will cause damage to the thermostat.
12. Close the fryer control panel and replace the screws the upper corners.
13. Reinstall the thermostat knob with its pointer aligned with the 325ºF (162ºC) index mark on the
temperature dial.
14. Reconnect the fryer to the electrical supply.
1.8 Replacing Fryer Components
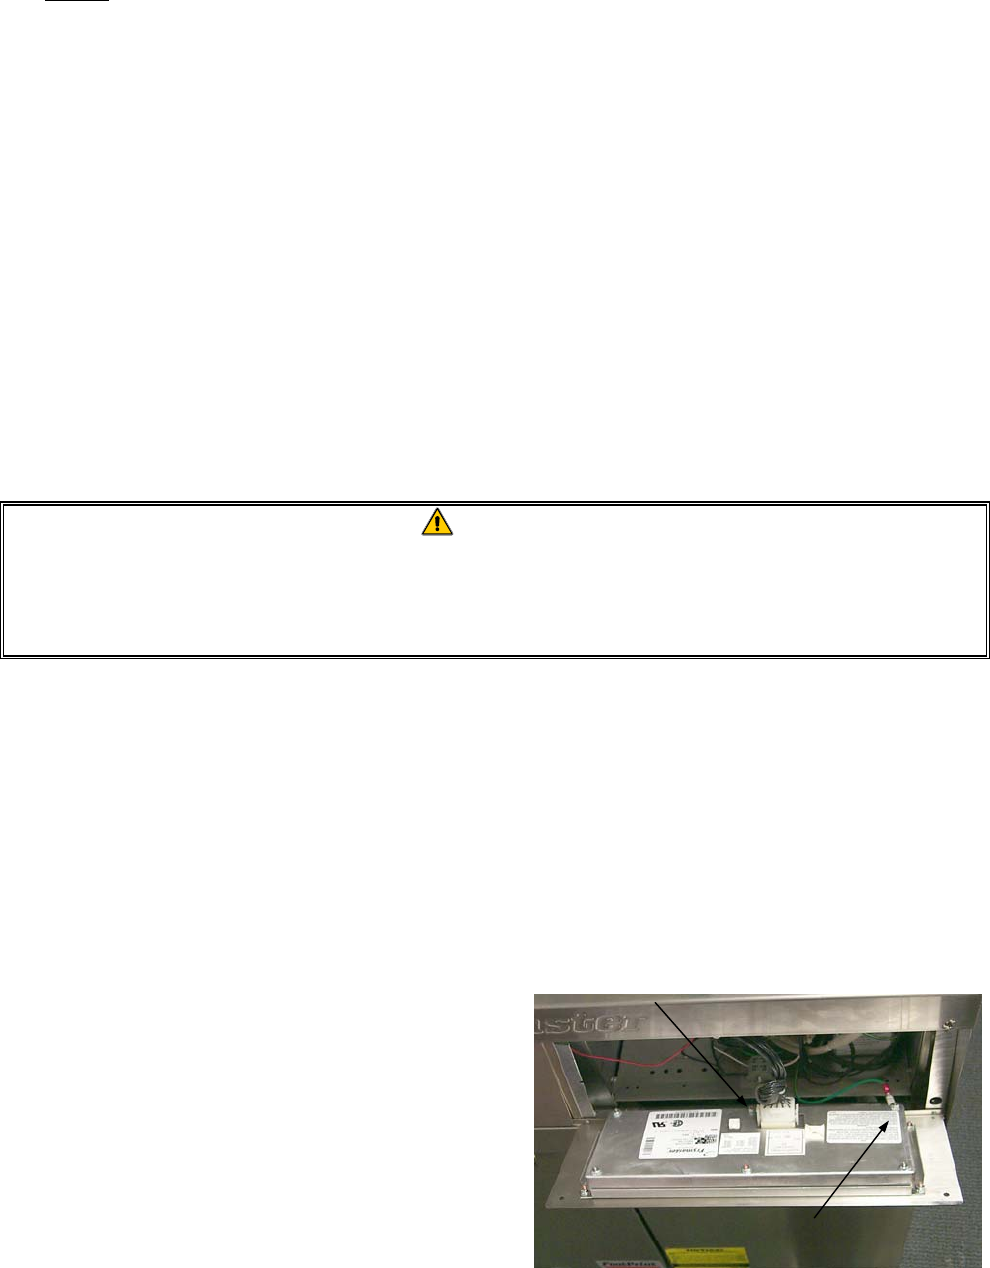
1.8.1 Replacing the Controller or Computer
1. Disconnect the fryer from the electrical power
supply.
2. Unscrew the two control panel screws. The
control panel is hinged at the bottom and will
swing open from the top.
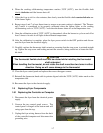
3. Unplug the fryer wiring harness from the back
of the controller/computer and disconnect the
grounding wire.
Unplug
harness
Disconnect
grounding wire


