


6-4
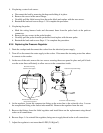
7. Position the replacement element in the cookpot with the standoffs on the bottom of the cookpot,
and thread the element leads through the Teflon washers recovered from the failed element.
Secure the element in place with the nuts removed in Step 5.
8. Install two metal wire ties to secure the high-limit thermostat against the inside of the left leg of
the element.
9. Thread each set of element leads through the fiberglass insulation removed in Step 4 and secure
the insulation in place with a wire tie as close as possible to the brass nut.
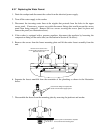
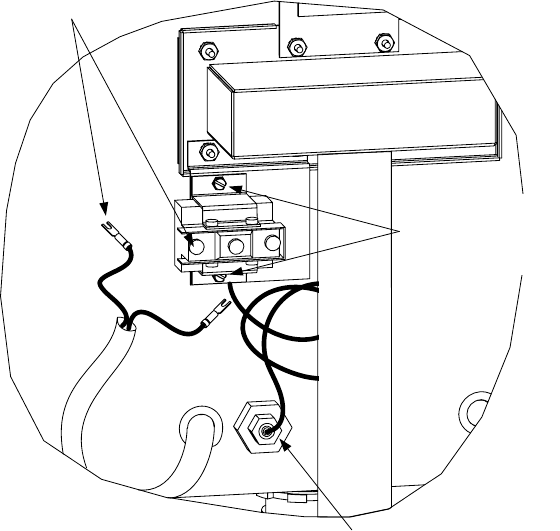
10. Thread one set of leads into the component box and connect them to the contactor block in
accordance with the notes made in Step 3 or the wiring diagram on the door. NOTE: The leads
are numbered to facilitate making proper connections. Repeat this step for the remaining set of
leads.
11. Replace the cover on the component box, being sure to reconnect the ground wire. Reinstall any
drain plumbing components that were removed, and reconnect the unit to the electrical power
supply.
6.3.4 Replacing the High-Limit Thermostat
1. Drain the cookpot and disconnect the cooker from the electrical power supply.
2. Cut the metal wire ties securing the thermostat body to the element.
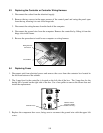
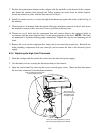
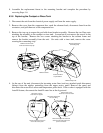
3. Open the control panel by removing the screws in each upper corner. Mark and then disconnect
the two leads connected to the thermstat terminals.
Loosen the small compression nut, then
unscrew the large fitting from the cookpot.
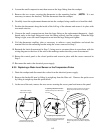
Mark and disconnect wires from
the thermostat terminals.
Remove the two
screws securing the
thermostat to the
mounting bracket.