Not
all
features
are
on
all
models. Appearance may vary.
I
,+J
)
A
HOUR
v
A
MIN.
v
\
!0[
COOK
TIME
Q
(JN/oFF
1
W“IIT
ON/OFF
[
)
e
.
d
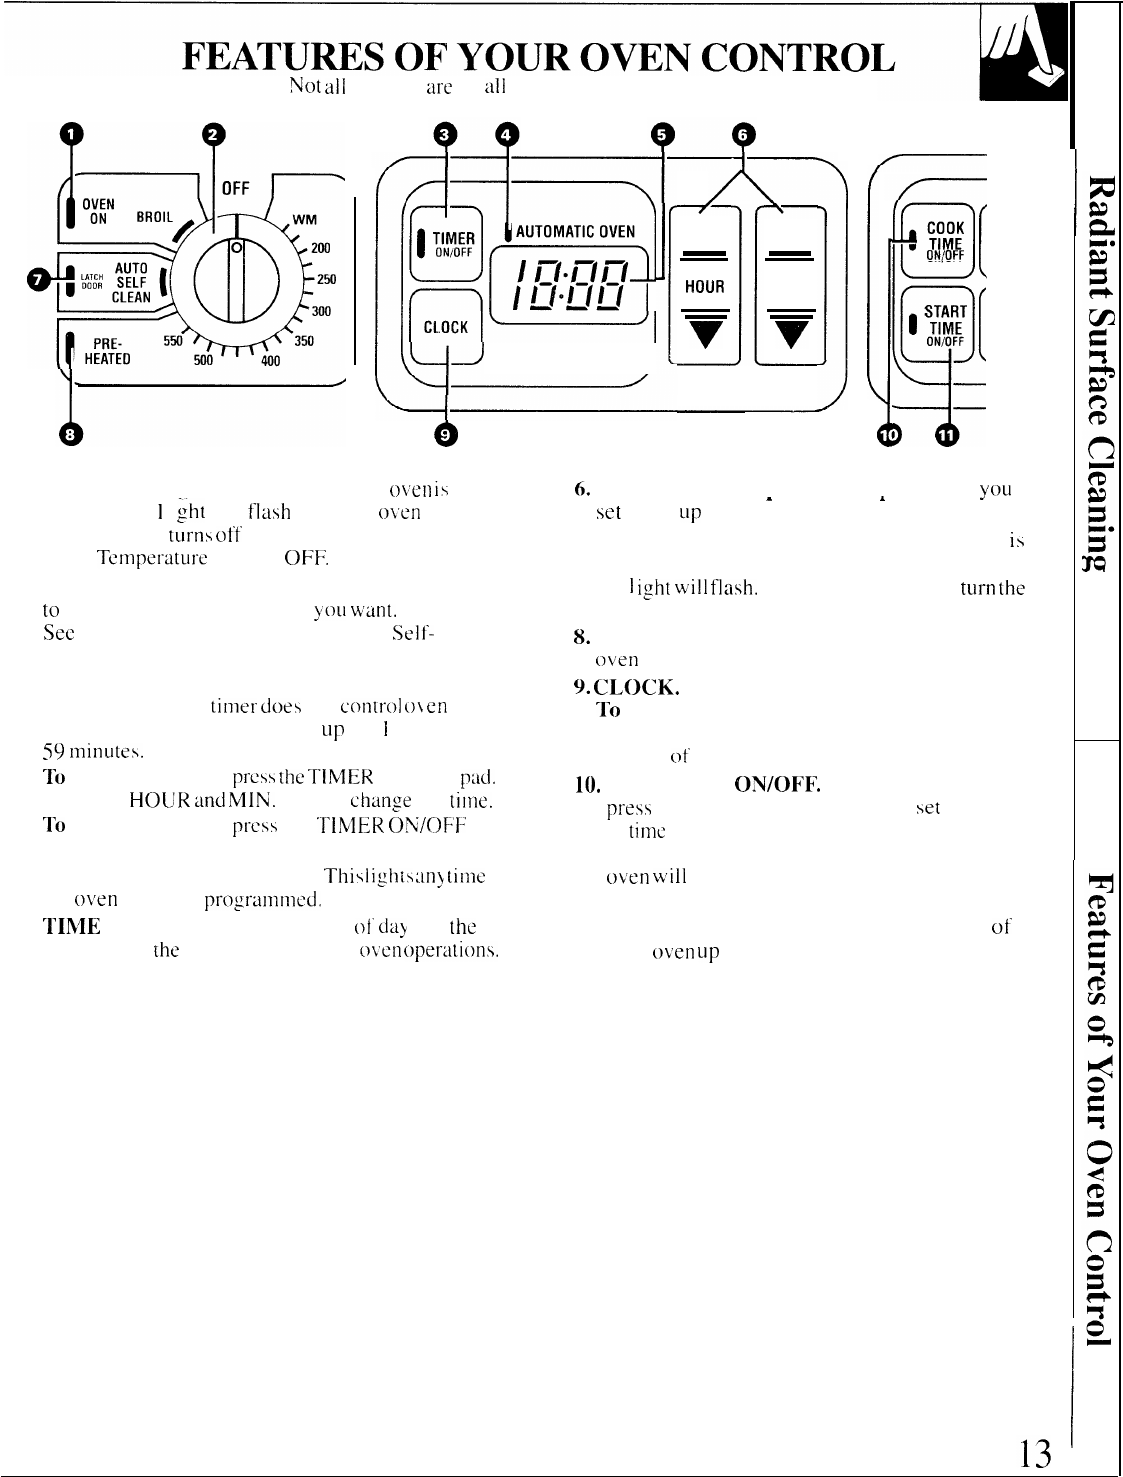
1. OVEN ON Light. Glows anytime the
o~en
i~
6.
HOUR and MIN. pads. These pads allow
you
to
heating. The
1
i
~ht
will
flash
when the
o~en
automatically
(urns
oft to remind you to turn the
Oven
Ten~peratL]rc
knob to
OFF.
2. Oven Temperature Knob. Turn i his knob
to
the temperature or function
you
wtirrt.
See
the Baking, Rousting, Broiling and
Self-
Cleaning sections.
3. TIMER ON/OFF. Press this pad to select the
timer feature. The
timer
doe~
not
con[ro]
ot
en
operations. The timer can time
up
to I
1
hours and
59
Ininutes.
To
set the timer, first
press
the
TIMER
ON/OFF
p:id.
Press the
HOIJR
and
MIhr.
pads to
change
the
tilne.
To
cancel the timer,
press
the
“rIMER
ON/OF’lF
pad until the display clears.
4. AUTOMATIC OVEN Light. Thii
li:his
:m}
ti~ne
the
o~’en
has been
programmtxl.
5.
‘1’IME
DISPLAY. Shows the time
t~i”
day
and
the
times set for
the
timer- on automatic
o~en
oper-ations.
.
.
.
set
times
LIp
to 11 hours and 59 minutes.
7. LATCH DOOR Light. Glows when the over-r
is
in the Self--Clean cycle. After the Self-Clean Cycle,
the
I
ight
will
flash.
Unlatch the door and
turn
the
Oven Temperature knob to OFF.
8.
PREHEATED Indicator Light. Glows when the
oven
reaches your selected temperature.
9.
CLOCK. Press this pad before setting the clock.
To
set the clock, first press the CLOCK pad.
Then press the HOUR and MIN. pads to change
the time of day.
10.
COOK TIME
ON/OF’F.
Press this pad and then
press
the HOUR and MIN. pads to
set
the amount
of
titnc
you want your food to cook. Turn the O\ en
Temperature knob to the desired temperature. The
o~ren
will
shut off after the Cook Time has run out.
11. START TIME ON/OFF. Press this pad and the
HOUR and MIN. pads to delay the starting
of
your
o~’en
LIp
to 11 hours and 59 minutes.
I


