


USmG
YOUR
OWN
,
ire
Using Your Oven
1.
I.nuk
at
the
c(]ntrols.
Be
sure you understand
how
tu
set
[hem
properly.
2.
Check the oven
interiur.
b)(]k
at
the shelves.
Take
a
practice run
at
removing
and
replacing them
properly
to
give
sure, sturdy support.
3.
Read
(~ver
inf(~rmati(~n
and
tips
that
folluw.
4.
Keep this guide
handy
so
you can refer
to
it,
especially during
the
tirst
w~ks
of using your
new
range.
NOTE:
●
You
may
notice a “burning” or “oily” smell the
first few times you turn
your oven on. This is normal
in a
ncw
oven and will disappear in a short time.
To speed the process, set a self-clean cycle
ff)r
a
minimum
of
3
hours.
See the Operating the Self-
Cleaning Oven section.
●
A
fan may automatically turn
on
and off to cool
internal parts. This is normal and the fan may
continue
tu
run even after the oven is turned off.
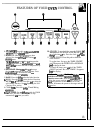
Electric Ignition
The oven burner and broil burner are lit by
electric ignition.
T()
light
either burner. touch
the
pad
ft)r
the
desi~d
function
and
press
the
INCREASE or DECREASE
pad until
the
desired
tcmpcratum is displayed. The
burner should
ignite
within
3(L90
secf)nds.
After the
{)vcn
reaches the selected temperature, the
burner
cycle=)tl.
complctcly,
then
on
with a
full
tltimc-to
keep
the
oven temperature
c[)ntrol]ed.
Power
Outige
CAUTION: DO NOT MAKE ANY
A~EMPT
TO
OPERATE THE ELECTRIC IGNITION OVEN
DURING AN ELECTRICAL
~WER
OUTAGE.
Neither the oven nor the broiler can be lit during an
electrical
~)wer
outage. Gas will not flow unless the
glow
bar is hot.
If
the
oven is in use when
a
power
outage
occurs,
the oven burner shuts
off
and cannot be
re-lit
until
pt)wer
is restored.
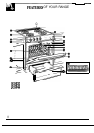
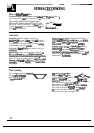
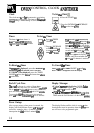
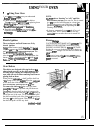
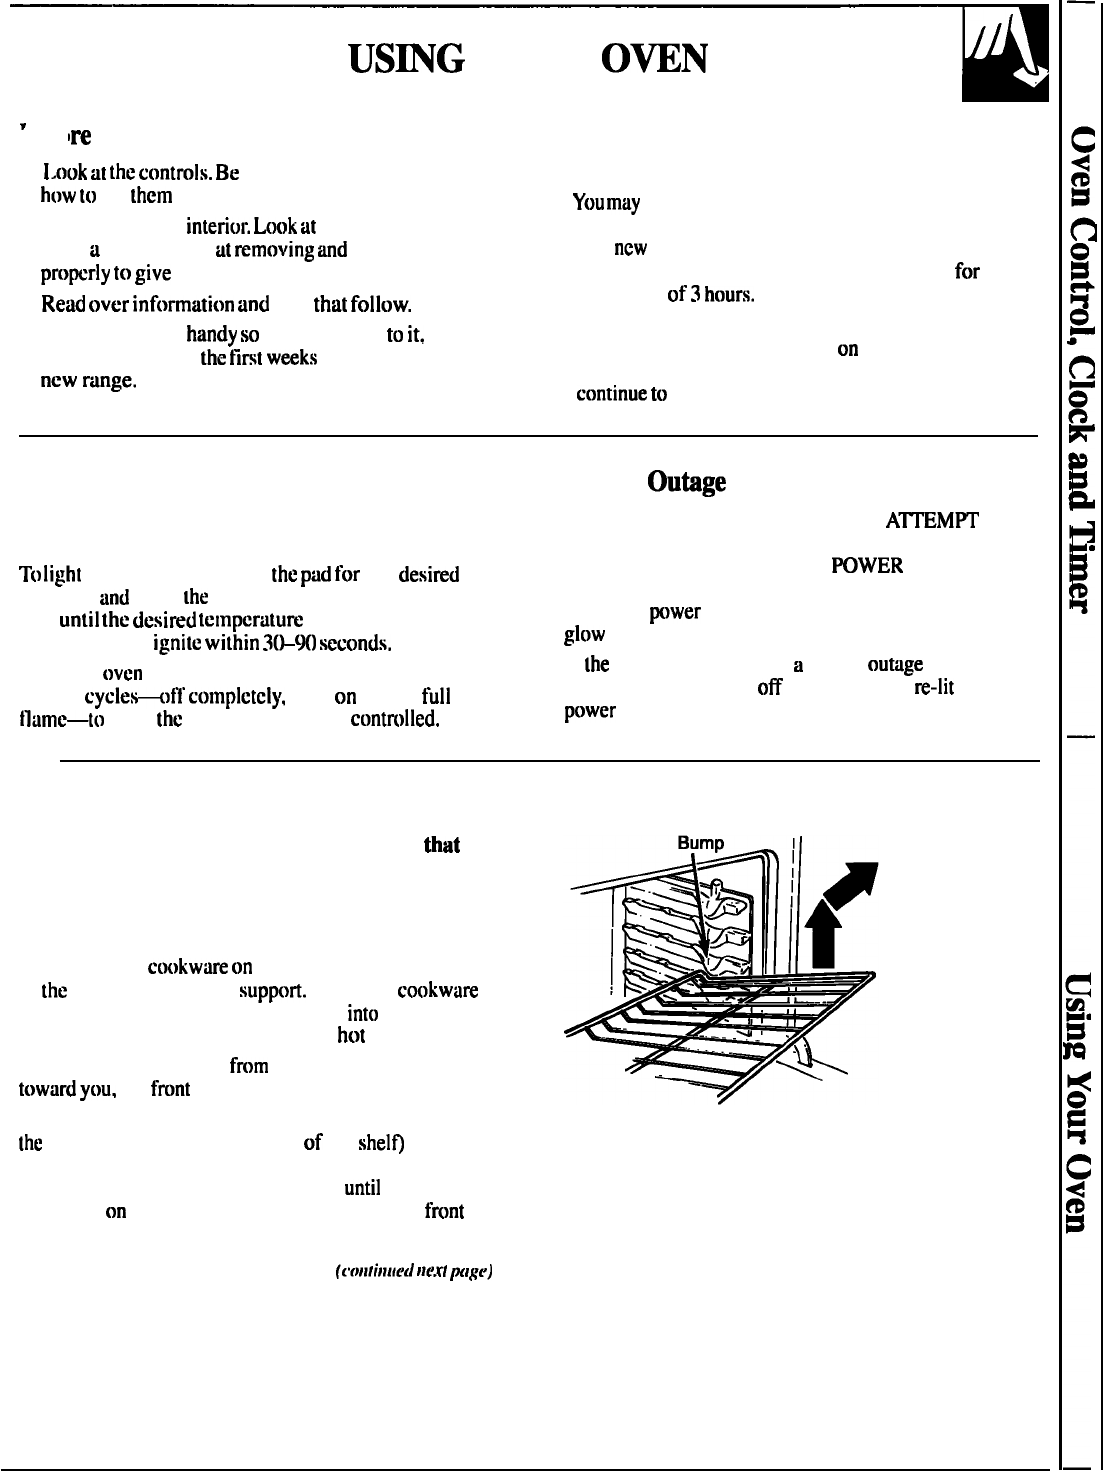
Oven Shelves
The shelves are designed with stop-locks so
that
when placed correctly on the shelf supports, they
will stop before coming out completely from the
oven, and will not tilt when removing food from or
placing food on them.
When placing
coukwarc
on
a shelf, pull the shelf out
to
the
bump on the shelf
support.
Place the
cookware
on the shelf. then slide the shelf back
into
the oven.
This will eliminate reaching into the
hot
oven.
To remove the shelves
fmrn
the oven, pull them
t(~wtird
you,
tilt
f~)nt
end upward and pull them out.
To replace,
place the shelf on the shelf support with
the
stop-locks (curved extension
of
the
shel~
facing up
toward the rear of the oven. Tilt up the front and push
the shelf toward the back of the oven
until
it goes past
the bump
on
the shelf support. Then lower the
f~)nt
of
the shelf and push it all the way back.
(1’f~lilillfll~li
IIIB.rt
pIgrj
15