


4
Installation and Operations Manual
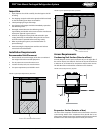
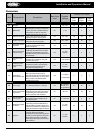
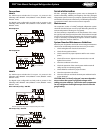
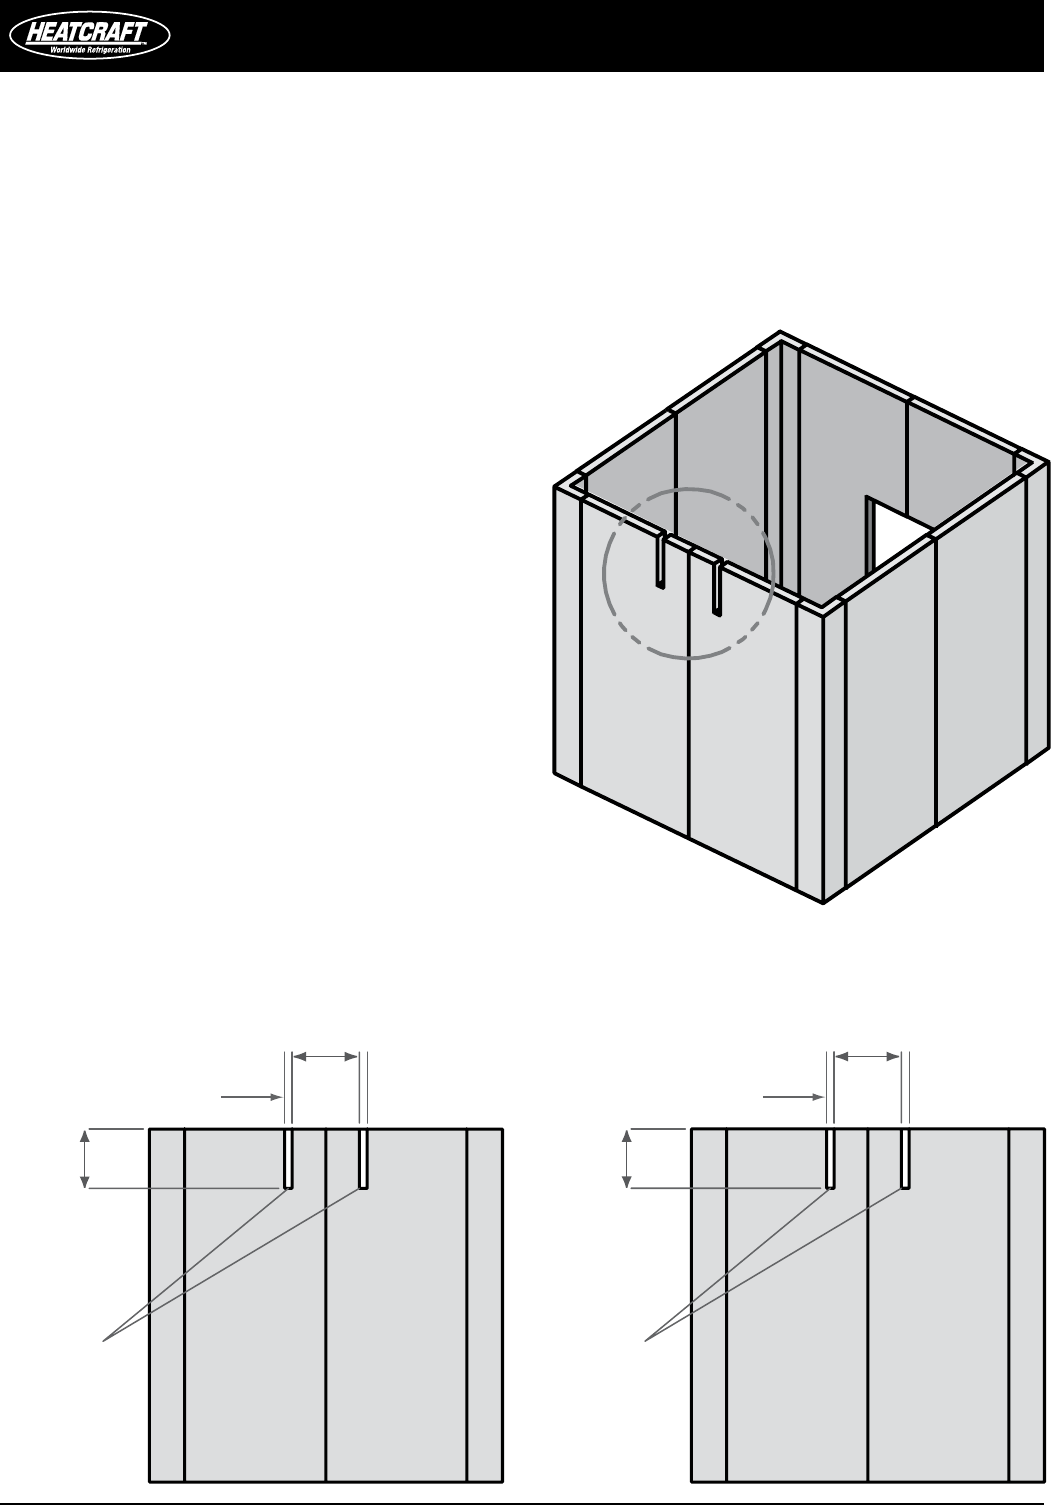
FIGURE 4: Cutout Location
2.62" TYP
20.25" TYP
22.75" TYP
CUTOUTS
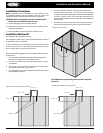
2.62" TYP
20.25" TYP
28.75" TYP
CUTOUTS
FIGURE 6: Cutout Dimensions | Large Cabinet
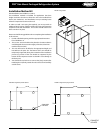
FIGURE 5:
Cutout Dimensions | Small Cabinet
CAUTION: Do not support any portion of the unit by the
drain pan.
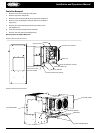
Installation Procedures
NOTE: Installation and maintenance to be performed only
by qualied personnel who are familiar with local codes and
regulations and are experienced with this type of equipment.
CAUTION: Make sure all power sources are disconnected
before any service work is done on units.
A.) Inspect packaging/unit for shipping damage
B.) Review the space and location requirements provided for your
method of installation.
C.) Follow installation instructions listed in method #1 or #2
Installation Method #1
Top Installation (See FIGURES 4, 5 and 6)
This installation method is the recommended installation method
in applications where it is feasible.
In order to install a unit using this method, you will need to provide
cutout slots for the “arms.” The unit should be placed on the wall
prior to setting and securing the roof of the box.
Please use the following guidelines when completing the installation
in this manner.
1. You will need to provide nished slots with the appropriate
dimensions in the box wall.
See FIGURES 5 and 6.
2. The slots can straddle a seam but they should not be on a seam.
See FIGURE 4.
3. The cut-out sections should not be placed in a location where
they would interfere with any cam locks.
4. It is preferred that a cam lock be placed in between the cutouts
to give additional support
5. The unit will need to be lifted to the appropriate height and
inserted into the open slots. The bottom of the unit should
be temporarily supported during the remainder of the installation
process (no portion of the unit should be supported by the
bottom of the evaporator section as this WILL cause damage to
the drain pan).
6. Set and secure the roof of the box and rmly attach the unit to
the box and carefully seal all seams and penetration points.