


PRO
3
Side Mount Packaged Refrigeration System Installation and Operations Manual, May 2008 5
PRO
3
Side Mount Packaged Refrigeration System
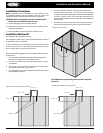
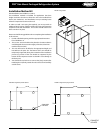
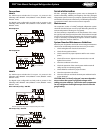
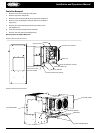
Installation Method #2
Side Installation (See FIGURES 7, 8, and 9)
This installation method is intended for applications that have
height restrictions that do not allow the unit to be installed from
above (see method #1) and installations into pre-existing boxes
where it is impractical to remove the roof.
In order to install a unit using this method, you must provide an
additional “plug” section of the box to ll in the open space between
evaporator arms after installation. This section should contain cam
locks to anchor it in place.
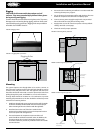
Please use the following guidelines when completing the installation
in this manner.
1. Provide a nished opening with the appropriate dimensions
from FIGURE
8 or 9.
2.
The cut-out section should not be placed in a location where it
would degrade the structural integrity of the box (should not
interfere with cam locks)
3. The unit will need to be lifted to the appropriate height and
inserted into the open slot. The bottom of the unit should be
temporarily supported during the remainder of the installation
process (no portion of the unit should be supported by the
bottom of the evaporator section as this WILL cause damage to
the drain pan).
4. You should use cam locks to re-connect the “plug” section after
installing the unit, rmly attach the unit to the box and carefully
seal all seams.
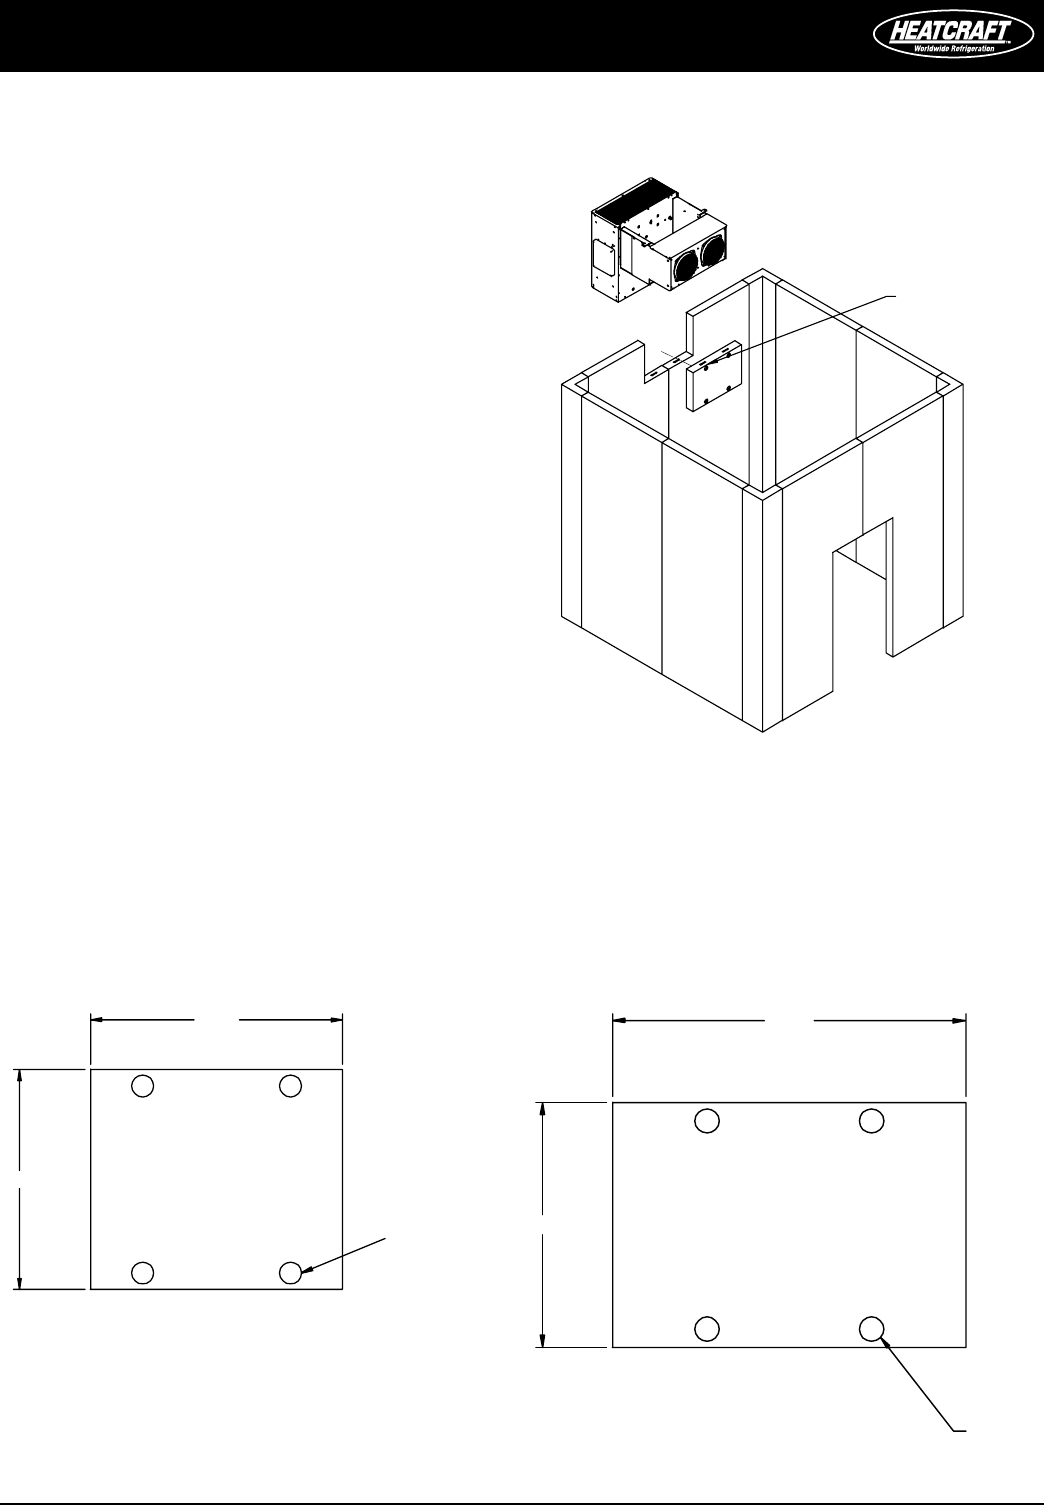
SEE PLUG DETAIL
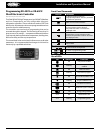
29.00
20.07
CAMLOCKS
4 PLACES
20.00
23.00
CAMLOCKS
4 PLACES
FIGURE 7: Plug Detail
FIGURE 9:
Plug Detail | Large Cabinet
FIGURE 8:
Plug Detail | Small Cabinet