


--- 17 ---
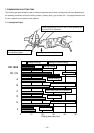
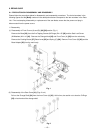
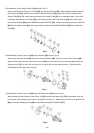
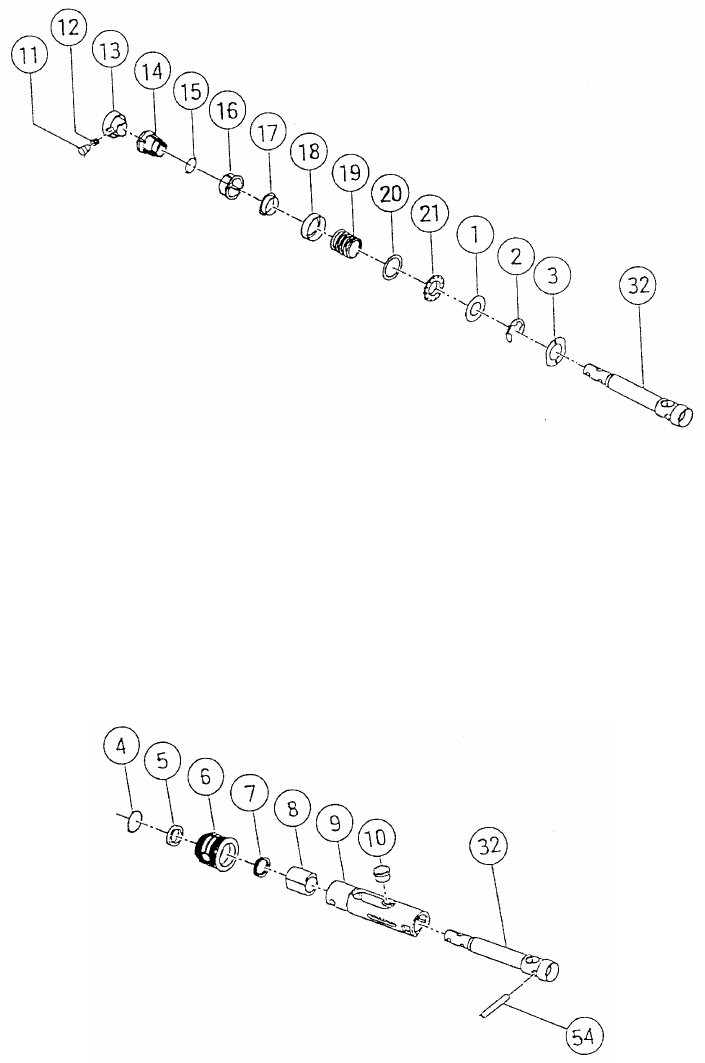
(3) Disassembly of the blade mounting section (Fig. 5)
Remove the Retaining Ring (E-Type) for D14 Shaft [2] from Plunger (A) Set [32] with a flatblade screwdriver.
At this time, be careful that Spring (A) [19] is pushing against the retaining ring. Next, slide the Guide Washer
[17] backward and remove the two Steel Balls D4.76 [15]. Move Holder Sleeve (B) [14] backward and adjust
the position of the notch on Holder Sleeve (B) [14] (see Fig. 16) then remove the Holder Pin [11] and Spring
(B) [12] with a magnet. At this time, be careful not to damage Spring (B) [12] by applying undue force or
forgetting to remove it. Remove Holder Sleeve (A) [13], Holder Sleeve (B) [14], Holder Sleeve (C) [16], Guide
Washer [17], Dust Washer [18], Spring (A) [19], Washer (D) [20], Thrust Bearing [21], Washer (E) [1] and
Washer (F) [3] from Plunger (A) Set [32].
Fig. 5
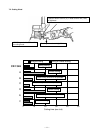
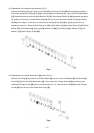
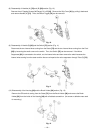
Fig. 6
(4) Disassembly of the Guide Sleeve Ass'y [9] section (Fig. 6)
Remove the O-Ring [4] from the rim of the Seal Sleeve [6] and pull out the Felt Washer [5], Seal Sleeve [6]
and V-Ring [7] from the Guide Sleeve Ass'y [9]. Next, remove the Plunger Sleeve [10] by pressing it from
underneath Plunger (A) Set [32] with a hand press (see Fig. 19). Remove the Pin D6 [54] and then Plunger
(A) Set [32] from the rear of the Guide Sleeve Ass'y [9].