


--- 22 ---
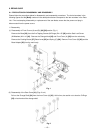
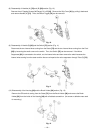
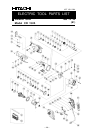
(4) Press-fitting plunger (A) into the plunger sleeve (Figs. 18 and 19)
Tool required: Special repair tool J-317
Apply Nippeco SEP-3A grease to the sliding portion of plunger (A) and insert it into the Guide Sleeve Ass'y [9].
Insert the Pin D6 [54] into plunger (A). Mount it to the special repair tool J-317 and press-fit it in the direction
of the arrow as shown in Fig. 18. At this time, be careful not to gall the plunger sleeve. After reassembly,
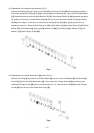
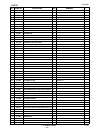
check that plunger (A) slides smoothly. For reference, the special repair tool J-317 can also be used for
pulling out the plunger sleeve as shown in Fig. 19.
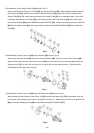
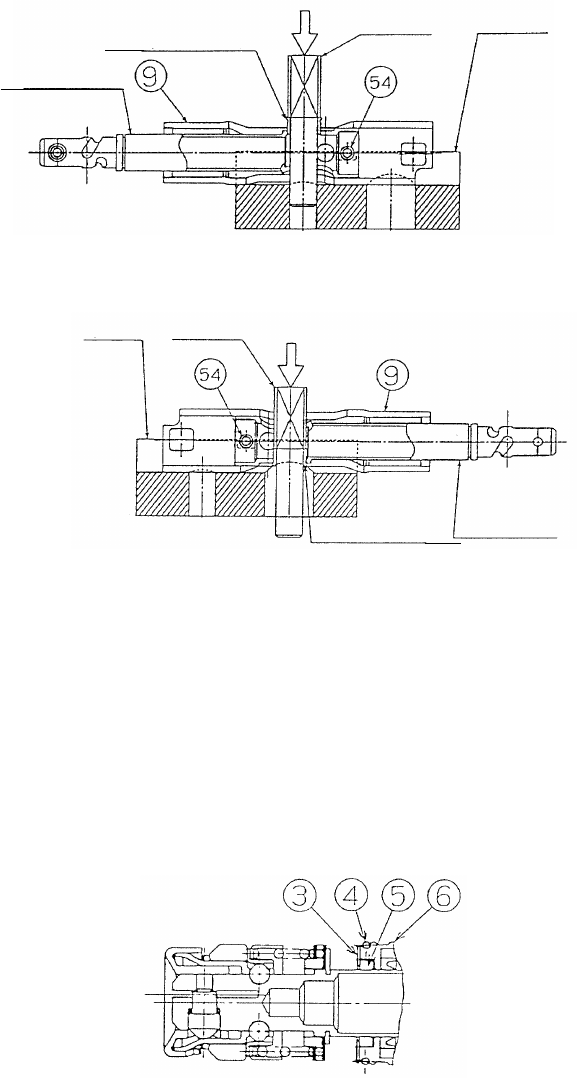
Fig. 20
Fig. 19
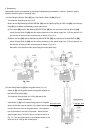
(5) Others
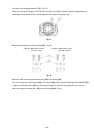
* Be careful not to dislodge the Felt Washer [5]. (Fig. 20)
The Felt Washer [5] is inserted in the Seal Sleeve [6]. The O-Ring [4] is provided around the seal sleeve to
make closer contact between the felt washer and plunger (A) and also to increase the dust-resistance.
Moving plunger (A) after mounting the felt washer can dislodge the felt washer. Hold Washer (F) [3] with
your hand to prevent the felt washer from becoming dislodged when moving plunger (A).
Fig. 18
Plunger sleeve
Plunger (A)
J-317
Plunger sleeve
Plunger (A)
J-317
J-317
J-317