


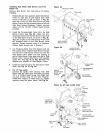
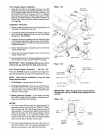
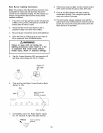
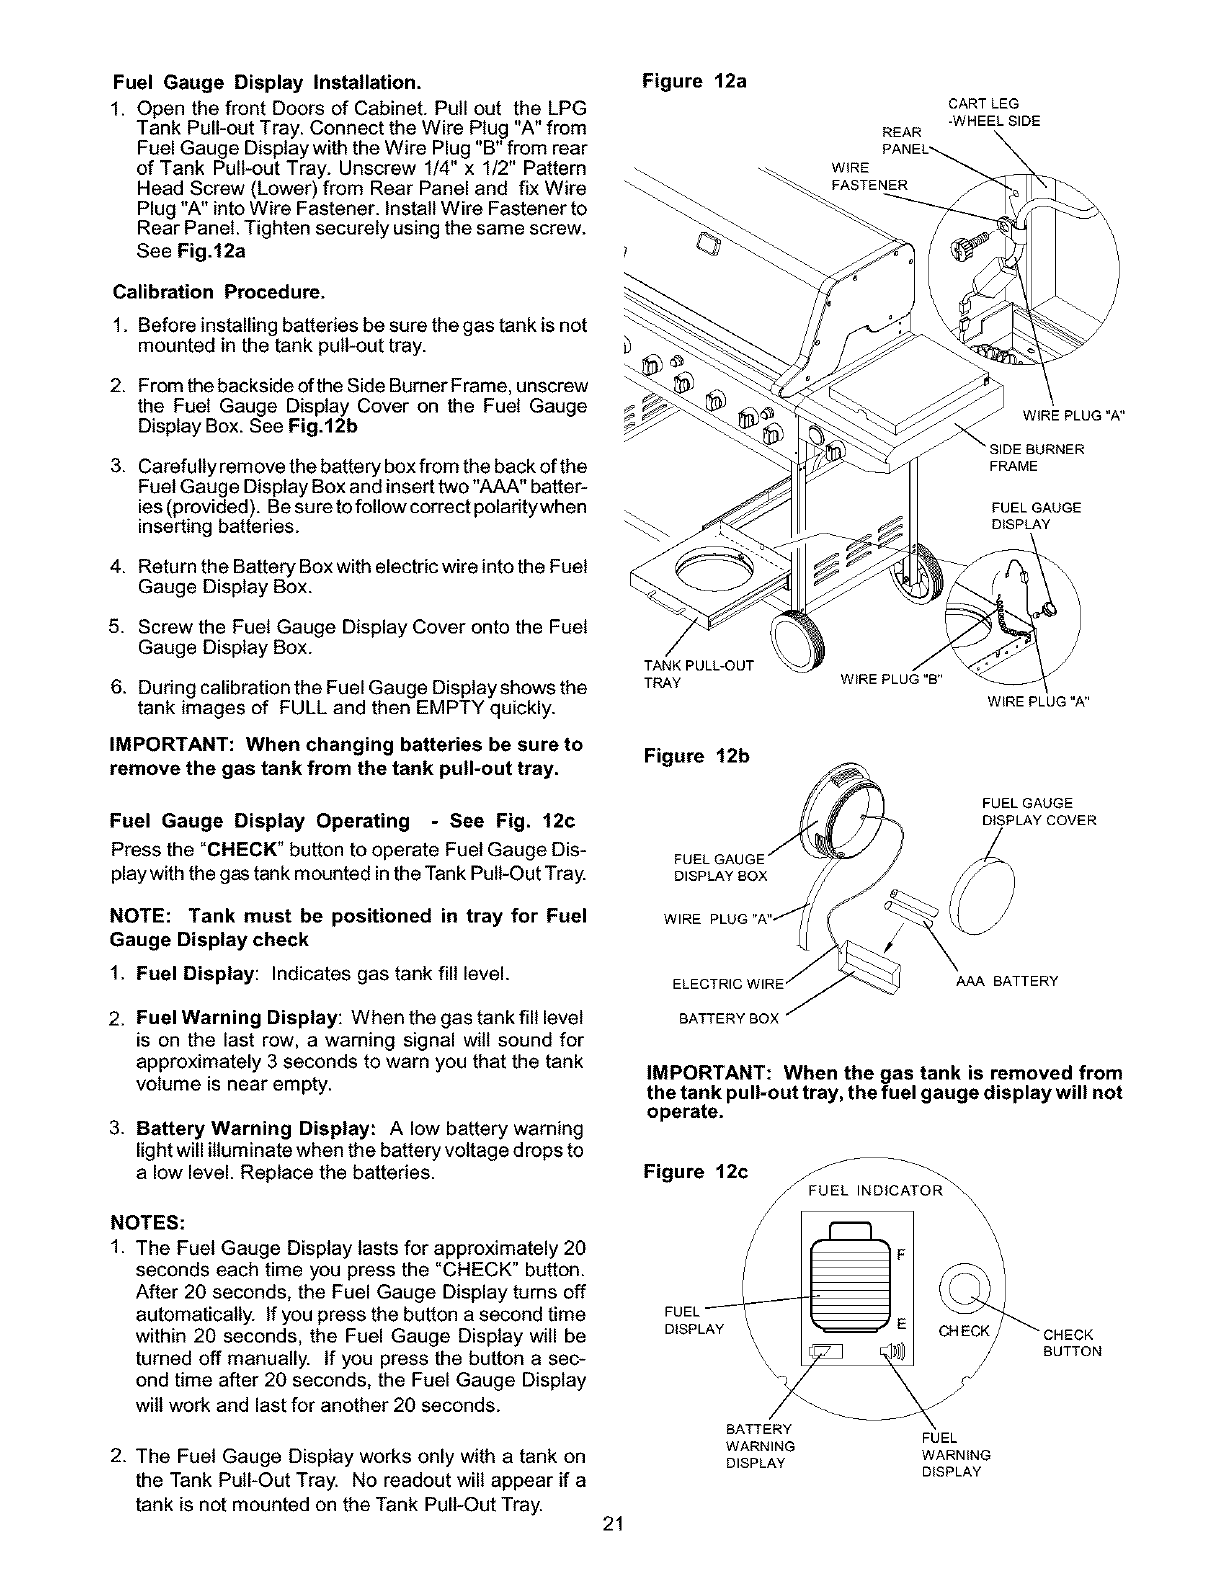
Fuel Gauge Display Installation.
1. Open the front Doors of Cabinet. Pull out the LPG
Tank Pull-out Tray. Connect the Wire Plug "A" from
Fuel Gauge Display with the Wire Plug"B" from rear
of Tank Pull-out Tray. Unscrew 1/4" x 1/2" Pattern
Head Screw (Lower) from Rear Panel and fix Wire
Plug "A" intoWire Fastener. Install Wire Fastener to
Rear Panel. Tighten securely using thesame screw.
See Fig.12a
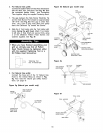
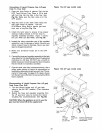
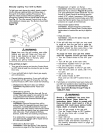
Calibration Procedure.
1. Before installing batteries be sure the gas tank is not
mounted in the tank pull-out tray.
2. From the backside ofthe Side Burner Frame, unscrew
the Fuel Gauge Display Cover on the Fuel Gauge
Display Box. See Fig.12b
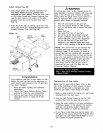
3. Carefully remove the battery box from the back of the
Fuel Gauge Display Box and inserttwo "AAA" batter-
ies(provided). Be sure to follow correct poladtywhen
inserting batteries.
4. Return the Battery Box with electric wire into the Fuel
Gauge Display Box.
5. Screw the Fuel Gauge Display Cover onto the Fuel
Gauge Display Box.
6. During calibration the Fuel Gauge Display shows the
tank images of FULL and then EMPTY quickly.
IMPORTANT: When changing batteries be sure to
remove the gas tank from the tank pull-out tray.
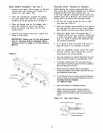
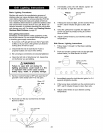
Fuel Gauge Display Operating - See Fig. 12c
Press the "CHECK" button to operate Fuel Gauge Dis-
play with the gas tank mounted in the Tank Pull-Out Tray.
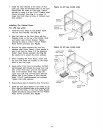
Figure 12a
REAR
WiRE
TANK PULL-OUT
TRAY WiRE PLUG "B"
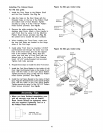
Figure 12b
FUEL
DISPLAY BOX
CART LEG
-WHEEL SIDE
WiRE PLUG "A"
BURNER
FRAME
FUEL GAUGE
DISPLAY
WiRE PLUG "A"
FUEL GAUGE
DISPLAY COVER
NOTE: Tank must be positioned in tray for Fuel
Gauge Display check
1. Fuel Display: Indicates gas tank fill level.
WIRE
AAA BATTERY
2. FuelWarning Display: Whenthegastankfilllevel
is on the last row, a warning signal will sound for
approximately 3 seconds to warn you that the tank
volume is near empty.
3. Battery Warning Display: A low battery warning
light will illuminate when the battery voltage drops to
a low level. Replace the batteries.
NOTES:
1. The Fuel Gauge Display lasts for approximately 20
seconds each time you press the "CHECK" button.
After 20 seconds, the Fuel Gauge Display turns off
automatically. If you press the button a second time
within 20 seconds, the Fuel Gauge Display will be
turned off manually. If you press the button a sec-
ond time after 20 seconds, the Fuel Gauge Display
wilt work and last for another 20 seconds.
2. The Fuel Gauge Display works only with a tank on
the Tank Pull-Out Tray. No readout will appear if a
tank is not mounted on the Tank Pull-Out Tray.
BATTERY BOX
IMPORTANT: When the gas tank is removed from
the tank pull-out tray, the fuel gauge display will not
operate.
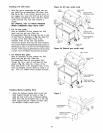
Figure 12c
FUEL Ay_
DISPL
J FUEL INDICATOR_\
BATTERY
FUEL
WARNING
DISPLAY WARNING
DISPLAY
BUTTON
21