


Exterior surfaces and interior:
u
Clean the ventilation grilles regularly.
w
Dust deposits increase energy consumption.
u
Clean the plastic surfaces, outside and inside, by hand
using lukewarm water and a little dish washing liquid.
u
To clean the drain opening: remove
deposits with a thin instrument, e.g.
a cotton bud.
Items of equipment:
u
Clean the roller plates in the dishwasher.
u
Clean other items of equipment by hand using lukewarm
water and a little dish washing liquid.
u
To dismantle shelves: remove trims
and side parts.
u
To dismantle door racks: remove
protective films from the trims.
After cleaning:
u
Wipe dry the appliance and items of equipment.
u
Connect the appliance and switch it on again.
u
Switch on SuperFrost. (see section on SuperFrost)
When the temperature is sufficiently cold:
u
Put the food back in the appliance.
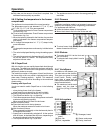
6.3 Cleaning the IceMaker*
Fig. 7
The IceMaker must be switched on.
u
Pull out the drawer and take out the ice.
u
Clean the drawer with warm water and mild dish washing
liquid.
u
With the drawer pulled out, press and hold the On/Off
button (for about 10 seconds).
w
After about 1 second the LED goes out, the IceMaker is
switched off.
w
After about 10 seconds the LED flashes for about 60
seconds.
u
Push the drawer in while the LED is flashing.
w
The ice tray of the IceMaker rotates and tilts.
u
Take out the drawer.
u
Clean the ice tray with warm water. If necessary, use a
mild dish washing liquid. Then rinse.
To switch the IceMaker on again:
u
Press the ON/OFF button until the LED lights up, then
push the drawer in.
w
The IceMaker starts to produce ice cubes.
If dish washing liquid was used:
u
Throw out the first three batches of ice cubes to get rid of
any dish washing liquid residues.
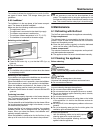
6.4 Replacing the interior light*
Light bulb data
q
max. 25 W (25 W)
q
120 V
q
Bulb fitting: E14
q
Current and voltage must agree with the details on the
rating plate.
WARNING
Danger of electric shock.
u
First, remove the plug or switch off the fuse.
CAUTION
Cutting hazard!
u
To prevent possible injury due to broken glass, use hand
protection when replacing the interior light.
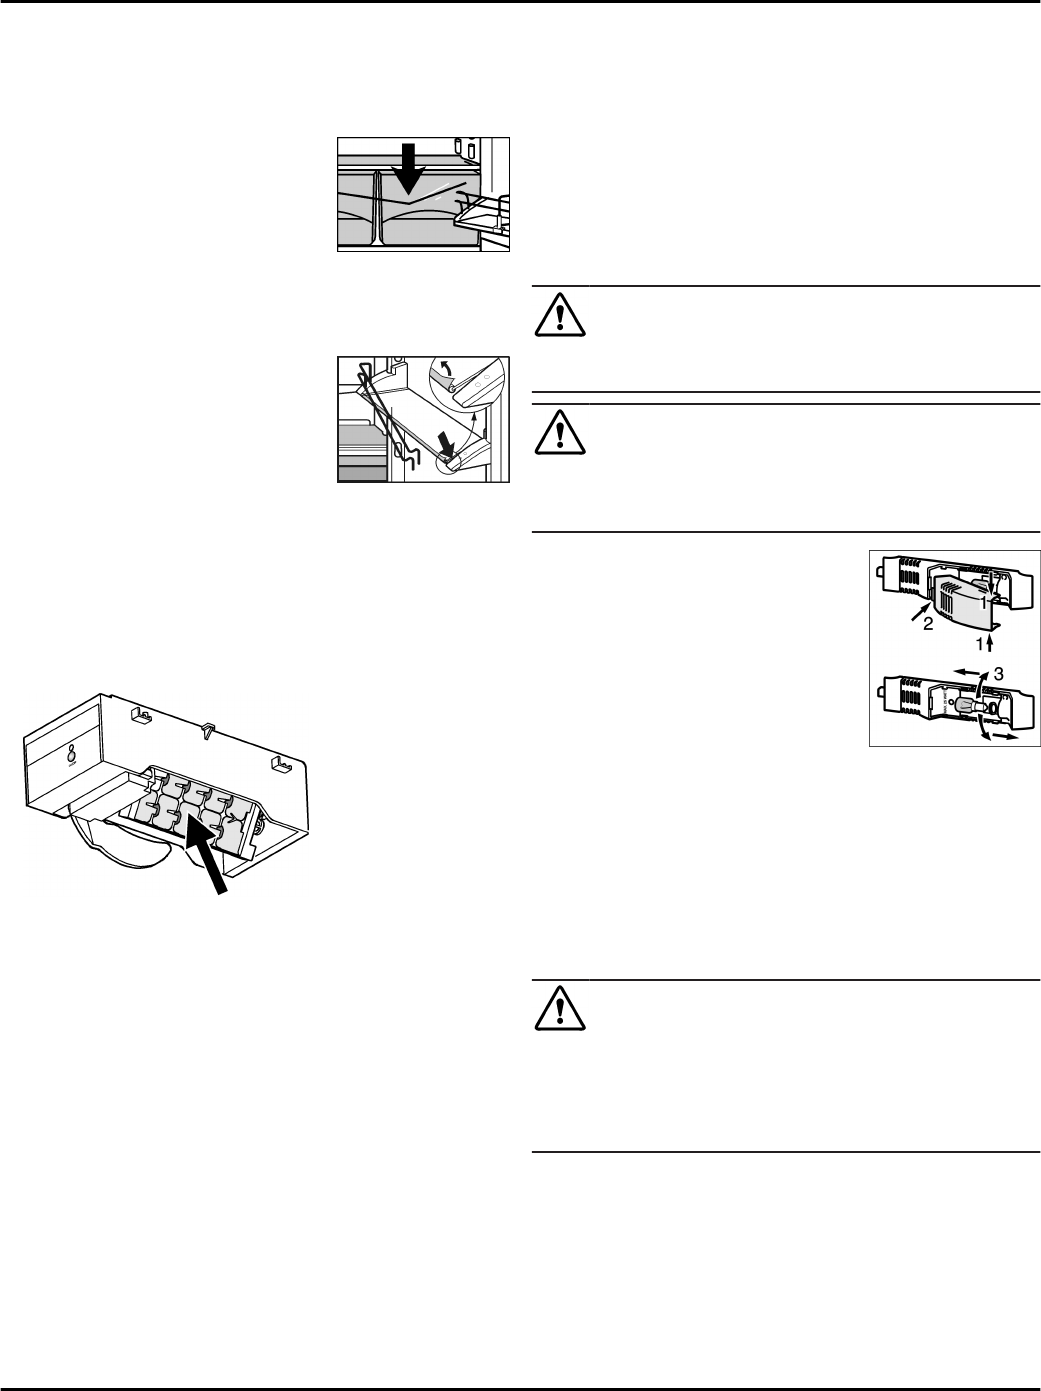
u
Take hold of the light cover at the
top and bottom
Fig. 8 (1)
.
u
Unclip light cover at the back
and unhook
Fig. 8 (2)
.
u
Replace the light bulb
Fig. 8 (3)
.
When turning it, use a little more
force to overcome the static friction
of the seal. Make sure the seal sits
cleanly in the light socket.
u
Hook the cover in again at the
back and clip in at the sides.
Fig. 8
6.5 Customer service
First check whether you can remedy the fault yourself using
the summary in the Troubleschooting section. If this is not
the case, please contact the Customer Service department.
You can find the address in the enclosed customer service
list.
WARNING
Risk of injury from repairs by non-professionals.
u
Repairs and work on the appliance and the power cord,
which are not expressly named in the Maintenance sec-
tion should only be carried out by the customer service
department.
Maintenance
12