


36
Tips
• Never fill the baking pan with ingredients completely, as the
dough will expand as it rises.
• If you have a ready-made dough, it can be baked in the
machine without kneading and proving (use programme 12).
• If you want to mix a dough (e.g. for buns or pizza) for baking in
an ordinary oven, you can use programme 8.
• The breadmaker is best suited for baking bread, but it is also
possible to bake cakes, preferably without too much fat. Try
your own recipes or ready-made cake mixes.
Operating the breadmaker
• Remove the baking pan, and fit the kneading paddle in the
baking pan (unless you use programme 12, when the dough is
not kneaded).
• Place the ingredients in the baking pan.
- The ingredients must be at room temperature (18-23° C) and
must be added in the order given in the recipe!
- Dried yeast must be added last and placed in a small
depression in the flour.
- Sugar, salt and other spices should be distributed evenly
over the rest of the ingredients.
• Place the baking pan in the baking chamber.
• Close the lid.
• Plug in.
• Select the required programme and bread size and crust
colour, if required.
• Set the timer function, if required (see below).
• Press the START/STOP button. The colon in the display
flashes and the programme starts.
- Baking consists of the following processes: kneading/resting,
proving, baking and keeping warm after baking has finished.
- During kneading, the breadmaker will buzz as the kneading
paddle rotates. This is perfectly normal.
- If you have set the timer function, the programme will start
once the timer has stopped (see below). The colon in the
display flashes will continue to flash.
- If you have selected programme 1, 2, 3, 5 or 11, the
breadmaker beeps several times, the second time it kneads in
order to indicate that fruit or nuts, etc. can be added.
- During baking, steam can rise from the ventilation openings
in the lid. This is perfectly normal.
- Do not open the lid before baking ends as this may affect the
quality of the bread, particularly its ability to rise.
• Once the programme has finished, the breadmaker beeps
once. The breadmaker then keeps the bread warm for 1 hour,
after which 10 beeps are heard and the breadmaker switches
off. You can stop the breadmaker’s keep-warm function before
the hour has passed by pressing and holding the
START/STOP button for approximately 3 seconds.
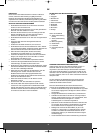
• Open the lid and remove the baking pan.
Important! The baking pan is very hot after baking! Always use
an oven glove or similar when removing the baking pan and do
not place it on a surface that may be damaged by the heat.
• Remove the plug from the socket.
• Please note that the kneading paddle may stick to the bread
when you remove it from the baking pan!
• Important! Only use plastic or wooden utensils when releasing
the bread from the baking pan, as the non-stick coating may
be damaged if you use metal utensils.
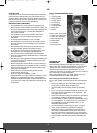
Using the timer function
The breadmaker can be set to start with a delay. For instance you
can set it in the evening to start early the next morning.
Press TIME+ to increase the delay by 10 minutes and TIME- to
reduce it by 10 minutes. Enter the time required up until the bread
has finished baking.
EXAMPLE:
It is currently 9 pm and you want the bread to finish baking at 7 am
the next morning. This is a difference of 10 hours, so press TIME+
until 10.00 is shown on the display, and then press Start.
• Important! Do not use perishable ingredients such as milk or
eggs when using the timer function.
Warning messages
Message Meaning
H:HH The display shows this message when you start
the breadmaker if the temperature in the baking
chamber is too high. Stop the breadmaker, open
the lid and allow the breadmaker to cool for 10-20
minutes.
E:EE The display shows this message when you start
the breadmaker if the temperature sensor is faulty.
Take the appliance to an authorised service
centre.
rev_Breadmaker_IM 31/10/05 13:09 Side 36
FOR UNITED KINGDOM ONLY
Plug wiring:
This product is fitted with a BS 1363 13-amp plug. If you have to
replace the fuse, only those that are ASTA or BSI approved to
BS1362 and with a rated current of 13 amps should be used. If there
is a fuse cover fitted,
this cover must be refitted after changing the fuse. If the fuse cover
is lost or damaged, the plug must not be used. You must also check
if the socket outlets in your home fit with the plug of the appliance. If
the socket outlet in your home does not fit with the plug, the plug
must be removed and disposed of safely as insertion of the plug into
the socket is likely to cause electric hazard. A replacement plug
should be wired according to following description.
Important
This appliance must be earthed. The wires in the cord set are
coloured thus:
BLUE- Neutral, Brown-Live, Green& Yellow-earth (For detach-
able plug only)
As the colours of the wires in the mains lead of this appliance may
not correspond with the coloured markings identifying the
terminals in your plug, proceed as follows:
The wire that is coloured Green& Yellow must be connected to
the terminal in the plug that is marked with the letter E or by the
earth symbol, or coloured green& yellow.
The wire that is coloured blue must be connected to the terminal
that is marked with the letter N or coloured black.
The wire that is couloured brown must be connected to the
terminal that is marked with the letter L or coloured red.