


Using Your Product
8
Utilisation de l’appareil
8
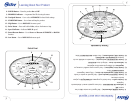
PulsePause
Resume
Low High
FOOD DRINK
MANUAL
SPEEDS
START
STOP
AUTO
OOD
Froze
Drin
Milk
Shake
Nuts/
Crumbs
p
Baby
Food
PulsePause
Resume
START
STOP
POWER
PROGRESS
O
D
AU
DRI
S
Frozen
Drink
Ice
Crus
Milk
Shake
Nuts/
Crumbs
Baby
Food
er
PulsePause
Resume
ow High
FOOD DRINK
MANUAL
SPEEDS
START
STOP
AUTO
DRINK
Smooth
Frozen
Drink
Po
D
Milk
Shake
/
bs
aby
ood
PulsePause
Resume
Low High
FOOD DRINK
MANUAL
SPEEDS
START
STOP
AUTO
OOD
Froze
Drin
Milk
Shake
Nuts/
Crumbs
p
Baby
Food
PulsePause
Resume
START
STOP
POWER
PROGRESS
O
D
AU
DRI
S
Frozen
Drink
Ice
Crus
Milk
Shake
Nuts/
Crumbs
Baby
Food
er
PulsePause
Resume
ow High
FOOD DRINK
MANUAL
SPEEDS
START
STOP
AUTO
DRINK
Smooth
Frozen
Drink
Po
D
Milk
Shake
/
bs
aby
ood
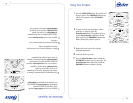
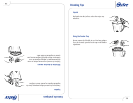
Utilisation MANUELLE
«Low» (bas), «High» (haut) et «Pulse»
(impulsions) sont les touches MANUELLES. Ces
touches sont destinées à la préparation de vos recettes
personnelles et vous servent également à prolonger le
travail une fois le programme terminé.
1 Appuyez sur la touche POWER (alimentation).
2 Mettez vos ingrédients dans le récipient.
3 Placez le couvercle et le bouchon-mesure.
Utilisation des touches «Low» et «High»
1 Appuyez sur le touches «Low» (bas) et «High»
(haut) selon que vous désirez une allure plus
lente ou plus rapide. Le voyant START/STOP
(marche-arrêt) clignotera, indiquant que
l’appareil est prêt à fonctionner.
Utilisez les réglages les plus bas pour les
aliments, les plus hauts, pour les boissons.
2 Appuyez sur la touche START/STOP pour mettre
l’appareil en marche. Un seul segment de la
barre de PROGRESSION sera activé et le
mélangeur fonctionnera à la vitesse qu’indique
les voyants de vitesse.
3 Pour ajuster la vitesse au cours du
fonctionnement, il suffit d’appuyer sur la touche
Low (bas) ou High (haut).
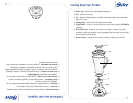
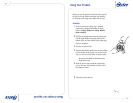
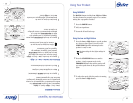
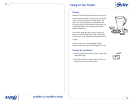
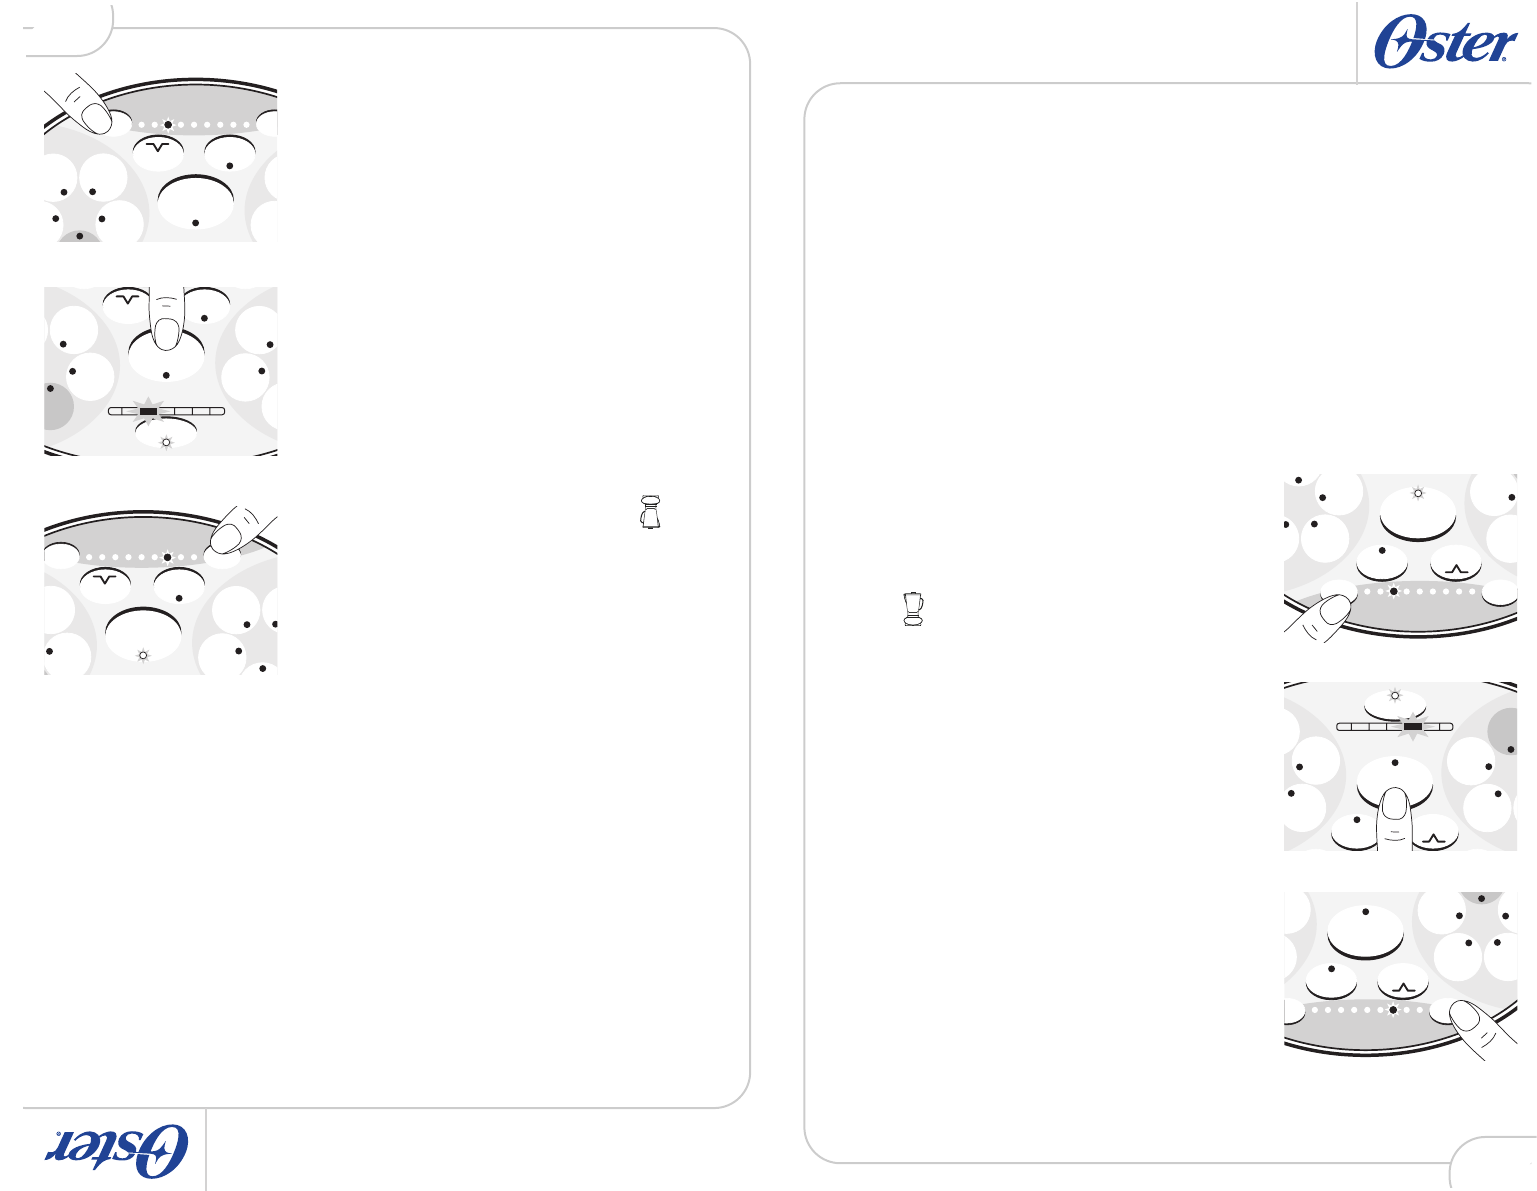
Using MANUALLY
The MANUAL buttons include, Low, High and Pulse.
Use these buttons for personal recipes or to continue
mixing after a program is finished.
1 Press the POWER button.
2 Add your ingredients.
3 Secure the lid and feeder cap.
Using the Low and High Buttons
1 Press the Low or High button to run the product
at a slower or faster speed. You will see the
START/STOP light blink indicating that the
product is ready to start.
Use lower settings for food, higher settings for
drinks.
2 Press the START/STOP button to start the
product. A single segment travels in the
PROGRESS indicator bar and the product will
run at the speed shown by the speed indicator
lights.
3 To adjust the speed while the product is running,
press the Low or High buttons.