


3
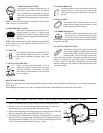
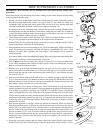
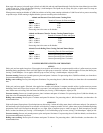
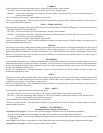
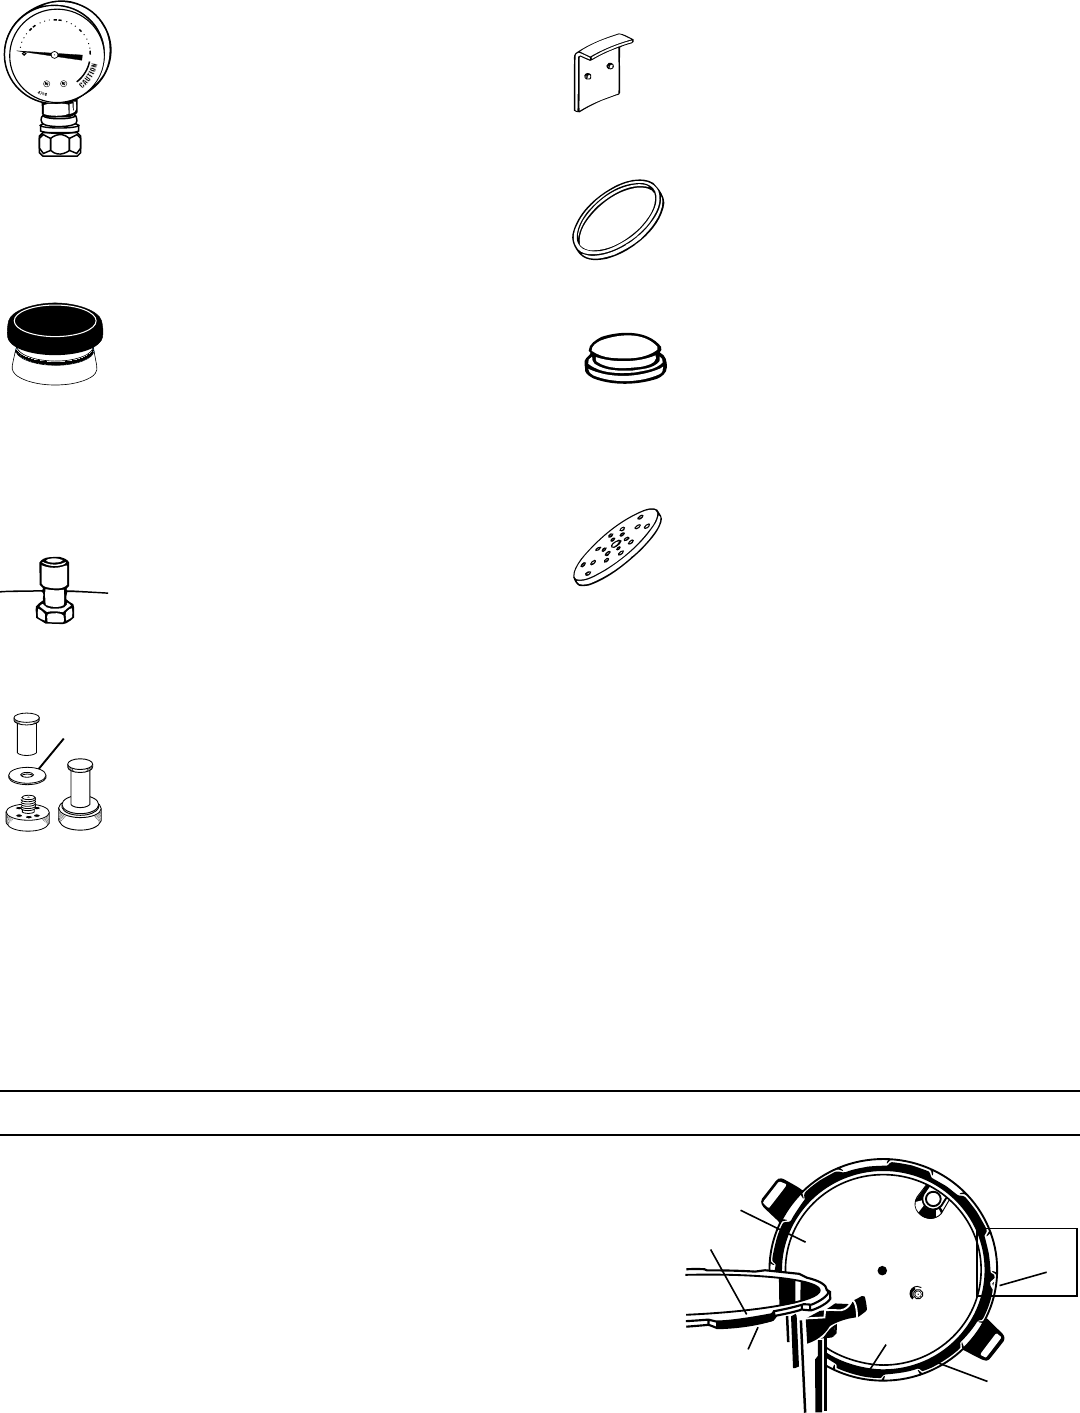
1. PRESSURE DIAL GAUGE
The pressure dial gauge registers pressure in
pounds(persquareinch)orPSI.Thepointer
moves around the dial indicating the pressure
within the unit. Pressure can be controlled and
maintained by adjusting the heat setting on your
stove.
NOTE:ThePressureDialGaugecanbefoundinthefoamller
ofthecarton.Itisinawhitebox.
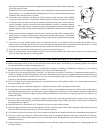
2. PRESSURE REGULATOR
The pressure regulator acts as a safety device to
preventpressureinexcessof15poundsfrom
building in the canner. Pressure readings on the
pressure canner are registered only on the pressure
dial gauge.
NOTE: ThePressureRegulatorcanbefoundinthetopfoamller
ofthecarton.Itisinabagidentiedwiththewords“Pressure
regulator enclosed”.
3. VENT PIPE
The vent pipe is the primary pressure relief valve
andwillreleasepressureinexcessof15pounds.
The pressure regulator sits loosely on the vent
pipe.
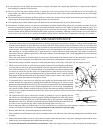
4. AIR VENT/COVER LOCK
The air vent/cover lock automatically “vents” or
exhaustsairfromthecannerandactsasavisual
indication of pressure in the canner. The small
gasket must be in place for the air vent/cover lock
to seal completely.
5. LOCKING BRACKET
The locking bracket on the inside of the canner body
engages with the air vent/cover lock to prevent the
cover from being opened when there is pressure in
the unit.
6. SEALING RING
Thesealingringtsintothecannercoverand
forms a pressure-tight seal between the cover and
body during canning and cooking.
7. OVERPRESSURE PLUG
The black, rubber overpressure plug is located
in the canner cover. It will automatically pop out
and release steam in case the vent pipe becomes
blocked and/or clogged and pressure cannot be released normally
through the vent pipe.
8. CANNING-COOKING RACK
The canning-cooking rack is placed in the bottom
of the canner to hold jars off the bottom of the unit
while canning. When cooking, the rack is used for
steaming foods. It can also be used to hold foods
suchasvegetablesoutofthecookingliquidwhichallowsseveral
foods to be cooked at the same time without an intermingling
ofavors.Whenitisdesirabletoblendavors,donotusethe
canning-cooking rack. The canning-cooking rack must always be
used when canning.
REPLACEMENT PARTS
PRESTO
®
Canner parts are available at most hardware stores or they can be ordered directly from Presto; see service and parts informa-
tion on page 32.
When ordering parts, please specify the seven digit model number found stamped on the side of the canner body.
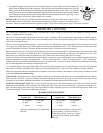
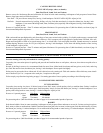
BEFORE USING THE CANNER FOR THE FIRST TIME
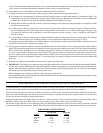
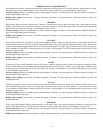
1. Remove the sealing ring by simply pulling it from the sealing ring groove.
2. Wash the cover, body, and sealing ring with hot, sudsy water to remove any
manufacturing oils. Rinse all parts with warm water and dry.
3. Replacethesealingringinthesealingringgroove,makingcertaintotthering
underthestoptablocatedontheinsiderimofthecover(Fig.A).
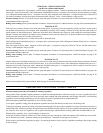
4. The sealing ring is prelubricated. If necessary, to help make the cover easier to
open and close, a very light coating of cooking oil may be applied to the sealing
ringandundersideofthebodylugs(Fig.B).Thecovershouldopenandclose
easily when following the instructions on page 5, step 6.
READ INSTRUCTIONS
BEFORE OPERATING
psi
0
5
10
15
20
Small
Gasket
TOP
TOP
Fig. B
Cover
Body Lug
Apply
Cooking
Oil Here
Apply
Cooking
Oil Here
Stop
Tab
Sealing Ring in
Sealing Ring
Groove
Fig. A