


5
HOW TO PRESSURE CAN FOODS
IMPORTANT: Read carefully. Do not attempt to use your canner before reading these
instructions.
Follow these step-by-step instructions for pressure canning in your canner. Prepare food according
tothedirectionsinspecicrecipe.
1. Be sure your canner is thoroughly cleaned and working properly. Before each canning season,
havethedialgaugecheckedforaccuracy(seepage8,step12).Alsocheckthesealingring,
overpressure plug, and the small, white gasket of the air vent/cover lock. Replace these parts
when they become hard, deformed, cracked, worn, pitted, or unusually soft.
If canning on an electric smoothtop range, clean the stovetop with a cooktop polishing cream,
accordingtothestovetopmanufacturer’sinstructions,beforeandaftercanneruse.Inaddition,
to avoid scratching smoothtop ranges, check the bottom of the canner to be sure it is clean and
free of debris and does not have any nicks or scratches.
2. Check Mason jars for nicks, cracks, and sharp edges. Check screw bands for dents or rust. Use
only jars, lids, and bands in perfect condition so an airtight seal may be obtained.
Wash and rinse jars, lids, and bands. Pour hot water into jars and set aside until needed. Follow
closuremanufacturer’sdirectionsforbandsandlids.
3.Selectfreshrmfood.Sortfoodaccordingtosize.Cleanfoodthoroughly.Prepareaccordingto
recipe.FillhotMasonjarspromptlywithfoodandliquidtorecommendedlevel.Allow½-inch
headspaceforfruits.Mostvegetablesandmeatsrequire1-inchheadspaceduetoexpansion
during processing.
Work out air bubbles with a clean nonmetallic spatula. Wipe sealing edge clean with a damp cloth.
Adjustbandsaccordingtoclosuremanufacturer’sdirections.
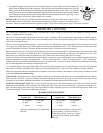
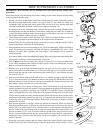
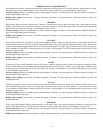
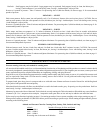
4. Place 3 quartsofhotwater,canningrack,andjarsincanner(Fig.D).Topreventwaterstains
on jars, add 2 tablespoons white vinegar to water in canner. Always use canning rack. Jars may
break if set directly on bottom of canner.
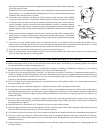
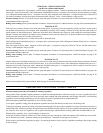
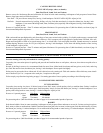
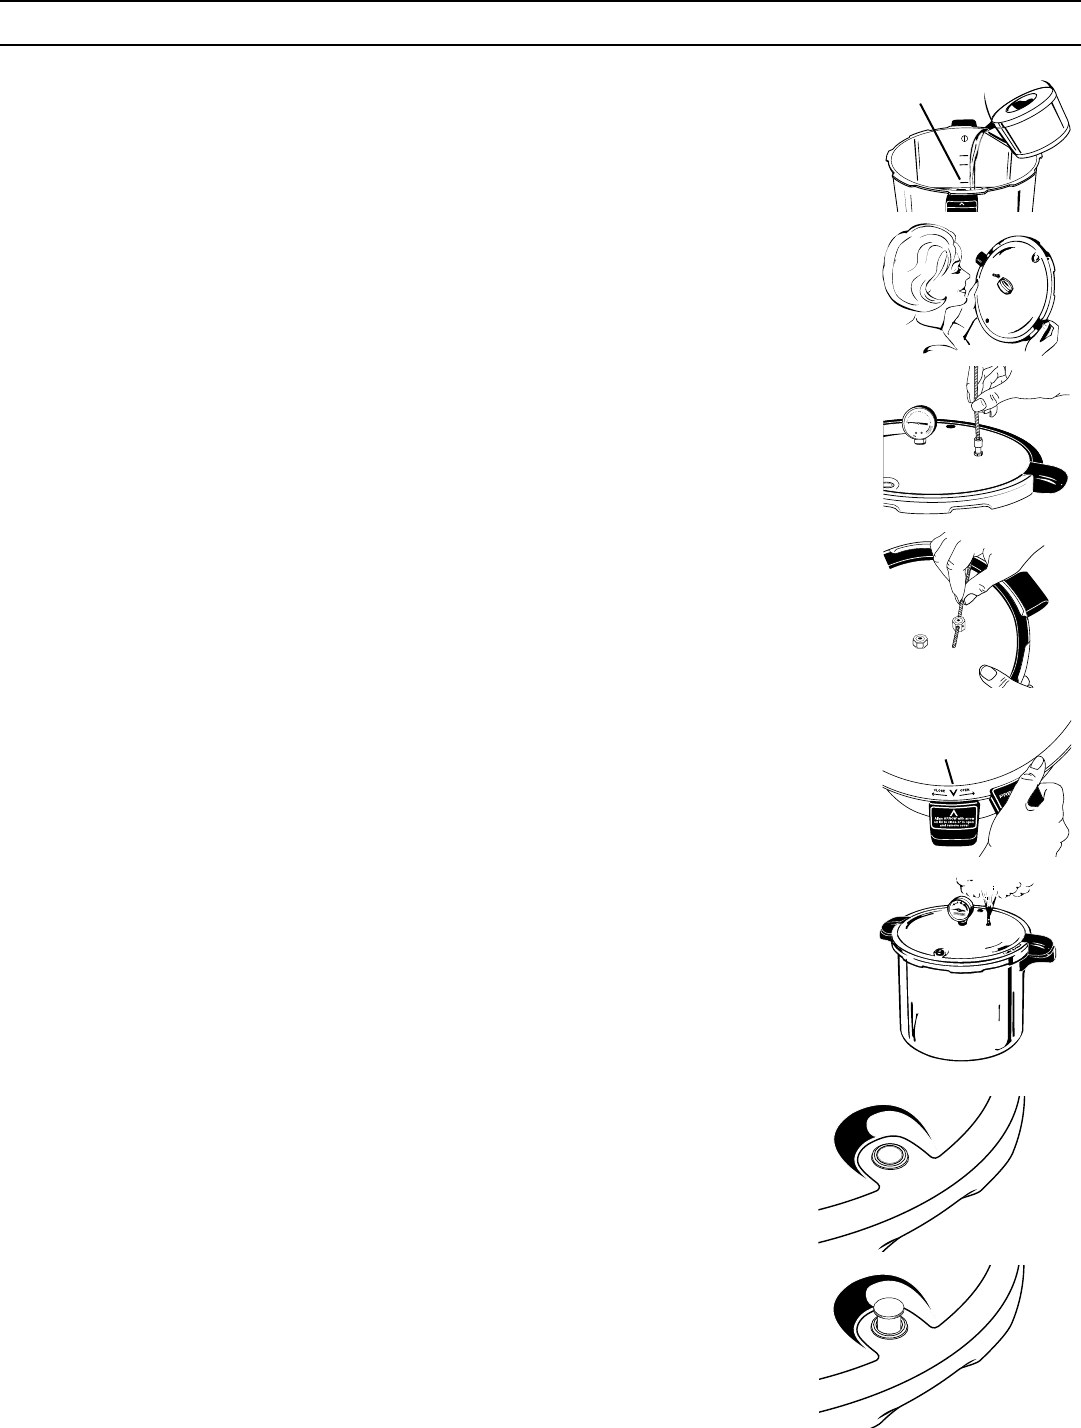
5.Holdthecoveruptothelightandlookthroughtheventpipe(Fig.E)tobecertainitisopen
before placing the cover on the canner. If it is clear, proceed to step 6. If it is blocked or partially
blocked,cleantheventpipewithasmallbrushorpipecleaner(Fig.F).Alsocleantheventpipe
nutasshown(Fig.G).
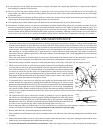
6. Place cover on canner, aligning the V mark on the cover with the
V
mark on the body handle
(Fig.H).Pressdownonthecoverhandlestocompressthesealingringandturnthecoverinthe
directionindicatedtoclose(clockwise)untilthecoverhandlesarecentereddirectlyabovethe
body handles. Do not rotate the cover beyond this point.
7. Position canner on a level burner and range only. Use on a tilted burner or range may interfere
with the operation of the pressure regulator. To prevent damage to the pressure canner, do not use
onanoutdoorLPgasburnerorgasrangeover12,000BTU’s.AhighBTUburnerwillsoftenthe
canner causing the bottom to warp. It may also result in property damage and/or personal injury.
Using arelativelyhighheatsetting,heatthepressurecanneruntilasteadyowofsteamcanbe
seen,heard,orfeltcomingfromtheventpipe(Fig.I).Exhaustairfromthecannerfor10minutes
byallowingsteamtoowfromtheventpipe.Reduceheat,ifnecessary,tomaintainasteady,
moderateowofsteam.
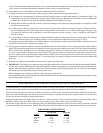
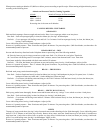
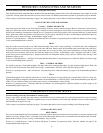
8. Placepressureregulatoronventpipe.Ifheatwasreducedforexhausting,adjusttoarelatively
high setting and heat canner. As pressure develops in the canner the air vent/cover lock will lift
and lock the cover on the canner. The air vent/cover lock is a visual indicator of the presence of
pressure. When in the up position pressure is in the unit, when in the down position there is no
pressureincanner(Fig.J).Also,aspressurebuildsthepointerofthegaugewillmoveacross
the face. Continue heating until the pressure gauge registers the correct pressure. Adjust heat to
maintain the correct pressure on the dial gauge. The pressure regulator will rock ONLY at 15
pounds of pressure.
9. Processing time begins when the pressure gauge registers the correct pressure. Adjust heat to
maintain correct pressure on the dial gauge. If pressure drops below desired setting, it will be
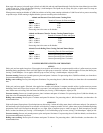
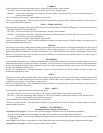
READ INSTRUCTIONS
BEFORE OPERATING
psi
0
5
10
15
20
Fig. D
Fig. E
Fig. F
Fig. G
Align the V mark on the cover with
the
V
mark on the body handle.
Fig. H
3-quartwaterline(lowest
markincanner)
Fig. I
Air Vent/Cover
Lock in UP Position.
Pressure in Unit.
Air Vent/Cover Lock
in DOWN Position.
No Pressure in Unit.
Fig. J
TOP
TOP
LOCKED
UNLOCKED