


17
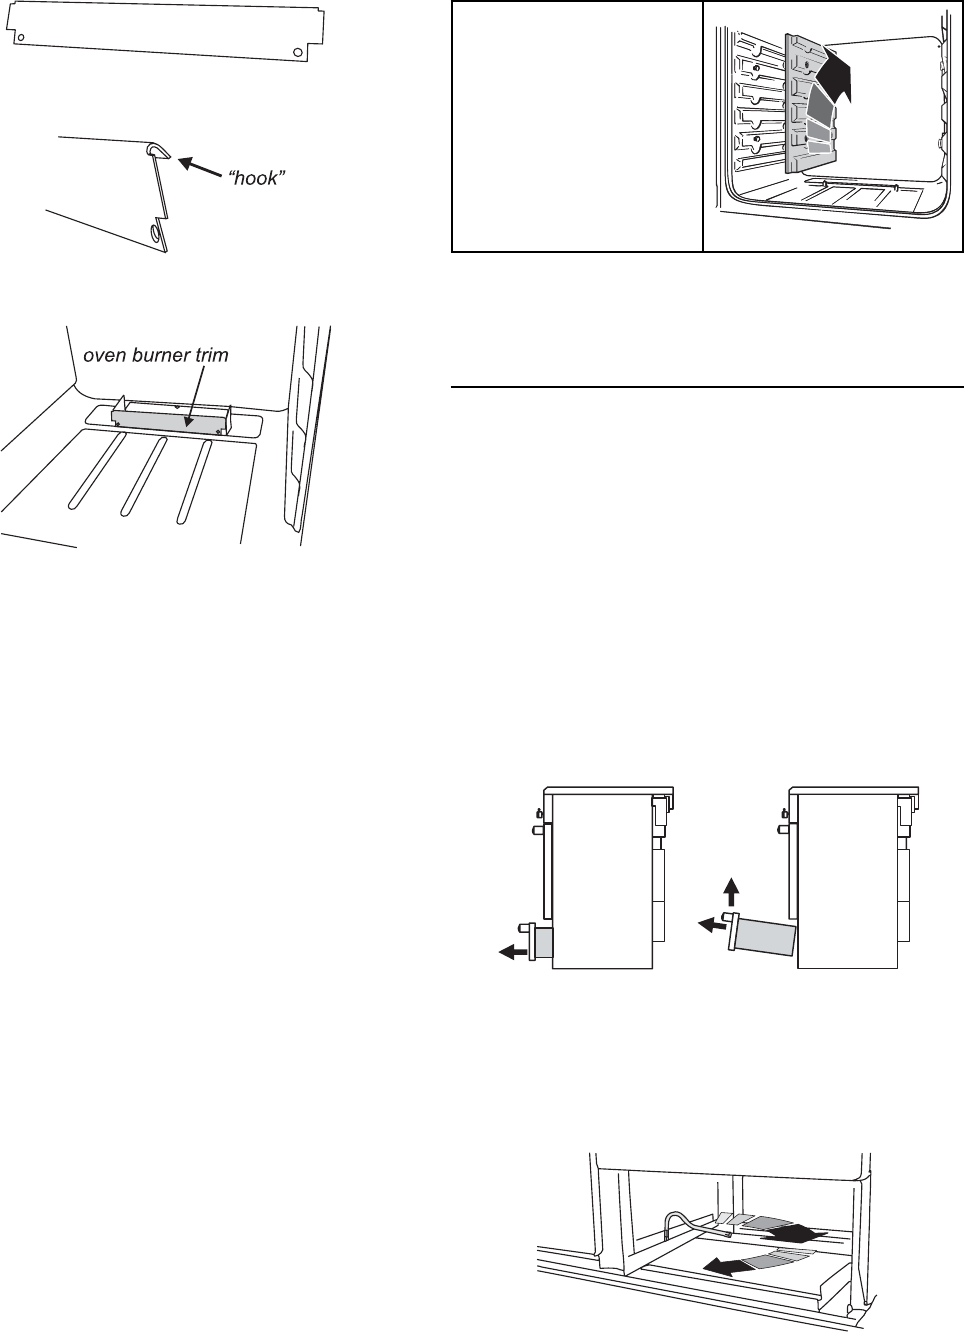
The oven burner trim hooks onto the front of the
oven burner bracket.
When refi tting make sure that the trim is in the
middle of the front of the oven burner bracket.
The Oven side linings
The oven has removable oven side lining panels
that have been coated with special enamel that
partly cleans itself. This does not stop all marks
on the lining, but helps to reduce the amount of
manual cleaning needed.
The Cook & Clean panels work better above
gas Mark 6. If you do most of your cooking
below this temperature, occasionally
remove the panels and wipe with a lint
free cloth and hot soapy water. The panels
should then be dried and replaced and the
oven heated at Gas Mark 7 for about one
hour. This will ensure the Cook & Clean
panels are working effectively.
Don’t use steel wool (Brillo) or any other
materials that will scratch the surface. Don’t use
oven cleaning pads.
Before cleaning the oven, cover the burner at
the rear to stop the holes getting blocked as you
clean. If they are accidentally blocked, clean
them out with thin wire, such as fuse wire.
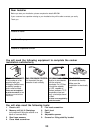
Removing the Oven Linings
The lining panels can be removed for cleaning
and for cleaning behind. Remove the shelves
fi rst.
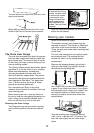
Each side of the oven
is fi xed with four fi xing
screws. You don’t have
to remove the screws
to remove the oven
linings. Lift each side
panel upwards and
they will slide off the
screws. Then pull them
forwards.
Once the linings are removed, the oven enamel
interior can be cleaned.
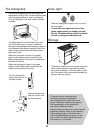
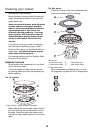
Moving your cooker
Switch off the electricity supply.
The cooker is heavy, two people may be
required to move it. The cooker is fi tted with
one roller at the front and two at the back.
There are also two screw down levelling feet
at the front.
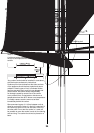
The front roller, designed for moving the cooker
can be wound down. The levelling tool that
controls this roller is in the storage drawer
compartment.
Remove the storage drawer (by pulling it
right out and lifting it up slightly) and you
should see the levelling tool.
Your installer may not have left the levelling tool
in place. If not, locate it as shown. If you cannot
fi nd the levelling tool, contact your installer. See
the Installation section of these instructions
where your installer should have written their
contact details.
Turn the levelling tool clockwise, two full
(180°) turns. It will be stiff. The front of the
oven will rise slightly as the roller drops
down.